
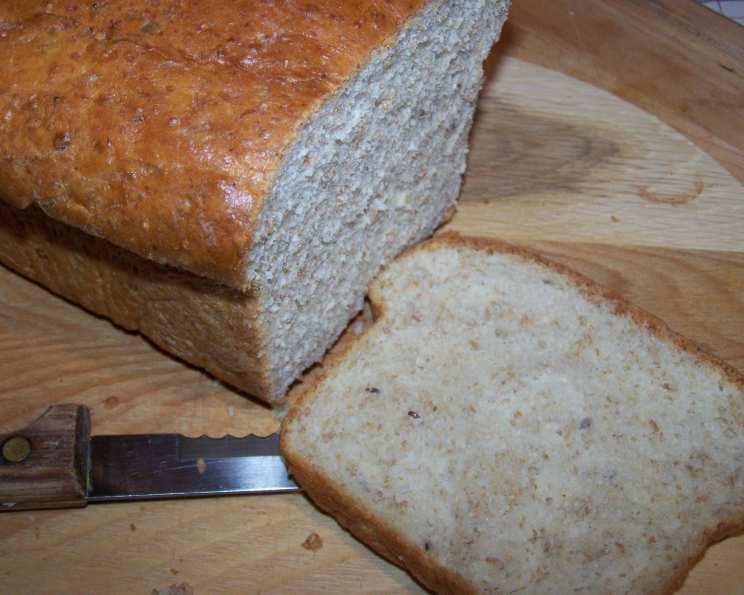
Mile High Multigrain Bread: A Taste of Home
The scent of baking bread… it’s a memory woven into the fabric of my childhood. I remember standing on a stool in my grandmother’s kitchen, mesmerized as she transformed simple ingredients into a fragrant loaf. The warmth radiating from the oven, the comforting aroma filling the air – it felt like a tangible expression of love. This Mile High Multigrain Bread, with its hearty texture and subtle sweetness, evokes that same sense of comfort and connection, a reminder of simpler times and the joy of sharing homemade goodness.
Recipe Overview
- Prep Time: 35 minutes
- Cook Time: 35 minutes
- Total Time: 2 hours 35 minutes
- Yields: 2 Loaves & 12 small buns
- Serves: 36
- Dietary Type: Vegetarian
Ingredients
- 2 3/4 cups hot water
- 1/3 cup olive oil (any oil is fine)
- 1/3 cup sugar
- 1 tablespoon salt
- 2 tablespoons instant yeast
- 4 cups multi-grain flour
- 3 cups all-purpose white flour
- 1 tablespoon melted butter
Equipment Needed
- Stand mixer (optional, but recommended)
- Two bread pans
- 8×8 inch pan
- Measuring cups and spoons
- Mixing bowls
- Cooling rack
Instructions
-
In the bowl of a stand mixer (or a large mixing bowl if mixing by hand), combine the hot water, olive oil, sugar, salt, and instant yeast. Mix well to dissolve the sugar and salt.
-
Add 2 cups of the multi-grain flour to the wet ingredients. This helps to cool the water slightly, ensuring the dough reaches the ideal temperature for yeast activity. Mix until just combined.
-
Add the remaining 2 cups of multi-grain flour and 2 cups of the all-purpose white flour. Mix on low speed (or with a wooden spoon) until a shaggy dough begins to form.
-
Gradually add the remaining all-purpose white flour, about 1/2 cup at a time, mixing until the dough begins to pull away from the sides of the bowl. The dough should be slightly tacky to the touch, but not sticky.
-
The key to a fluffy bread is to use just enough flour to achieve the right consistency. Avoid adding too much flour, which can result in a dense, dry loaf.
-
Once the dough has formed, cover the bowl and let it rise for approximately 10 minutes. The dough will rise slightly, but it doesn’t need to double in size at this stage. This short rest allows the gluten to relax, resulting in a more tender crumb.
-
While the dough is resting, grease two bread pans and an 8×8 inch pan with cooking spray, such as Pam. This ensures that the bread and buns will release easily from the pans after baking.
-
After the 10-minute rest, gently mix the dough again to deflate it slightly. This helps to redistribute the yeast and even out the texture.
-
Turn the dough out onto a lightly floured surface. Use your hands to gently shape the dough into a round ball. Be careful not to overwork the dough, as this can develop the gluten too much and result in a tough bread. Lightly buttering your hands can prevent the dough from sticking without adding extra flour.
-
Divide the dough into three portions: two larger portions for the loaves and one slightly smaller portion for the buns.
-
Shape the larger portions into loaves. You can simply form them into oblong shapes, or you can braid the dough for a more decorative touch. Place the shaped loaves into the prepared bread pans.
-
Shape the smaller portion of dough into 12 small buns. Place the buns in the prepared 8×8 inch pan.
-
Cover the pans and let the loaves and buns rise in a warm place until almost doubled in size, about 1 hour. The rising time may vary depending on the temperature of your environment.
-
Preheat your oven to 350°F (175°C).
-
Bake the loaves in the preheated oven for 35 minutes. If you forgot to preheat the oven, bake for 40 minutes instead. Bake the buns for 20 minutes in the preheated oven.
-
Once the loaves and buns are golden brown and sound hollow when tapped on the bottom, remove them from the oven.
-
Immediately brush the tops of the loaves and buns with melted butter. This adds flavor and creates a beautiful, shiny crust.
-
Let the loaves and buns cool in their pans for 10-15 minutes before turning them out onto a cooling rack to cool completely. Allowing them to cool slightly in the pans prevents them from sticking and makes them easier to remove.
-
Do not wrap the bread until it is completely cooled. Wrapping warm bread can trap moisture and make it soggy.
-
To store, wrap the cooled bread in tin foil and keep it on the counter. Avoid storing it in the refrigerator, as this can cause it to become dry and hard.
Expert Tips & Tricks
- Water Temperature: The water temperature is crucial for activating the yeast. Too hot and it will kill the yeast; too cold and it won’t activate. Aim for a temperature that feels comfortably warm to the touch.
- Dough Consistency: Don’t be afraid of a slightly tacky dough. It will result in a lighter, fluffier bread.
- Rising Time: The rising time can vary depending on the temperature of your kitchen. A warmer environment will speed up the process.
- Oven Temperature: Oven temperatures can vary, so keep an eye on the bread and adjust the baking time as needed. A toothpick inserted into the center should come out clean.
- Kneading: If you don’t have a stand mixer, you can knead the dough by hand on a floured surface for about 8-10 minutes, until it becomes smooth and elastic.
Serving & Storage Suggestions
This Mile High Multigrain Bread is incredibly versatile. Serve it warm with a smear of butter or a drizzle of honey for a simple breakfast. It also makes excellent sandwiches or toast. The buns are perfect for sliders or as a side dish with soup or salad.
Store the cooled bread wrapped in tin foil at room temperature for up to 3 days. For longer storage, you can freeze it for up to 2 months. To reheat, thaw completely and warm in a low oven or toaster oven.
Nutritional Information
| Nutrient | Amount per Serving | % Daily Value |
|---|---|---|
| Calories | 67.5 kcal | N/A |
| Calories from Fat | 22g | N/A |
| Total Fat | 2.5g | 3% |
| Saturated Fat | 0.5g | 2% |
| Cholesterol | 0.8mg | 0% |
| Sodium | 197mg | 8% |
| Total Carbohydrate | 10.1g | 3% |
| Dietary Fiber | 0.4g | 1% |
| Sugars | 1.9g | 7% |
| Protein | 1.3g | 2% |
Variations & Substitutions
- Honey Instead of Sugar: Substitute honey for sugar for a deeper, richer flavor.
- Different Flours: Experiment with different types of flour, such as whole wheat or rye, for a unique flavor profile.
- Seeds and Nuts: Add seeds (sunflower, pumpkin, flax) or chopped nuts (walnuts, pecans) to the dough for added texture and nutrition.
- Herbs and Spices: Incorporate herbs and spices, such as rosemary, thyme, or cinnamon, for a savory or sweet twist.
- Dairy-Free: To make this recipe dairy-free, use a plant-based butter alternative.
FAQs (Frequently Asked Questions)
Q: Can I use active dry yeast instead of instant yeast?
A: Yes, but you’ll need to proof the active dry yeast first. Dissolve it in the warm water with a teaspoon of sugar and let it sit for 5-10 minutes until foamy before adding the other ingredients.
Q: Why is my bread dense and not fluffy?
A: This could be due to several factors, including using too much flour, not allowing the dough to rise enough, or over-kneading the dough.
Q: Can I make this dough in a bread machine?
A: Yes, you can use the dough setting on your bread machine. Follow your machine’s instructions for adding the ingredients in the correct order.
Q: How do I know when the bread is done?
A: The bread is done when it is golden brown and sounds hollow when tapped on the bottom. A toothpick inserted into the center should also come out clean.
Q: Can I freeze the baked bread?
A: Yes, you can freeze the baked bread. Wrap it tightly in plastic wrap and then in foil. It will keep for up to 2 months. Thaw completely before serving.
Final Thoughts
I truly hope you’ll give this Mile High Multigrain Bread recipe a try. Baking your own bread is not just about making food; it’s about creating an experience, a memory, a little piece of home. Share your creations with loved ones, and don’t hesitate to experiment with variations to make it your own. I’d love to hear your feedback and see your beautiful loaves! Perhaps pair it with a hearty soup on a cold evening, or simply enjoy a slice with your morning coffee. Happy baking!