
Milk and Honey Bath Bombs: A Luxurious Home Spa Experience
There’s something incredibly comforting about the scent of warm milk and honey. It evokes memories of childhood evenings, a mug clutched in my hands, and the gentle lull of bedtime stories. Now, imagine that feeling enveloping you in a warm bath, the water softened by the gentle fizz of a homemade bath bomb, infused with the nourishing properties of milk and honey. That’s precisely the experience I wanted to create with this recipe – a little piece of affordable luxury, handcrafted with love.
Recipe Overview
- Prep Time: 20 minutes
- Total Time: Overnight drying time
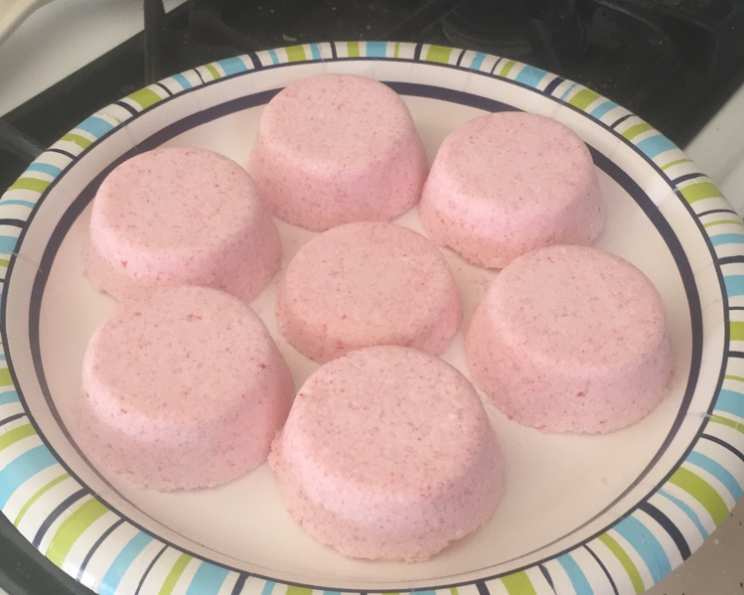
- Yields: 9 half balls
- Dietary Type: Vegetarian
Ingredients
- 1 cup baking soda
- ½ cup citric acid
- ¼ cup cornstarch
- ¼ cup powdered milk
- 2 teaspoons shea butter (or mango, avocado, cocoa butter)
- 1 tablespoon honey, warm
- 1 tablespoon jojoba oil or 1 tablespoon olive oil
- 1 teaspoon essential oil (lavender, chamomile, or vanilla recommended)
Equipment Needed
- Mixing bowl
- Microwave-safe measuring cup or small pot
- Bath bomb molds (or large ice cube trays)
- Small cutting board (optional)
- Sharp knife (optional)
- Decorative bags and ribbon (optional, for gifting)
Instructions
-
Prepare Your Workspace: Before you begin, gather all your ingredients and equipment. Bath bomb making requires a bit of speed, so having everything readily available is key. Make sure your molds are clean and dry.
-
Combine Dry Ingredients: In a large mixing bowl, thoroughly combine the baking soda, citric acid, cornstarch, and powdered milk. Use a whisk or your hands to break up any clumps and ensure the mixture is evenly distributed. This ensures a consistent fizz and texture in your final product.
-
Melt the Butters and Oils: In a microwave-safe measuring cup or a small pot over very low heat, gently melt the shea butter. Add the warm honey and jojoba oil (or olive oil) to the melted butter and stir until fully combined. Warming the honey helps it blend more easily with the other ingredients.
-
Combine Wet and Dry Ingredients: Slowly pour the melted butter and oil mixture into the bowl of dry ingredients. Add the essential oil of your choice.
-
Mix Thoroughly: Use your hands to mix the wet and dry ingredients together. This is where you’ll need to put in a little elbow grease. The mixture should start to clump together and hold its shape when squeezed in your hand, like damp sand. If the mixture seems too dry and crumbly, add a tiny spritz of water (very lightly!) at a time until it reaches the desired consistency. Be careful not to add too much water, as this will activate the fizzing reaction prematurely. If you add too much liquid, simply dry the product out and leave it loose (it will still work!).
-
Mold the Bath Bombs: Working quickly, firmly press the mixture into your bath bomb molds. Make sure to pack the mixture tightly to prevent crumbling. Clean any excess mixture from the edges of the mold to create a neat finish.
-
Release and Dry: Leave the bath bombs in the molds for a couple of minutes. Then, carefully remove them. One method is to place a small cutting board over the top of the mold, flip it over, and gently lift the mold off.
-
Drying Time: Let the bath bombs dry overnight in a cool, dry place. This allows them to harden properly and prevents them from crumbling.
-
Package (Optional): Once the bath bombs are completely dry, you can package them in decorative bags and tie them with ribbon for a beautiful homemade gift.
-
To Use: Drop 1-2 bath bombs into a warm bath and relax!
Alternatively, you can leave the mixture in the mixing bowl for 24 hours, periodically mixing and breaking up any clumps. Once the product has dried out completely, place it in a decorative bag with a colorful ribbon.
Expert Tips & Tricks
- Mold Matters: Choosing the right mold is crucial. Avoid molds with sharp angles, as these can make the bath bombs more fragile. Softer edges are ideal.
- Clean Edges: While the bombs are in the molds, run a sharp knife along the bottom to get a clean, flat edge.
- Coloring: If you want to add color to your bath bombs, use cosmetic-grade micas or liquid dyes specifically designed for bath products. Add a small amount to the wet ingredients and mix thoroughly.
- Troubleshooting Dryness: If your mixture is too dry and not holding together, try adding a few drops of jojoba oil or olive oil at a time until it reaches the right consistency.
- Troubleshooting Premature Fizzing: If your mixture starts to fizz prematurely, it means it’s too wet. Add more baking soda and cornstarch to absorb the excess moisture.
- Dried Botanicals: While you can add dried lavender flowers, rose petals, or other botanicals to your mixture, be mindful of the potential for clogging your drain. And if you put too much dried flowers in, the bomb may not come together.
- Storage: Store your finished bath bombs in an airtight container in a cool, dry place to prevent them from absorbing moisture.
Serving & Storage Suggestions
These milk and honey bath bombs make a thoughtful and luxurious gift. Present them in a clear cellophane bag tied with a ribbon, or arrange them in a decorative box.
Store the bath bombs in an airtight container away from moisture and direct sunlight. Properly stored, they should last for several months.
Nutritional Information
Note: Nutritional information is an estimate and may vary based on specific ingredients used.
| Nutrient | Amount per Serving | % Daily Value |
|---|---|---|
| Calories | 38 kcal | 2% |
| Total Fat | 1 g | 1% |
| Saturated Fat | 1 g | 3% |
| Sodium | 6827 mg | 284% |
| Total Carbohydrate | 7 g | 2% |
| Dietary Fiber | 0 g | 0% |
| Sugars | 3 g | 13% |
| Protein | 1 g | 1% |
Variations & Substitutions
- Vegan Version: Substitute the honey with agave nectar or maple syrup. Ensure the milk powder is a plant based alternative such as coconut milk powder.
- Essential Oil Blends: Experiment with different essential oil combinations to create unique aromatherapy experiences. Try a blend of lavender and chamomile for relaxation, or eucalyptus and peppermint for a refreshing boost.
- Customize with Color: Add natural food coloring or cosmetic-grade dyes to customize the color of your bath bombs.
- Oatmeal Bath Bomb: Add a tablespoon of finely ground oatmeal to the dry ingredients for extra soothing and moisturizing properties.
FAQs (Frequently Asked Questions)
Q: Why are my bath bombs cracking?
A: Cracking is usually caused by the mixture being too dry or not being packed tightly enough into the molds. Try adding a few drops of jojoba oil or olive oil at a time until the mixture reaches the right consistency, and make sure to press it firmly into the molds.
Q: My bath bombs are fizzing before I put them in the water. What am I doing wrong?
A: Premature fizzing indicates that the mixture is too wet. Add more baking soda and cornstarch to absorb the excess moisture. Also, make sure you are working in a dry environment.
Q: Can I use regular milk instead of powdered milk?
A: No, using liquid milk will activate the fizzing reaction prematurely. Powdered milk is essential for this recipe.
Q: How long do homemade bath bombs last?
A: When stored properly in an airtight container away from moisture, homemade bath bombs can last for several months.
Q: What kind of molds should I use?
A: Round molds or silicone molds are ideal for bath bombs. Avoid molds with sharp edges. Large ice cube trays also work well.
Final Thoughts
Creating these milk and honey bath bombs is a simple yet rewarding experience that allows you to indulge in a little self-care or create a personalized gift for someone special. Don’t be afraid to experiment with different essential oils and colors to tailor them to your preferences. So, gather your ingredients, put on some relaxing music, and enjoy the process of crafting these luxurious treats for your bath!