
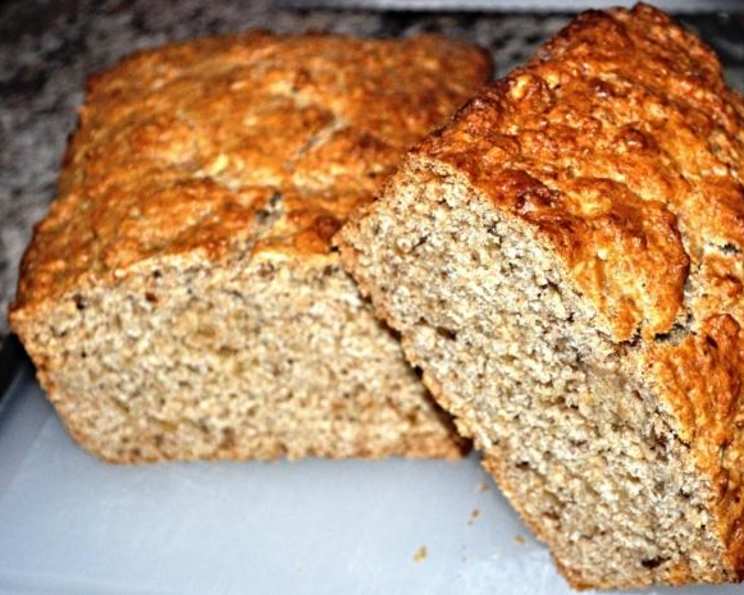
Milk and Honey White Bread: A Slice of Nostalgia
The scent of baking bread is more than just a pleasant aroma; it’s a time machine. One whiff of yeasty warmth and I’m instantly transported back to my grandmother’s kitchen. I remember standing on a wobbly stool, mesmerized as she kneaded dough with her strong, flour-dusted hands. While this Milk and Honey White Bread isn’t quite the same as her sourdough, it evokes that same sense of comfort and homemade goodness. It’s the perfect simple loaf to enjoy warm, straight from the oven.
Recipe Overview
- Prep Time: 20 minutes
- Cook Time: 1 hour
- Total Time: 1 hour 20 minutes
- Servings: approximately 16 slices
- Yield: 1 loaf
- Dietary Type: Not Vegan
Ingredients
- 1 cup milk
- 2/3 cup honey
- 1/4 cup butter or margarine
- 1 1/2 cups all-purpose flour
- 1 cup whole wheat flour
- 1/2 cup toasted wheat germ
- 1/2 cup chopped walnuts, toasted (optional)
- 1 tablespoon baking powder
- 1/2 teaspoon salt
Equipment Needed
- Saucepan or microwave-safe bowl
- Large mixing bowl
- 9-in. x 5-in. x 3-in. loaf pan
- Measuring cups and spoons
- Wire rack
Instructions
- Begin by combining the milk, honey, and butter (or margarine) in a saucepan or a microwave-safe bowl.
- Heat the mixture gently until the butter is completely melted. Be careful not to boil the mixture. The goal is simply to melt the butter and warm the liquids.
- Once the butter is melted, remove the mixture from the heat and allow it to cool for approximately 10 minutes. This cooling period is crucial; you don’t want the hot liquid to affect the rising process later.
- While the milk mixture is cooling, prepare the dry ingredients. In a large mixing bowl, combine the all-purpose flour, whole wheat flour, toasted wheat germ, chopped walnuts (if using), baking powder, and salt.
- Stir the dry ingredients together thoroughly to ensure the baking powder is evenly distributed. This will help the bread rise uniformly.
- Once the milk mixture has cooled slightly, pour it into the bowl with the dry ingredients.
- Stir the ingredients together just until they are combined. Be careful not to overmix the batter, as this can result in a tough loaf of bread. A few lumps are perfectly fine.
- Grease a 9-in. x 5-in. x 3-in. loaf pan thoroughly. You can use butter, shortening, or cooking spray.
- Pour the batter into the prepared loaf pan, spreading it evenly.
- Bake in a preheated oven at 325°F (160°C) for 1 hour, or until a toothpick inserted near the center of the loaf comes out clean. If the top of the bread starts to brown too quickly, you can loosely tent it with foil during the last 15-20 minutes of baking.
- Once the bread is done, remove it from the oven and let it cool in the pan for 10 minutes before transferring it to a wire rack to cool completely.
- Serve the bread warm, sliced, and perhaps with a pat of butter or a drizzle of honey.
Expert Tips & Tricks
- Toast the wheat germ for an extra layer of nutty flavor. Spread the wheat germ on a baking sheet and toast in a 350°F oven for 5-7 minutes, or until lightly golden and fragrant. Watch it carefully, as it can burn quickly.
- Adjust the honey according to your preference. If you prefer a less sweet bread, reduce the amount of honey slightly.
- Don’t overmix the batter. Overmixing develops the gluten in the flour, which can lead to a tough, dense bread. Stir just until the ingredients are combined.
- Check for doneness by inserting a toothpick into the center of the loaf. If the toothpick comes out clean, the bread is done. If it comes out with batter clinging to it, continue baking for a few more minutes and check again.
- If your oven runs hot, reduce the baking temperature by 25°F.
- For a softer crust, brush the top of the loaf with melted butter immediately after removing it from the oven.
Serving & Storage Suggestions
This Milk and Honey White Bread is best served warm from the oven, allowing the butter to melt invitingly into each slice. It’s wonderful on its own or paired with a bowl of soup or a simple salad. Leftovers can be stored at room temperature in an airtight container for up to 3 days. For longer storage, wrap the bread tightly in plastic wrap and freeze it for up to 2 months. To reheat, thaw the bread completely and warm it in a 350°F oven for 10-15 minutes, or toast individual slices. This bread also makes fantastic toast or French toast.
Nutritional Information
| Nutrient | Amount per Serving | % Daily Value (approximate) |
|---|---|---|
| Calories | 160 kcal | 8% |
| Total Fat | 5g | 6% |
| Saturated Fat | 3g | 15% |
| Cholesterol | 10mg | 3% |
| Sodium | 170mg | 7% |
| Total Carbohydrate | 25g | 9% |
| Dietary Fiber | 1g | 4% |
| Sugars | 12g | |
| Protein | 3g | 6% |
Note: Nutritional information is an estimate and may vary based on specific ingredients and serving sizes.
Variations & Substitutions
- Vegan Version: Substitute the milk with your favorite plant-based milk (almond, soy, or oat milk all work well). Replace the butter with a vegan butter alternative or coconut oil.
- Gluten-Free: Use a gluten-free all-purpose flour blend. Be sure to include a binder such as xanthan gum to help with the texture.
- Spice It Up: Add a teaspoon of ground cinnamon, nutmeg, or cardamom to the dry ingredients for a warm, spiced flavor.
- Seed Power: Substitute some of the walnuts with other seeds like pumpkin seeds, sunflower seeds, or flax seeds.
- Citrus Zest: Add the zest of one lemon or orange to the batter for a bright, citrusy flavor.
- Herbs: Incorporate 1-2 tablespoons of fresh, chopped herbs like rosemary or thyme for a savory twist.
FAQs (Frequently Asked Questions)
Q: Why do I need to cool the milk mixture before adding it to the dry ingredients?
A: Cooling the milk mixture prevents the hot liquid from activating the baking powder too early, which can result in a flat loaf of bread. It also helps to prevent the eggs from cooking if using.
Q: Can I use all all-purpose flour instead of whole wheat flour?
A: Yes, you can substitute the whole wheat flour with all-purpose flour. However, the bread will be slightly less dense and have a less nutty flavor.
Q: My bread is browning too quickly. What should I do?
A: If the top of the bread is browning too quickly, loosely tent it with foil during the last 15-20 minutes of baking.
Q: How do I know when the bread is done?
A: Insert a toothpick into the center of the loaf. If the toothpick comes out clean or with just a few moist crumbs attached, the bread is done.
Q: Can I make this bread without the wheat germ?
A: Yes, you can omit the wheat germ if you don’t have it on hand. The bread will still be delicious, but it will have a slightly different texture and flavor.
Final Thoughts
This Milk and Honey White Bread is more than just a recipe; it’s an invitation to slow down, savor the simple pleasures, and fill your home with the comforting aroma of freshly baked bread. Whether you’re a seasoned baker or a novice in the kitchen, I encourage you to try this recipe and experience the joy of creating something delicious from scratch. I hope that you enjoy this recipe as much as I do! Don’t hesitate to experiment with variations and make this bread your own. Share your creations and feedback, and perhaps even pair it with your favorite homemade jam or a cup of tea for the ultimate cozy experience. Happy baking!