
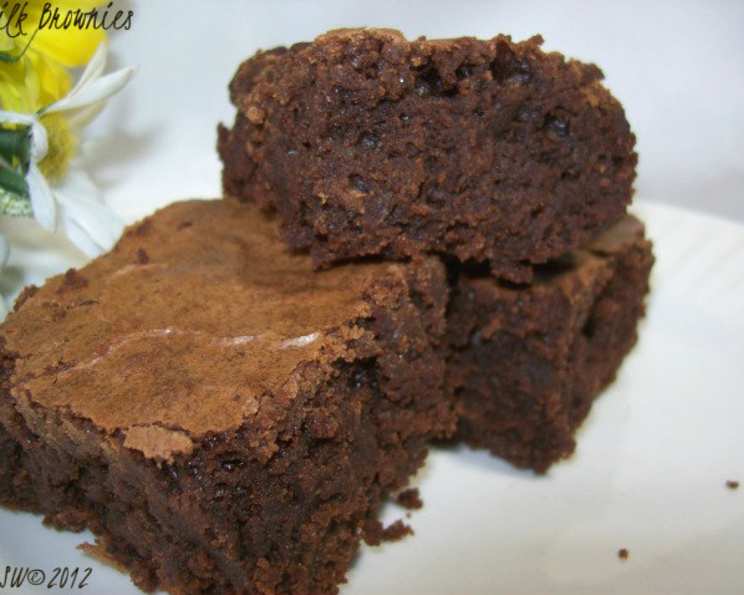
Milk Brownies: A Nostalgic Treat Worth Sharing
I still remember the thrill of discovering this brownie recipe, not in a fancy cookbook or a culinary magazine, but emblazoned on the back of a humble bag of potato chips. The bold claim of perfect brownies paired with a picture promising fudgy goodness was all it took. These weren’t just any brownies; they were destined to be dunked in a cold glass of milk, creating a simple yet sublime moment of pure joy. Twenty-five years later, this recipe remains a cherished staple, evoking memories of carefree afternoons and the simple pleasure of sharing a sweet treat with loved ones.
Recipe Overview
- Prep Time: 15 minutes
- Cook Time: 40-45 minutes
- Total Time: 55-60 minutes
- Servings: 24 squares
- Yield: 1 pan (13×9 inch)
- Dietary Type: Not Gluten-Free
Ingredients
- 1 (12 ounce) package semi-sweet chocolate chips
- 1 cup margarine (or 2 sticks, please do not use the 48% vegetable oil margarine)
- 4 large eggs
- 2 cups sugar
- 1 teaspoon vanilla
- 2 cups self-rising flour
Equipment Needed
- Small saucepan
- Large bowl
- Whisk
- 13×9 inch baking pan
- Measuring cups and spoons
Instructions
-
Preheat your oven to 325°F (160°C). Ensure the oven rack is positioned in the center for even baking.
-
In a small saucepan, combine the chocolate chips and margarine. Melt them over low heat, stirring constantly until the mixture is smooth and well blended. Be patient and keep the heat low to prevent the chocolate from scorching. Once melted, remove the saucepan from the heat and allow the mixture to cool slightly. This cooling process is important because adding hot chocolate to the eggs can cook them.
-
In a large bowl, crack in the eggs. Using a whisk (and DO NOT USE MIXER), beat the eggs vigorously until they become foamy and light yellow in color. This step incorporates air into the eggs, contributing to the brownies’ tender texture.
-
Gradually add the sugar to the bowl of foamy eggs, continuing to whisk until the sugar is fully incorporated and the mixture is smooth. Then, stir in the vanilla extract.
-
Pour the slightly cooled chocolate chip and margarine mixture into the egg and sugar mixture. Gently whisk until everything is well combined. Avoid overmixing at this stage, as it can lead to tough brownies.
-
Add the self-rising flour to the wet ingredients. Mix until just combined. Ensure that the flour is evenly distributed, but do not overmix. Overmixing develops the gluten in the flour, which can result in brownies that are dense and chewy rather than fudgy and tender.
-
Lightly grease a 13×9-inch baking pan. You can use cooking spray or butter and flour to prevent the brownies from sticking. Pour the brownie batter into the prepared pan and spread it evenly with a spatula.
-
Bake in the preheated oven for 40 to 45 minutes, or until the brownies pull away from the sides of the pan and appear set in the center. You can also insert a toothpick into the center; it should come out with moist crumbs attached. Be careful not to overbake the brownies, as this will make them dry.
-
Once baked, remove the brownies from the oven and place the pan on a wire rack. Allow the brownies to cool completely in the pan before cutting them into squares. This step is crucial for achieving clean cuts and preventing the brownies from crumbling.
Expert Tips & Tricks
- For extra fudgy brownies, slightly underbake them. If the toothpick comes out with a few gooey streaks, they’re ready!
- If you don’t have self-rising flour, you can make your own by combining 1 cup of all-purpose flour with 1 ½ teaspoons of baking powder and ¼ teaspoon of salt.
- Adding a handful of chopped walnuts or pecans to the batter can enhance both the texture and flavor of the brownies.
- For a richer chocolate flavor, use dark chocolate chips instead of semi-sweet.
- To prevent the edges from overbaking, consider using a baking pan with light-colored metal, which reflects heat more evenly.
- For easy removal, line your baking pan with parchment paper, leaving an overhang on the sides. Once the brownies have cooled, simply lift them out using the parchment paper “handles”.
Serving & Storage Suggestions
These milk brownies are best served slightly chilled or at room temperature, alongside a tall glass of cold milk for that classic pairing. They can be cut into squares or rectangles of your preferred size. For a more elegant presentation, dust them with powdered sugar or drizzle them with melted chocolate.
To store leftover brownies, place them in an airtight container at room temperature for up to 3 days. For longer storage, they can be refrigerated for up to a week. You can also freeze them for up to 2 months. To freeze, wrap the brownies individually in plastic wrap and then place them in a freezer-safe bag or container. Thaw them at room temperature before serving. To reheat, microwave individual squares for a few seconds until slightly warm.
Nutritional Information
| Nutrient | Amount per Serving | % Daily Value |
|---|---|---|
| Calories | 215.8 kcal | N/A |
| Calories from Fat | 80 g | 37% |
| Total Fat | 8.9 g | 13% |
| Saturated Fat | 3.6 g | 17% |
| Cholesterol | 31 mg | 10% |
| Sodium | 190.3 mg | 7% |
| Total Carbohydrate | 33.6 g | 11% |
| Dietary Fiber | 1.1 g | 4% |
| Sugars | 24.4 g | 97% |
| Protein | 2.7 g | 5% |
Note: Nutritional information is an estimate and may vary based on specific ingredients and portion sizes.
Variations & Substitutions
- Peanut Butter Swirl Brownies: Swirl a few tablespoons of peanut butter into the batter before baking for a nutty twist.
- Mint Chocolate Brownies: Add a teaspoon of peppermint extract to the batter and top with chopped Andes mints after baking.
- Espresso Brownies: Add a tablespoon of instant espresso powder to the batter for a mocha flavor.
- Salted Caramel Brownies: Drizzle with caramel sauce and sprinkle with sea salt after baking.
- Gluten-Free Option: Substitute the self-rising flour with a gluten-free self-rising flour blend.
- Vegan Option: Replacing the margarine with a vegan butter alternative and using flax eggs (1 tablespoon of flaxseed meal mixed with 3 tablespoons of water per egg) will create a vegan-friendly version.
FAQs (Frequently Asked Questions)
Q: Why is it important not to use a mixer when beating the eggs?
A: Overmixing can lead to tough brownies. The goal is to gently incorporate air into the eggs for a tender texture, which is best achieved with a whisk.
Q: Can I use salted butter instead of margarine?
A: While margarine is specified in the recipe, you can substitute it with salted butter. However, be mindful of the salt content, and you may want to reduce or omit any additional salt called for in other recipes.
Q: How can I tell if the brownies are done without a toothpick?
A: Look for the edges pulling away from the pan and the center appearing set. A slight jiggle in the center is acceptable, as they will continue to set as they cool.
Q: What if my brownies are too dry?
A: Overbaking is the most common cause of dry brownies. Reduce the baking time slightly in future batches and make sure to store them in an airtight container.
Q: Can I double the recipe and bake it in a larger pan?
A: Yes, you can double the recipe, but you will need to adjust the baking time accordingly. Monitor the brownies closely and bake until they are set in the center.
Final Thoughts
These milk brownies are more than just a dessert; they’re a nostalgic trip down memory lane, a comforting reminder of simpler times. I encourage you to try this recipe and experience the pure joy of a perfectly fudgy brownie dunked in a cold glass of milk. Share them with friends and family, and let the memories and laughter flow. And please, don’t hesitate to share your own variations or tips! Happy baking!