
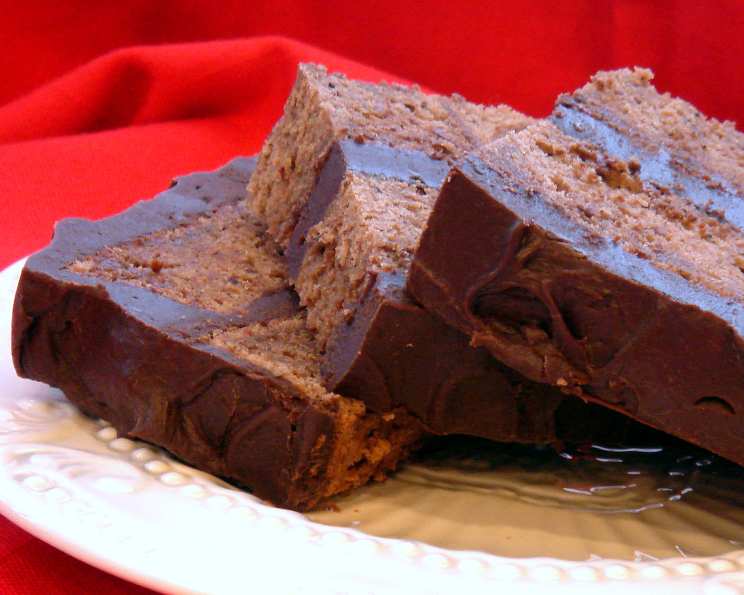
Milk Chocolate Frosted Layer Cake
The scent of milk chocolate baking always transports me back to my grandmother’s kitchen. She wasn’t a fancy baker, but her chocolate cakes were legendary. They were simple, comforting, and made with an abundance of love—and always frosted with a thick, almost decadent, milk chocolate frosting that was impossible to resist. This recipe, while a bit more refined, captures that same warmth and nostalgic flavor that I remember so fondly. It’s a cake that speaks of home, of simple pleasures, and of the joy of sharing something delicious with those you cherish.
Recipe Overview
- Prep Time: 45 minutes
- Cook Time: 25 minutes
- Total Time: 2 hours
- Servings: 12
- Yield: 1 cake
- Dietary Type: Not specified
Ingredients
- 1 1⁄4 cups cake flour
- 1⁄4 cup unsweetened cocoa powder
- 1⁄2 teaspoon baking powder
- 1 cup unsalted butter
- 1⁄2 cup whole milk
- 6 large eggs, separated
- 1 cup sugar (divided by 1/2 cups)
- 1 pinch salt
- 1 1⁄2 cups heavy cream
- 1 1⁄2 lbs milk chocolate, finely chopped
- Shaved milk chocolate, for garnish (optional)
Equipment Needed
- Two 9-inch square cake pans
- Medium bowls
- Medium saucepan
- Electric mixer
- Heatproof bowl
- Wire rack
Instructions
-
Preheat your oven to 325°F (160°C). This lower temperature helps ensure the cake bakes evenly and stays moist.
-
Prepare your cake pans by thoroughly buttering them and then dusting with flour. This prevents the cake from sticking and ensures easy removal. Tap out any excess flour. Set the prepared pans aside.
-
In a medium bowl, whisk together the cake flour, cocoa powder, and baking powder. This ensures that the dry ingredients are evenly distributed, which is crucial for a consistent texture. Set the bowl aside.
-
In a medium saucepan, combine the butter and milk. Melt them over low heat, stirring occasionally, until the butter is completely melted and the mixture is smooth. Be careful not to boil the milk.
-
Transfer the melted butter and milk mixture to a large bowl and allow it to cool slightly. You want it to be warm, not hot, to avoid cooking the egg yolks in the next step.
-
Whisk the egg yolks and 1/2 cup of the sugar into the cooled butter mixture. Whisk until the mixture is pale yellow and slightly thickened.
-
Add the dry ingredients (the flour, cocoa, and baking powder mixture) to the wet ingredients and whisk until just smooth. Be careful not to overmix, as this can develop the gluten in the flour and result in a tougher cake. A few small lumps are okay.
-
In a clean bowl (make sure there’s no grease or residue!), beat the egg whites with the salt using an electric mixer until soft peaks form.
-
Gradually add the remaining 1/2 cup of sugar to the egg whites, beating at medium-high speed until the whites are stiff and glossy. This creates a meringue that will give the cake its light and airy texture.
-
Gently fold the beaten egg whites into the chocolate batter in two or three additions, until no streaks of egg white remain. Be careful not to deflate the egg whites. This is what makes the cake light and airy.
-
Divide the batter evenly between the two prepared cake pans.
-
Bake for 25 minutes, or until the cakes are springy to the touch and a toothpick inserted into the center comes out clean. Start checking for doneness around the 23-minute mark, as oven temperatures can vary.
-
Transfer the cakes to a wire rack and allow them to cool completely in the pans before frosting. Cooling the cakes completely prevents the frosting from melting.
-
While the cakes are cooling, prepare the milk chocolate frosting. In a medium saucepan, bring the heavy cream to a simmer over medium heat. Do not boil the cream.
-
Put the finely chopped milk chocolate in a heatproof bowl.
-
Pour the hot cream over the chopped chocolate.
-
Allow the mixture to stand for 3 minutes, undisturbed, to allow the heat of the cream to melt the chocolate.
-
After 3 minutes, whisk the mixture until smooth and glossy. This is your milk chocolate ganache.
-
Let the frosting stand at room temperature, stirring occasionally, until it is thick enough to spread, about 1 hour. The frosting will thicken as it cools. If you’re in a hurry, you can chill it in the refrigerator, but be sure to stir it frequently to prevent it from becoming too firm.
-
Once the cakes are completely cool and the frosting has thickened, turn the cakes out of the pans.
-
Place one cake layer on a serving plate.
-
Top with 1 cup of the frosting, spreading it evenly to the edge of the cake.
-
Carefully place the second cake layer on top of the frosted layer.
-
Spread the remaining frosting over the top and sides of the cake, creating a smooth and even finish.
-
Let the frosted cake stand at room temperature for about 30 minutes before cutting into squares. This allows the frosting to set slightly and makes it easier to slice.
-
Garnish with shaved milk chocolate, if desired.
-
Serve and enjoy!
Expert Tips & Tricks
- For an extra-rich flavor, use high-quality milk chocolate with a higher cocoa percentage.
- If your frosting becomes too thick, you can gently warm it in the microwave for a few seconds at a time, stirring frequently, until it reaches the desired consistency.
- To ensure even layers, use a kitchen scale to weigh the batter before dividing it between the cake pans.
- If you don’t have cake flour, you can make your own by measuring out 1 cup of all-purpose flour, removing 2 tablespoons, and replacing them with 2 tablespoons of cornstarch.
Serving & Storage Suggestions
This Milk Chocolate Frosted Layer Cake is best served at room temperature, allowing the frosting to be soft and creamy. To serve, cut the cake into squares or slices. You can store leftover cake in an airtight container at room temperature for up to 2 days or in the refrigerator for up to 5 days. If storing in the refrigerator, allow the cake to come to room temperature before serving for the best flavor and texture. For longer storage, the cake can be frozen for up to 2 months. Wrap the cake tightly in plastic wrap and then in foil before freezing. Thaw overnight in the refrigerator before serving.
Nutritional Information
| Nutrient | Amount per Serving | % Daily Value |
|---|---|---|
| Calories | 704.8 kcal | N/A |
| Calories from Fat | 417 g | 59% |
| Total Fat | 46.4 g | 71% |
| Saturated Fat | 25.8 g | 128% |
| Cholesterol | 201.2 mg | 67% |
| Sodium | 126 mg | 5% |
| Total Carbohydrate | 64 g | 21% |
| Dietary Fiber | 2.8 g | 11% |
| Sugars | 46.7 g | N/A |
| Protein | 10.1 g | 20% |
Please note that nutritional information is an estimate and may vary based on specific ingredients and portion sizes.
Variations & Substitutions
- Dark Chocolate Frosting: Substitute dark chocolate for the milk chocolate in the frosting for a richer, more intense flavor.
- Espresso Infusion: Add a teaspoon of instant espresso powder to the batter for a subtle mocha flavor.
- Nuts: Sprinkle chopped nuts, such as pecans or walnuts, on top of the frosting for added texture and flavor.
- Extracts: Enhance the flavor by adding a teaspoon of vanilla, almond, or peppermint extract to the batter.
- Gluten-Free Option: Substitute the cake flour with a gluten-free all-purpose flour blend. Be sure to check that your baking powder is also gluten-free.
FAQs (Frequently Asked Questions)
Q: Can I use all-purpose flour instead of cake flour?
A: While you can, cake flour is highly recommended for its lower protein content, which results in a more tender and delicate cake. If you must substitute, see the tip above about creating a cake flour substitute.
Q: Why is it important to whip the egg whites separately?
A: Whipping the egg whites separately incorporates air into the batter, which helps the cake rise and gives it a light and airy texture.
Q: Can I make the frosting ahead of time?
A: Yes, you can make the frosting a day in advance and store it in the refrigerator. Be sure to let it come to room temperature and stir it well before using.
Q: How do I prevent the cake from sticking to the pan?
A: Thoroughly buttering and flouring the cake pans is crucial. You can also use parchment paper to line the bottom of the pans for extra insurance.
Q: The frosting is too thick. What can I do?
A: Gently warm the frosting in the microwave for a few seconds at a time, stirring frequently, until it reaches the desired consistency. Be careful not to overheat it.
Final Thoughts
This Milk Chocolate Frosted Layer Cake is more than just a dessert; it’s an experience. The tender crumb of the cake, paired with the creamy, melt-in-your-mouth milk chocolate frosting, is a combination that’s sure to delight your taste buds. Don’t be intimidated by the steps; each one is simple and straightforward. Gather your ingredients, put on some music, and enjoy the process of creating something special. Share this cake with your loved ones and create memories that will last a lifetime. I’d love to hear about your baking experiences and any variations you try!