
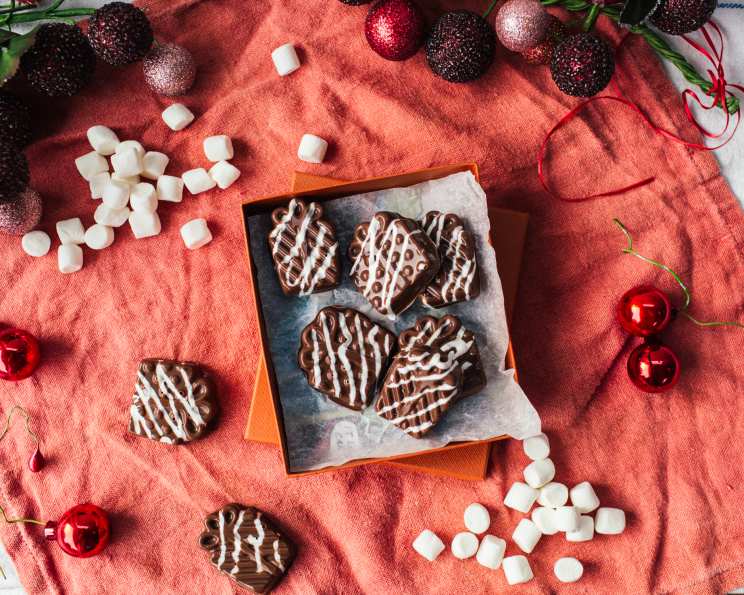
Milk Chocolate Marshmallow Candies: A Sweet Symphony in Every Bite
My earliest memory of chocolate involves a little tin box, nestled high on a shelf, filled with individually wrapped chocolates. Each one was a treasure, but the milk chocolate ones with the fluffy marshmallow center were always the first to disappear. These Milk Chocolate Marshmallow Candies transport me right back to that childhood joy – a simple yet irresistible combination of creamy chocolate and pillowy sweetness. They’re not just a treat; they’re a tiny, edible memory.
Recipe Overview
- Prep Time: 15 minutes
- Freeze/Chill Time: 1 hour 15 minutes
- Total Time: 1 hour 30 minutes
- Yields: 1 tray
- Dietary Type: Vegetarian
Ingredients
- Cooking spray
- 2 cups milk chocolate candy melts
- 1/3 cup white chocolate candy melts
- 6 extra large marshmallows, cut in half
Equipment Needed
- Ice cube tray
- Piping bag (optional)
- Microwave-safe bowls
Instructions
- Begin by lightly spraying an ice cube tray with cooking spray. This will ensure easy removal of the candies later.
- Next, melt the white chocolate candy melts in a microwave-safe bowl. Microwave in 30-second intervals, stirring well after each interval, until completely smooth. Be careful not to overheat the chocolate, as it can seize.
- Once melted, transfer the white chocolate to a piping bag. If you don’t have a piping bag, a small plastic bag with a tiny corner snipped off will work just fine, or you can simply use a spoon.
- Pipe thin stripes of the melted white chocolate across the entire ice cube tray. Alternatively, if you’re using a spoon, drizzle the white chocolate artfully across the tray. Don’t worry about being perfect; the stripes add a lovely visual contrast.
- Place the ice cube tray in the freezer to set the white chocolate stripes. This should take about 10-15 minutes. This step is crucial to prevent the colors from blending when the milk chocolate is added.
- While the white chocolate is setting, melt the milk chocolate candy melts in a separate microwave-safe bowl, using the same method as before: 30-second intervals, stirring well between each interval, until smooth.
- Once the milk chocolate is melted and smooth, carefully pour about 2 tablespoons into each compartment of the prepared ice cube tray.
- Tilt the entire tray in all directions to coat the sides of each compartment evenly with the melted milk chocolate. Ensure there are no gaps, so the marshmallow is fully encased in chocolate.
- Return the tray to the freezer to set the chocolate shell. This should take about 10-15 minutes.
- Remove the tray from the freezer. Place one marshmallow half into each compartment, pressing it gently into the partially set chocolate.
- Cover the marshmallows with the remaining melted milk chocolate, ensuring they are completely submerged. Use a spatula or spoon to smooth the tops.
- Place the tray in the refrigerator for about 1 hour, or until the chocolate is completely set and firm.
- Once set, carefully remove the Milk Chocolate Marshmallow Candies from the ice cube tray. You may need to gently flex the tray or use a small spatula to help release them.
Expert Tips & Tricks
- Tempering your chocolate (while not strictly necessary for candy melts) will give your candies a beautiful shine and a satisfying snap. You can temper the chocolate using the seed method or by using a double boiler.
- For a smoother finish, tap the ice cube tray gently on the counter after pouring in the chocolate to release any trapped air bubbles.
- If your chocolate starts to seize while melting, try adding a teaspoon of vegetable oil or shortening to help smooth it out.
- Don’t overcrowd the microwave when melting the chocolate. This can lead to uneven heating and burning.
- Experiment with different types of candy melts. Dark chocolate or even flavored candy melts would make delicious variations.
- If you want to add extra flavor, try adding a pinch of sea salt to the melted chocolate. The salt enhances the sweetness and adds a delightful complexity.
Serving & Storage Suggestions
These Milk Chocolate Marshmallow Candies are perfect as a sweet treat after dinner, a party favor, or a homemade gift. Arrange them artfully on a platter, or package them in small cellophane bags tied with ribbon.
Store leftover candies in an airtight container in the refrigerator for up to 1 week. They can also be frozen for up to 2 months. Let them thaw in the refrigerator before serving. While they can be kept at room temperature, the chocolate may soften in warmer climates.
Nutritional Information
(Estimated values; may vary based on specific brands and marshmallow size)
| Nutrient | Amount per Serving | % Daily Value |
|---|---|---|
| Calories | 443 kcal | 22% |
| Total Fat | 18 g | 28% |
| Saturated Fat | 11 g | 55% |
| Cholesterol | 12 mg | 4% |
| Sodium | 86 mg | 4% |
| Total Carbohydrate | 69 g | 23% |
| Dietary Fiber | 0 g | 0% |
| Sugars | 58 g | 116% |
| Protein | 4 g | 8% |
Variations & Substitutions
- Mint Chocolate Marshmallow Candies: Add a few drops of peppermint extract to the melted milk chocolate for a refreshing twist. You can also use mint-flavored chocolate candy melts.
- Dark Chocolate Version: Substitute dark chocolate candy melts for milk chocolate for a richer, more intense flavor.
- Peanut Butter Swirl: Swirl a small amount of melted peanut butter into the milk chocolate before pouring it into the ice cube tray.
- Sprinkles: Add sprinkles to the top of the chocolate before it sets for a festive look.
- Nuts: Sprinkle chopped nuts (such as almonds, pecans, or walnuts) onto the melted chocolate for added texture and flavor.
- Vegan Version: Use vegan marshmallows and vegan chocolate candy melts to make a completely plant-based version.
FAQs (Frequently Asked Questions)
Q: Can I use regular chocolate instead of candy melts?
A: While you can use regular chocolate, candy melts are specifically designed to melt smoothly and set firmly without tempering, making them easier to work with for this recipe.
Q: My chocolate seized up when I was melting it. What did I do wrong?
A: Overheating the chocolate is the most common cause of seizing. Melt the chocolate in short intervals (30 seconds) and stir well after each interval. If it seizes, try adding a teaspoon of vegetable oil or shortening.
Q: Can I use a different shape of ice cube tray?
A: Absolutely! Feel free to use any shape of ice cube tray you like. Just be sure to adjust the amount of chocolate accordingly.
Q: How do I prevent the white chocolate stripes from blending into the milk chocolate?
A: Make sure the white chocolate is completely set in the freezer before pouring in the milk chocolate. This will prevent the colors from mixing.
Q: Can I make these ahead of time?
A: Yes, these candies can be made ahead of time. Store them in an airtight container in the refrigerator for up to a week.
Final Thoughts
There’s something truly special about creating homemade treats, especially when they evoke such fond memories. These Milk Chocolate Marshmallow Candies are more than just a recipe; they’re an invitation to indulge in a little bit of childhood joy. So, gather your ingredients, put on your favorite music, and enjoy the process of creating these delightful little bites. And don’t forget to share them with someone you love – after all, the best treats are always those shared with friends and family! I encourage you to experiment with variations and let your creativity shine. Let me know how yours turn out!