
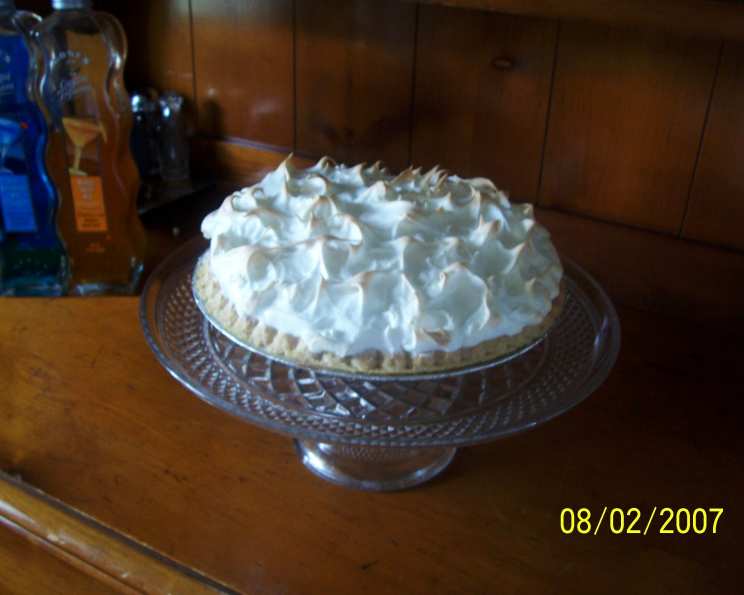
Milk Chocolate Pie: A Taste of Nostalgia
The aroma of baking chocolate, warm and inviting, always takes me back to my grandmother’s kitchen. She had a way of making even the simplest desserts feel incredibly special. While she was known for her decadent dark chocolate creations, it was her milk chocolate pie that truly captured my heart. The creamy, smooth filling paired with the light, airy meringue was a symphony of textures and flavors – a comforting classic that I still crave to this day.
Recipe Overview
- Prep Time: 20 minutes
- Cook Time: 30 minutes
- Total Time: 50 minutes
- Servings: 6
- Yield: 1 pie
- Dietary Type: Vegetarian
Ingredients
- 1 frozen pie shell
For the Filling:
- 3 tablespoons cocoa powder
- 1 cup sugar
- 2 cups milk
- 6 tablespoons flour
- 3 egg yolks
- 2 tablespoons butter
- 1 teaspoon vanilla
For the Meringue:
- 3 egg whites
- 6 tablespoons sugar
- 1 dash cream of tartar
- 1 dash salt
Equipment Needed
- Double boiler (or heatproof bowl and saucepan)
- Whisk
- Electric mixer
- Measuring cups and spoons
- Oven
Instructions
-
Pre-bake the pie shell: Place the frozen pie shell in the oven and bake for a few minutes, just until it is lightly browned. This helps prevent a soggy bottom. Keep a close eye on it; you don’t want it to burn.
-
Prepare the filling: In the top half of a double boiler, combine the cocoa powder, sugar, milk, and flour. If you don’t have a double boiler, you can use a heatproof bowl set over a simmering pot of water, ensuring the bottom of the bowl doesn’t touch the water.
-
Cook the filling: Cook the mixture over medium heat, stirring constantly with a whisk. Continue stirring until the mixture begins to thicken, which should take approximately 20 minutes. The texture should resemble a smooth, creamy pudding. Patience is key here! Don’t stop stirring, or the mixture may scorch.
-
Continue cooking: Once the filling has thickened, cover the double boiler with a lid and let it cook for an additional 10 minutes. This ensures that the flour is fully cooked and the filling is perfectly smooth.
-
Finishing touches: Remove the filling from the heat. Stir in the butter and vanilla until they are fully incorporated. The butter will add richness and the vanilla will enhance the chocolate flavor.
-
Assemble the pie: Pour the warm chocolate filling into the pre-baked pie shell, spreading it evenly.
-
Prepare the meringue: In a clean, dry bowl, beat the egg whites and salt with an electric mixer until they are almost stiff. This initial beating creates the foundation for a stable meringue.
-
Add cream of tartar: Add a small dash of cream of tartar to the egg whites. Cream of tartar helps stabilize the meringue and prevents it from weeping.
-
Sweeten the meringue: Gradually add the sugar, one tablespoon at a time, while continuing to beat the egg whites. This slow addition of sugar is crucial for creating a glossy, stable meringue.
-
Beat until stiff peaks form: Continue beating the meringue until stiff, glossy peaks form. The peaks should stand straight up when the beaters are lifted.
-
Top the pie: Gently spread the meringue over the top of the chocolate filling, ensuring it reaches the edges of the crust to seal it. You can create decorative swirls with the back of a spoon or a spatula.
-
Bake the pie: Bake the pie in a preheated oven at 375 degrees Fahrenheit until the meringue is lightly golden brown. This usually takes about 12-15 minutes. Keep a close eye on it to prevent burning.
Expert Tips & Tricks
- Preventing a Soggy Crust: Pre-baking the crust is essential for preventing a soggy bottom. You can also brush the bottom of the crust with melted chocolate before adding the filling for an extra layer of protection.
- Achieving a Smooth Filling: Continuous stirring while cooking the filling is crucial for preventing lumps and ensuring a smooth, creamy texture. If you do encounter lumps, you can try using an immersion blender to smooth them out.
- Making a Stable Meringue: Use a clean, dry bowl when beating the egg whites. Any traces of fat can prevent the meringue from forming properly. Also, adding the sugar gradually is key to creating a stable meringue that won’t weep.
- Preventing Meringue Weeping: Make sure the meringue seals completely to the crust to prevent weeping. Baking the pie in a slightly lower oven (350°F) for a longer time can also help prevent weeping.
- Make-Ahead Tip: The filling can be made a day ahead and stored in the refrigerator. Just bring it to room temperature before pouring it into the baked crust and topping with the meringue.
Serving & Storage Suggestions
This Milk Chocolate Pie is best served slightly chilled, allowing the filling to set fully and the meringue to retain its airy texture. A dusting of cocoa powder or a few chocolate shavings can add an elegant touch.
Leftover pie should be stored in the refrigerator. It will keep for up to 3 days. Keep in mind that the meringue may soften over time. Freezing is not recommended as it can affect the texture of both the filling and the meringue.
Nutritional Information
| Nutrient | Amount per Serving | % Daily Value |
|---|---|---|
| Calories | 420 kcal | 21% |
| Total Fat | 18g | 28% |
| Saturated Fat | 9g | 45% |
| Cholesterol | 120mg | 40% |
| Sodium | 300mg | 13% |
| Total Carbohydrate | 65g | 22% |
| Dietary Fiber | 2g | 8% |
| Sugars | 40g | N/A |
| Protein | 8g | 16% |
Note: Nutritional information is an estimate and may vary based on specific ingredients and serving sizes.
Variations & Substitutions
- Dark Chocolate Pie: Substitute the cocoa powder with an equal amount of dark cocoa powder for a richer, more intense chocolate flavor. You can also add a few ounces of melted dark chocolate to the filling.
- Gluten-Free Pie: Use a gluten-free pie crust instead of a traditional one. You can find pre-made gluten-free crusts or make your own using a blend of gluten-free flours.
- Dairy-Free Pie: Substitute the milk with almond milk, soy milk, or oat milk. Use a dairy-free butter alternative. Be aware this may affect the overall taste and texture.
- Peanut Butter Chocolate Pie: Add a few tablespoons of peanut butter to the filling for a delicious peanut butter chocolate combination.
- Espresso Chocolate Pie: Add a teaspoon of instant espresso powder to the filling to enhance the chocolate flavor and add a hint of coffee.
FAQs (Frequently Asked Questions)
Q: Can I use a graham cracker crust instead of a frozen pie shell?
A: Yes, a graham cracker crust is a great alternative. Just make sure to pre-bake it slightly before adding the filling.
Q: Why is my meringue weeping?
A: Weeping can occur if the meringue isn’t properly sealed to the crust, if the sugar wasn’t added gradually, or if the meringue was overbaked. Make sure the meringue touches the crust all around, add the sugar slowly, and don’t overbake.
Q: Can I use a stand mixer instead of a hand mixer for the meringue?
A: Absolutely! A stand mixer works perfectly for making meringue. Just be sure to use the whisk attachment.
Q: How do I prevent the crust from burning while baking the meringue?
A: You can use a pie shield or aluminum foil to cover the edges of the crust while the meringue is baking.
Q: Can I make this pie without a double boiler?
A: Yes, you can use a heatproof bowl set over a simmering pot of water, ensuring the bottom of the bowl doesn’t touch the water.
Final Thoughts
This Milk Chocolate Pie is more than just a dessert; it’s a warm embrace, a sweet memory, and a taste of home. Don’t be intimidated by the meringue – with a few simple tips, you can create a perfectly golden, cloud-like topping that will impress your family and friends. I encourage you to try this recipe and share the joy of this classic treat. Perhaps enjoy it with a scoop of vanilla ice cream or a cup of freshly brewed coffee for the ultimate indulgence!