
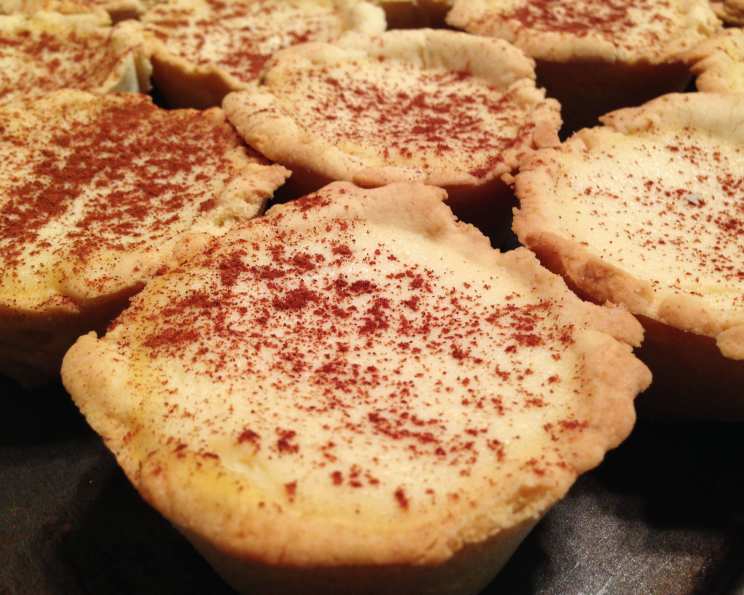
Milk Tart (Melk Tert): A Taste of South African Heritage
The first time I tasted Milk Tart, I was a wide-eyed child on a family trip to Cape Town. The creamy, subtly sweet custard, the delicate, crumbly crust, and that unmistakable dusting of cinnamon – it was pure magic. It wasn’t just the taste; it was the warmth, the feeling of being welcomed into a culture so rich and vibrant. Every bite felt like a hug from a distant relative, a sweet reminder of connection and home. Even now, decades later, the aroma of a freshly baked Milk Tart instantly transports me back to that sunny South African kitchen.
Recipe Overview
- Prep Time: 20 minutes
- Cook Time: 30-40 minutes
- Total Time: 4 hours (includes chilling time)
- Servings: 6-8
- Yield: 1 pie
- Dietary Type: Not Gluten-Free
Ingredients
For the Crust:
- 2 cups flour
- 1 egg
- ¼ cup sugar (adjust to taste depending on the fineness of your sugar)
- 4 ounces (113g) butter (real butter), cold and cubed
- 1 pinch salt
- 2 teaspoons baking powder
For the Filling:
- 4 ½ cups homogenized milk (whole milk), full fat is important
- 1 tablespoon butter (real butter)
- 2 ½ tablespoons cornstarch
- 3 eggs
- 1 teaspoon vanilla essence
- 1 pinch salt
- ¼ cup sugar
- 2 ½ tablespoons flour
- Ground cinnamon, for dusting
Equipment Needed
- Pie dish (9-inch is recommended)
- Mixing bowls
- Electric mixer or whisk
- Non-stick saucepan
- Whisk
- Measuring cups and spoons
Instructions
- Prepare the Crust: In a large mixing bowl, cream together the butter and sugar until light and fluffy. Add the egg and mix until well combined.
- In a separate bowl, whisk together the flour, salt, and baking powder.
- Gradually add the dry ingredients to the wet ingredients, mixing until just combined. Be careful not to overmix.
- Wrap the dough in plastic wrap and chill in the refrigerator for at least 30 minutes. This will make it easier to handle.
- Preheat your oven to 350°F (180°C).
- On a lightly floured surface, roll out the dough to fit your pie dish.
- Carefully transfer the dough to the pie dish and press it into the bottom and sides.
- Trim any excess dough and flute the edges of the crust.
- Bake the crust for 15-20 minutes, or until golden brown. Keep a close eye on it to prevent burning. Remove from oven and allow to cool slightly while you prepare the filling.
- Prepare the Filling: In a medium bowl, beat together the eggs, sugar, flour, cornstarch, and salt until smooth and well combined. Set aside.
- In a non-stick saucepan, heat the milk over medium heat until it almost boils. You’ll see tiny bubbles forming around the edges of the pot.
- Remove the saucepan from the heat (but don’t turn off the stove!). Slowly pour in the egg mixture, stirring constantly in a gentle figure-eight motion to prevent the eggs from curdling.
- Return the saucepan to the stove over medium heat. Using a whisk, continue stirring constantly until the mixture starts to thicken. This will take several minutes, so be patient.
- Remove the saucepan from the heat. Add the butter and whisk gently until it’s completely melted and incorporated.
- Stir in the vanilla essence.
- Pour the filling into the pre-baked pie crust while the crust is still slightly warm.
- Sprinkle the top of the filling liberally with ground cinnamon.
- Allow the Milk Tart to cool completely at room temperature, then refrigerate for at least 2 hours before serving. This will allow the filling to set properly.
- Enjoy!
Note: Cooking times may vary depending on your oven. The most important thing is to ensure that the crust is golden brown and the filling is thick enough to hold its shape when cooled.
Expert Tips & Tricks
- Preventing a Soggy Crust: To ensure a crisp crust, you can “blind bake” it. This involves lining the crust with parchment paper and filling it with pie weights or dried beans before baking. Remove the weights for the last few minutes of baking to allow the crust to brown evenly.
- Smooth Filling: For an extra smooth filling, strain the custard through a fine-mesh sieve after cooking. This will remove any lumps or bits of cooked egg.
- Don’t Overcook the Custard: Overcooked custard can become grainy or rubbery. Remove the saucepan from the heat as soon as the filling thickens to the consistency of a thick sauce. It will continue to thicken as it cools.
- Cinnamon Swirl: Instead of simply sprinkling cinnamon on top, try creating a swirl pattern for a more visually appealing dessert.
Serving & Storage Suggestions
Milk Tart is best served chilled. It makes a wonderful dessert on its own, or you can serve it with a dollop of whipped cream or a scoop of vanilla ice cream. For a truly South African experience, pair it with a cup of Rooibos tea.
Leftover Milk Tart can be stored in the refrigerator for up to 3 days. Cover it tightly with plastic wrap or store it in an airtight container to prevent it from drying out. It is not recommended to freeze Milk Tart, as the texture of the filling may change.
Nutritional Information
| Nutrient | Amount per Serving | % Daily Value |
|---|---|---|
| Calories | 555 kcal | 28% |
| Total Fat | 27g | 41% |
| Saturated Fat | 15g | 77% |
| Cholesterol | 205mg | 68% |
| Sodium | 416mg | 17% |
| Total Carbohydrate | 63g | 20% |
| Dietary Fiber | 1g | 5% |
| Sugars | 27g | 108% |
| Protein | 15g | 30% |
Note: Nutritional information is an estimate and may vary based on specific ingredients and portion sizes.
Variations & Substitutions
- Gluten-Free Milk Tart: Use a gluten-free pie crust recipe or a store-bought gluten-free crust.
- Dairy-Free Milk Tart: Substitute the homogenized milk with a full-fat plant-based milk alternative, such as coconut milk or oat milk. Be aware that this might slightly alter the flavor and texture.
- Flavor Variations: Add a touch of lemon zest or almond extract to the filling for a different flavor profile. You could also infuse the milk with cardamom pods or a cinnamon stick for a more subtle spice note.
- Crustless Milk Tart: Skip the crust altogether and bake the filling in a greased baking dish for a custard-like dessert.
FAQs (Frequently Asked Questions)
Q: Why is it important to use homogenized milk?
A: Homogenized milk, or whole milk, provides the richness and creamy texture that is characteristic of Milk Tart. Lower-fat milk may result in a thinner, less satisfying filling.
Q: Can I use a store-bought pie crust?
A: Yes, you can definitely use a store-bought pie crust to save time. Just make sure to choose one that is high quality and has a good flavor.
Q: How do I prevent the filling from cracking?
A: Avoid overbaking the Milk Tart, and allow it to cool slowly at room temperature before refrigerating. Drastic temperature changes can cause the filling to crack.
Q: Can I make Milk Tart ahead of time?
A: Absolutely! In fact, Milk Tart is best made at least a few hours in advance to allow the filling to set properly. It can be stored in the refrigerator for up to 3 days.
Q: What if my filling is too thin?
A: If your filling is too thin, you can try whisking a small amount of cornstarch (about 1 teaspoon) with a tablespoon of cold milk and adding it to the filling while it’s still cooking. Continue stirring until it thickens.
Final Thoughts
Now it’s your turn to bring a little bit of South Africa into your kitchen. This Milk Tart recipe is more than just a dessert; it’s a piece of heritage, a taste of home, and a celebration of simple pleasures. So, gather your ingredients, preheat your oven, and embark on a culinary adventure. Don’t be afraid to experiment with variations or add your own personal touch. And when you take that first bite, I hope it fills you with the same warmth and joy that I’ve experienced for years. Share your creations, your memories, and your love for Milk Tart with the world. And please, let me know how it turns out!