
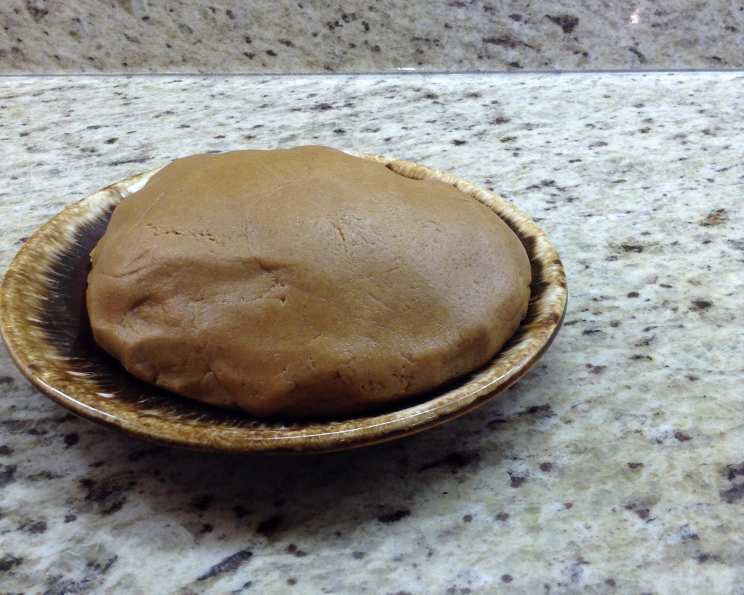
Milkless Peanut Butter Play Dough: A Culinary Adventure for Little Hands
I remember being a child, mesmerized by my grandmother’s hands as she kneaded dough. The feel of it between my fingers, the transformation from simple ingredients to a cohesive, malleable substance – it was pure magic. That’s the feeling I wanted to recreate for my own children, but with a playful twist. I wanted something edible, fun, and safe, a project where they could explore textures and shapes without worrying about mysterious chemicals. And since we often find ourselves without milk on hand, I set out to create a peanut butter play dough that was just as delightful, but entirely milk-free. This recipe captures the spirit of those childhood memories, offering a creative outlet that’s both engaging and delicious.
Recipe Overview
- Prep Time: 5 minutes
- Cook Time: 0 minutes
- Total Time: 5 minutes
- Yields: 1 cup
- Serves: 1
- Dietary Type: Dairy-Free
Ingredients
- ½ cup Smart Balance creamy peanut butter
- ½ cup flour
- 2 tablespoons honey
Equipment Needed
- Medium bowl
- Measuring cups and spoons
- Clean work surface
- Cookie cutters (optional)
Instructions
-
In a medium bowl, stir together the peanut butter and honey until well combined. The mixture should be smooth and slightly sticky.
-
Gradually add the flour, mixing it into the peanut butter mixture. Start by adding a couple of tablespoons at a time and stir until incorporated.
-
As the mixture thickens, switch to hand kneading. Turn the dough out onto a clean, lightly floured surface.
-
Continue to knead the dough, gradually adding more flour until it reaches a desired consistency. It should be pliable, smooth, and not too sticky. Be careful not to add too much flour, or the play dough will become dry and crumbly.
-
Once the play dough is ready, let the fun begin! Use cookie cutters to create shapes, sculpt miniature animals, or embellish your creations with edible decorations like raisins, pretzel rods, or nuts.
-
When not in use, store the play dough in an airtight container in a cool place. Refrigeration is not recommended, as it can make the play dough too hard. It should keep for a few days.
Note: If you are using a hydrogenated peanut butter like Peter Pan, Skippy, or Jiff, you may need to increase the amount of honey and decrease the amount of flour, as these types of peanut butter tend to be thicker and stiffer than Smart Balance. Adjust the ingredients accordingly until you achieve the desired play dough consistency.
Expert Tips & Tricks
- Peanut Butter Selection: As mentioned earlier, the type of peanut butter you use significantly impacts the final texture. Natural peanut butters, with their higher oil content, might require a touch more flour to achieve the right consistency. Experiment to find the perfect balance!
- Flour Power: Different types of flour also affect the dough. All-purpose flour is a reliable choice, but you can also experiment with whole wheat flour for a slightly denser and nuttier play dough. For a smoother texture, sift the flour before adding it to the mixture.
- Sweetness Adjustment: The amount of honey can be adjusted to suit your preferences. If you prefer a less sweet play dough, reduce the honey to one tablespoon. Alternatively, you can substitute maple syrup or agave nectar for a different flavor profile.
- Coloring Fun: Add a few drops of natural food coloring to create vibrant and exciting play dough. Beet juice, spinach juice, or turmeric powder can be used for natural coloring options. Knead the coloring in thoroughly to ensure an even distribution.
- Aromatherapy: A drop or two of food-grade essential oil, like vanilla or almond extract, can add a delightful aroma to the play dough. Be sure to use essential oils that are safe for consumption and use them sparingly.
- Texture Troubleshooting: If the play dough is too sticky, gradually add more flour, one tablespoon at a time, until it reaches the desired consistency. If it is too dry and crumbly, add a small amount of honey or peanut butter to moisten it. Knead well after each addition.
- Play Dough Revival: If the play dough becomes dry and hard after storage, knead it with a few drops of water or honey to restore its pliability.
Serving & Storage Suggestions
This milkless peanut butter play dough is best enjoyed as a creative activity rather than a snack. While the ingredients are edible, it’s designed for playing, sculpting, and creating.
To store, wrap the play dough tightly in plastic wrap or place it in an airtight container to prevent it from drying out. Store it in a cool, dry place, away from direct sunlight. Do not refrigerate, as this will make the play dough hard and difficult to work with.
The play dough should last for a few days if stored properly. Discard if it becomes moldy, discolored, or develops an unpleasant odor.
Nutritional Information
| Nutrient | Amount per Serving | % Daily Value |
|---|---|---|
| Calories | 445 kcal | 22% |
| Total Fat | 28g | 43% |
| Saturated Fat | 5g | 25% |
| Cholesterol | 0mg | 0% |
| Sodium | 5mg | 0% |
| Total Carbohydrate | 38g | 13% |
| Dietary Fiber | 3g | 12% |
| Sugars | 17g | 34% |
| Protein | 14g | 28% |
Note: Nutritional information is an estimate and may vary based on specific ingredients used.
Variations & Substitutions
- Gluten-Free Play Dough: Substitute the all-purpose flour with a gluten-free flour blend. You may need to adjust the amount of flour to achieve the desired consistency, as gluten-free flours tend to absorb more liquid.
- Nut-Free Play Dough: Replace the peanut butter with sunflower seed butter (sunbutter) or tahini (sesame seed paste). Be sure to check for any allergies before using these substitutes.
- Chocolate Peanut Butter Play Dough: Add 1-2 tablespoons of cocoa powder to the mixture for a chocolatey twist. You may need to add a little more honey to compensate for the bitterness of the cocoa powder.
- Spiced Play Dough: Add a pinch of cinnamon, nutmeg, or ginger to the mixture for a warm and fragrant play dough.
- Colorful Play Dough: Use natural food coloring or edible glitter to create vibrant and eye-catching play dough.
FAQs (Frequently Asked Questions)
Q: Is this play dough safe for children with peanut allergies?
A: No, this recipe contains peanut butter and is not safe for children with peanut allergies. Consider using sunbutter or tahini as a substitute.
Q: How long does this play dough last?
A: When stored properly in an airtight container, the play dough should last for a few days.
Q: Can I bake this play dough?
A: No, this play dough is not designed for baking. It’s meant for playing and sculpting.
Q: My play dough is too sticky. What should I do?
A: Gradually add more flour, one tablespoon at a time, until it reaches the desired consistency.
Q: My play dough is too dry. How can I fix it?
A: Knead it with a few drops of water or honey to restore its pliability.
Final Thoughts
This milkless peanut butter play dough is more than just a recipe; it’s an invitation to unleash your creativity and bond with your loved ones. Whether you’re making intricate sculptures, cutting out fun shapes, or simply enjoying the tactile experience, this recipe offers a delightful way to engage your senses and create lasting memories. Don’t hesitate to experiment with different variations and substitutions to personalize the play dough to your liking. I encourage you to gather your ingredients, roll up your sleeves, and embark on a culinary adventure that’s both fun and delicious. And if you do try it, I would love to hear about your creations and any fun twists you may have added! Happy playing!