
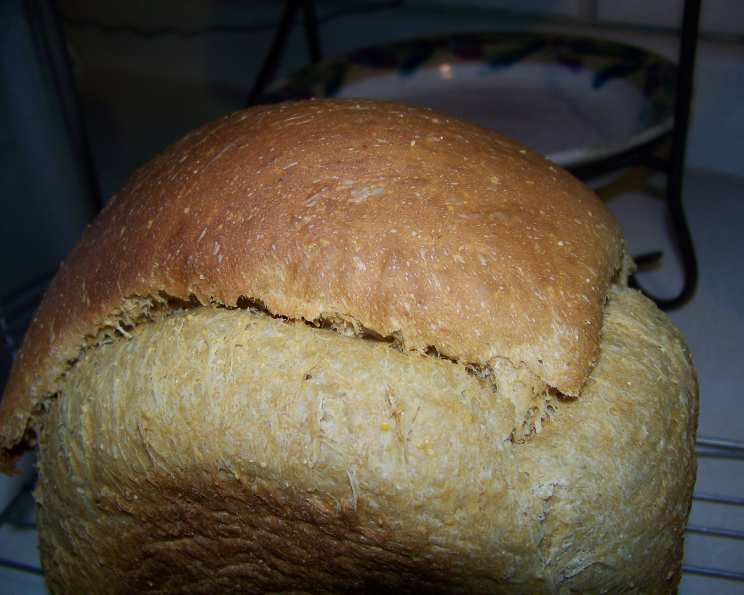
Mimi’s Anadama Bread (Bread Machine)
The scent of molasses always transports me back to my grandmother’s kitchen. She wasn’t a fancy baker, but her hearty, slightly sweet bread was a staple. I remember standing on a stool, watching her measure ingredients with well-worn spoons and cups. The rich, earthy aroma of the molasses mingling with the warm yeast was pure comfort, and that’s exactly what this Anadama bread, adapted for a bread machine, brings to mind – a taste of home, a hug from the past.
Recipe Overview
- Prep Time: 10 minutes
- Cook Time: 4 hours
- Total Time: 4 hours 10 minutes
- Servings: 16
- Yield: 1 large loaf or 1 medium loaf
- Dietary Type: Vegetarian
Ingredients
For a Large Loaf:
- 1 1/8 cups water
- 1/3 cup molasses
- 1 1/2 tablespoons butter
- 1 teaspoon salt
- 1/3 cup yellow cornmeal
- 3 1/2 cups bread flour
- 2 1/2 teaspoons yeast
For a Medium Loaf:
- 1 cup water
- 1/4 cup molasses
- 1 tablespoon butter
- 3/4 teaspoon salt
- 1/4 cup yellow cornmeal
- 3 cups bread flour
- 2 teaspoons yeast
Equipment Needed
- Bread machine
- Measuring cups and spoons
- Cooling rack
Instructions
-
Begin by adding the ingredients to your bread machine pan in the order recommended by your machine’s manufacturer. Typically, this means starting with the liquids (water and molasses), followed by the softened butter, salt, cornmeal, bread flour, and finally the yeast. Placing the yeast on top of the flour, away from the liquid, helps to ensure proper activation.
-
Select the appropriate settings on your bread machine. You’ll want to use the basic cycle with a light crust setting. Make sure to also select the correct loaf size (either large or medium) according to the amount of ingredients you’ve used.
-
Start the bread machine. Keep a close eye on the dough during the kneading process. The consistency should be smooth and slightly tacky, not sticky or overly dry.
-
If the dough appears too dry, gradually add a few drops of water at a time until it reaches the desired consistency. Be careful not to add too much water, as this can result in a sticky dough.
-
Conversely, if the dough seems too wet, slowly add a small amount of bread flour until it firms up. Again, add the flour gradually to avoid making the dough too dry.
-
Allow the bread machine to complete its cycle. This typically takes around 4 hours, including kneading, rising, and baking. The machine will signal when the bread is done.
-
Once the baking cycle is complete, carefully remove the bread pan from the machine. Use oven mitts to protect your hands, as the pan will be hot.
-
Turn the bread out onto a wire cooling rack. Allow the bread to cool completely before slicing and serving. This will prevent the bread from becoming gummy and will make it easier to slice.
Expert Tips & Tricks
-
Molasses Matters: Use unsulphured molasses for the best flavor. Blackstrap molasses will give a stronger, more intense flavor, but it can also be slightly bitter.
-
Temperature Control: Ensure your water is lukewarm (around 105-115°F or 40-46°C) for optimal yeast activation. Too hot, and you risk killing the yeast; too cold, and it won’t activate properly.
-
Flour Power: Bread flour is essential for the chewy texture of Anadama bread. Its higher protein content develops more gluten, resulting in a sturdier loaf. While you can substitute all-purpose flour in a pinch, the texture will be slightly different.
-
Butter Substitute: If you want to make this dairy-free, you can substitute the butter with a vegan butter alternative. Ensure it is a solid stick form for best results.
-
Enhance the Flavor: For an extra depth of flavor, try adding a teaspoon of vanilla extract or a pinch of ground cinnamon to the dough.
-
Visual Appeal: Before baking, you can brush the top of the dough with a beaten egg white and sprinkle it with coarse cornmeal for a rustic look.
-
Troubleshooting a Dense Loaf: If your bread consistently comes out dense, ensure your yeast is fresh and active. Also, avoid over-measuring the flour.
Serving & Storage Suggestions
Anadama bread is delicious served warm with a pat of butter or a drizzle of honey. It pairs well with hearty soups, stews, or sandwiches. It’s also fantastic toasted and served with jam or preserves.
To store leftover Anadama bread, wrap it tightly in plastic wrap or place it in an airtight container. It will keep at room temperature for up to 3 days. For longer storage, you can freeze the bread for up to 2 months. Thaw it completely before slicing and serving. To refresh the bread, you can briefly warm it in the oven or toaster.
Nutritional Information
| Nutrient | Amount per Serving | % Daily Value |
|---|---|---|
| Calories | 256.1 kcal | N/A |
| Calories from Fat | 22 g | N/A |
| Total Fat | 2.5 g | 3% |
| Saturated Fat | 1.2 g | 6% |
| Cholesterol | 4.8 mg | 1% |
| Sodium | 278.8 mg | 11% |
| Total Carbohydrate | 51.8 g | 17% |
| Dietary Fiber | 2 g | 8% |
| Sugars | 7 g | N/A |
| Protein | 6.1 g | 12% |
Variations & Substitutions
-
Spiced Anadama: Add 1 teaspoon of ground cinnamon, 1/2 teaspoon of ground nutmeg, and 1/4 teaspoon of ground cloves to the dough for a warm, spiced flavor.
-
Nutty Anadama: Mix in 1/2 cup of chopped walnuts or pecans into the dough for added texture and flavor.
-
Sweet Anadama: Increase the molasses to 1/2 cup for a sweeter loaf.
-
Savory Anadama: Add 1/4 cup of grated cheddar cheese and 1 tablespoon of chopped fresh rosemary to the dough for a savory twist.
-
Gluten-Free Anadama: Substitute the bread flour with a gluten-free bread flour blend. You may need to adjust the amount of liquid depending on the blend you use.
FAQs (Frequently Asked Questions)
Q: Can I make this bread without a bread machine?
A: Yes, you can adapt this recipe for a conventional oven. After the first rise, shape the dough, let it rise again, and bake at 375°F (190°C) for about 30-35 minutes, or until golden brown.
Q: Why is my Anadama bread so dense?
A: This can be due to several factors, including using old yeast, not measuring ingredients accurately, or not kneading the dough enough. Make sure your yeast is fresh, use accurate measuring cups and spoons, and ensure your bread machine kneads the dough properly.
Q: Can I use quick-rise yeast instead of active dry yeast?
A: Yes, you can use quick-rise yeast. However, follow your bread machine’s instructions for using quick-rise yeast, as the order of adding ingredients may differ.
Q: How do I know when the bread is fully baked?
A: The bread is fully baked when it sounds hollow when tapped on the bottom. You can also use a thermometer to check the internal temperature, which should be around 200-210°F (93-99°C).
Q: Can I add other grains to this bread?
A: Absolutely! Try substituting up to 1 cup of the bread flour with whole wheat flour or rye flour for a heartier flavor and texture.
Final Thoughts
This Anadama bread recipe, adapted for the ease of a bread machine, is more than just a recipe; it’s an invitation to create a taste of tradition in your own kitchen. Don’t be afraid to experiment with variations, adjusting the sweetness or adding your favorite spices. Most importantly, enjoy the process and the comforting aroma that fills your home as this bread bakes. Share your creations and feedback, and consider pairing it with a creamy tomato soup for a truly satisfying meal. Happy baking!