
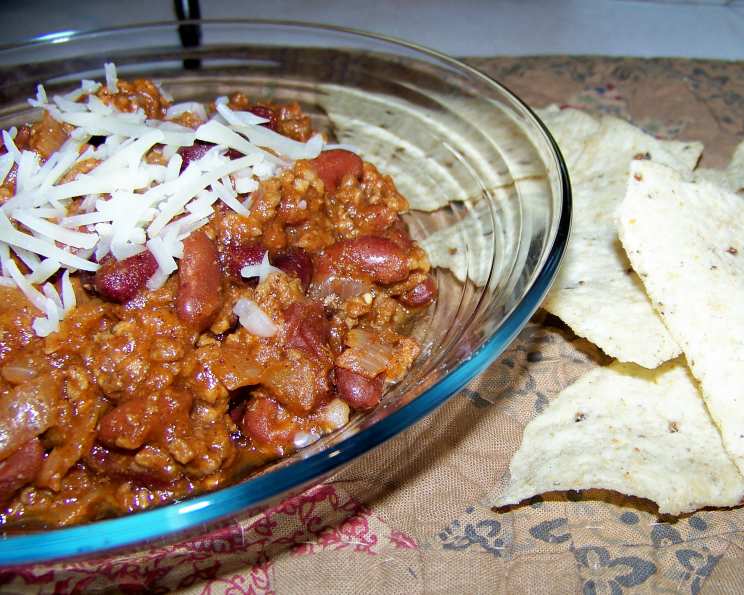
Mimi’s Chili: A Heartwarming Bowl of Comfort
My earliest memory of chili isn’t from a restaurant or a fancy cookbook, but from a care package arriving from home during a particularly harsh winter in college. The scent alone, a heady mix of spices and simmering goodness, was enough to transport me back to my mother’s kitchen. It was more than just a meal; it was a hug in a bowl, a reminder of warmth and love from miles away. Years later, when my best friend was going through a tough time, I knew exactly what to make – a big batch of Mimi’s Chili. Its robust flavor and comforting warmth have a way of making everything feel just a little bit better.
Recipe Overview
- Prep Time: 30 minutes
- Cook Time: 2 hours 40 minutes
- Total Time: 3 hours 10 minutes
- Servings: 8
- Yield: About 8 cups
- Dietary Type: Can be Gluten-Free (check labels)
Ingredients
BEAN MIXTURE
- 1/2 cup dry pinto beans
- 1/2 cup dried kidney beans
- 2 tablespoons dried onion flakes
- 1/2 teaspoon instant minced garlic
- 2 cups onions (chopped fine)
HAMBURG MIXTURE
- 2 lbs hamburger (ground beef)
- 1 (14 ounce) bottle catsup (ketchup)
- 1 tablespoon Worcestershire sauce
- 2 (8 ounce) cans tomato sauce
SPICE MIXTURE
- 1 1/2 teaspoons paprika
- 1 teaspoon cumin
- 5 teaspoons chili powder
- 1/2 teaspoon instant minced garlic
- 1/2 teaspoon turmeric
- 1/2 teaspoon black pepper
- 1/8 teaspoon red pepper flakes
- 1 teaspoon salt
Equipment Needed
- Large pot or Dutch oven
- Large skillet
- Colander
- Crock-Pot (optional)
Instructions
-
Begin by preparing the beans. Wash the dry pinto beans and dried kidney beans thoroughly. Place them in a large pot or Dutch oven.
-
Add the dried onion flakes and instant minced garlic to the pot with the beans.
-
Cover the beans with cold water, ensuring they are fully submerged.
-
Bring the water to a boil over high heat with the lid on. Once boiling, continue for 10 minutes.
-
After 10 minutes, turn off the heat and let the beans sit in the hot water, covered, for 1 hour. This allows the beans to begin softening and rehydrating.
-
After soaking, drain the beans in a colander, but do not rinse them.
-
Return the drained beans to the pot and cover them with fresh water.
-
Simmer the beans over low heat for 60-90 minutes, or until they are tender. Check them periodically and add more water if necessary to keep them submerged.
-
Once the beans are tender, drain them well and set aside.
-
While the beans are simmering, prepare the hamburg mixture. In a large skillet, sauté the chopped onions over medium heat until they are softened and translucent, about 5-7 minutes.
-
Add the hamburger (ground beef) to the skillet with the sautéed onions. Cook, breaking up the meat with a spoon, until the hamburger is fully cooked and no longer pink. Drain off any excess grease.
-
Once the hamburger is cooked, add the catsup (ketchup), Worcestershire sauce, and tomato sauce to the skillet. Stir well to combine.
-
In a small bowl, combine all the spice mixture ingredients: paprika, cumin, chili powder, instant minced garlic, turmeric, black pepper, red pepper flakes, and salt. Mix well to ensure even distribution of the spices.
-
Add the spice mixture to the hamburg mixture in the skillet. Stir to incorporate the spices thoroughly.
-
Simmer the mixture for 10-15 minutes, stirring occasionally, allowing the flavors to meld together.
-
Add the cooked and drained beans to the hamburg mixture in the skillet. Stir well to combine.
-
At this point, you have several options for finishing the chili:
- Crock-Pot Method: Transfer the chili to a crock-pot. Cook on high for 1-2 hours, then reduce the heat to low and cook for 4-6 hours, stirring occasionally.
- Stovetop Method: Reduce the heat to the lowest setting on your stove and simmer the chili for 2-3 hours, stirring occasionally.
-
Throughout the simmering process, watch the chili carefully to ensure it does not get dry. Add a little water if needed to maintain the desired consistency.
Expert Tips & Tricks
- Spice It Up (or Down): Adjust the amount of red pepper flakes to control the heat level of the chili. For a milder chili, omit the red pepper flakes altogether. For extra heat, add a pinch of cayenne pepper.
- Bean Variation: Feel free to experiment with different types of beans. Black beans, great northern beans, or even a mix of several types can add unique flavors and textures.
- Make Ahead: This chili is a fantastic make-ahead dish. The flavors actually improve as it sits, making it perfect for meal prepping.
- Thickening the Chili: If you prefer a thicker chili, you can mix a tablespoon of cornstarch with a tablespoon of cold water and stir it into the chili during the last 30 minutes of simmering.
- Freezing: To freeze the chili, let it cool completely, then transfer it to freezer-safe containers or bags. Be sure to leave some headspace in the containers, as the chili will expand slightly when frozen.
- To add some sweetness try adding a diced bell pepper (red or yellow).
Serving & Storage Suggestions
Mimi’s Chili is delicious served hot with a variety of toppings. Consider offering shredded cheddar cheese, sour cream, chopped green onions, diced avocado, or a dollop of plain yogurt. A side of cornbread or tortilla chips complements the chili perfectly.
To store leftovers, let the chili cool completely, then transfer it to an airtight container and refrigerate. It will keep in the refrigerator for up to 3-4 days.
To reheat, simply warm the chili in a saucepan over medium heat, stirring occasionally, or microwave in a microwave-safe bowl until heated through.
Frozen chili can be thawed overnight in the refrigerator or quickly thawed in the microwave using the defrost setting. Reheat as described above. Frozen chili will keep for up to 2-3 months.
Nutritional Information
Note: Nutritional information is an estimate and can vary based on specific ingredients and portion sizes.
| Nutrient | Amount per Serving | % Daily Value |
|---|---|---|
| Calories | 410 kcal | 21% |
| Total Fat | 18g | 28% |
| Saturated Fat | 7g | 35% |
| Cholesterol | 80mg | 27% |
| Sodium | 1350mg | 56% |
| Total Carbohydrate | 30g | 10% |
| Dietary Fiber | 5g | 20% |
| Sugars | 18g | – |
| Protein | 30g | 60% |
Variations & Substitutions
- Vegetarian Chili: Substitute the hamburger with plant-based ground meat or extra beans for a hearty vegetarian option.
- Chicken Chili: Replace the hamburger with shredded cooked chicken or ground chicken for a lighter version.
- Spicy Chorizo Chili: Add cooked and crumbled chorizo sausage for a smoky and spicy twist. Adjust the amount of red pepper flakes accordingly.
- Sweet Potato Chili: Add diced sweet potato for a touch of sweetness and added nutrients.
- White Bean Chili: Replace the kidney beans and pinto beans with great northern beans or cannellini beans for a different flavor profile.
- Gluten-Free Chili: Ensure all ingredients, especially the Worcestershire sauce, are certified gluten-free.
FAQs (Frequently Asked Questions)
Q: Can I use canned beans instead of dried beans?
A: Yes, you can substitute about 3-4 cans (15 oz each) of kidney beans and/or pinto beans for the dried beans. Be sure to drain and rinse them before adding them to the chili.
Q: How can I make the chili spicier?
A: Increase the amount of chili powder or red pepper flakes. You can also add a pinch of cayenne pepper or a few drops of hot sauce.
Q: Can I freeze the chili?
A: Absolutely! Chili freezes very well. Allow it to cool completely, then transfer it to freezer-safe containers or bags.
Q: How long does the chili last in the refrigerator?
A: Properly stored chili will last for 3-4 days in the refrigerator.
Q: Can I add vegetables to the chili?
A: Yes, you can add diced bell peppers, corn, zucchini, or any other vegetables you like. Add them during the last hour of cooking.
Final Thoughts
Mimi’s Chili is more than just a recipe; it’s a tradition, a comforting reminder of home, and a versatile dish that can be adapted to suit any taste. Whether you’re serving it at a casual gathering or enjoying a cozy night in, this chili is sure to warm you from the inside out. I hope you’ll give it a try and share it with the people you love. Don’t be afraid to experiment with the ingredients and make it your own. And please, let me know what you think! I’d love to hear about your experience and any variations you come up with. This chili pairs perfectly with a cold beer or a glass of red wine. Enjoy!