
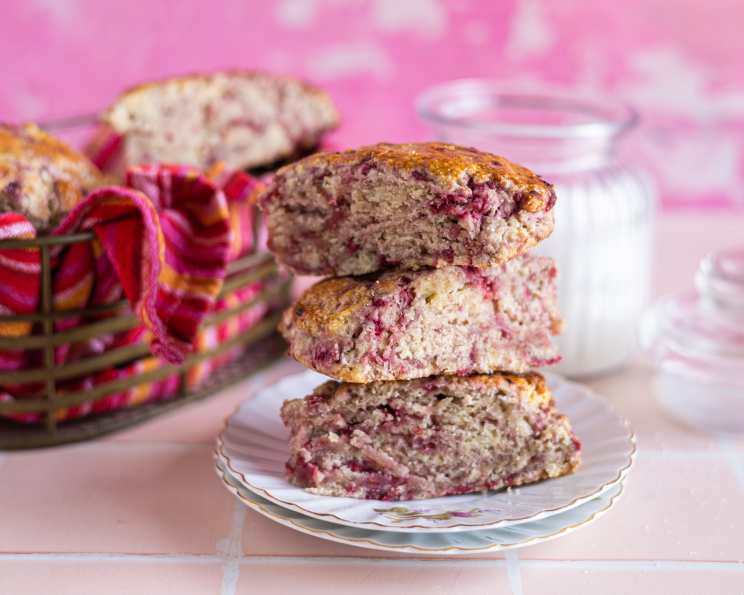
Mimi’s Raspberry Scones: A Taste of Summer Sunshine
The scent of freshly baked scones always transports me back to my grandmother Mimi’s cozy kitchen. I can almost see her now, flour dusting her apron as she hummed a gentle tune, her hands deftly working the dough. These raspberry scones, bursting with sweet-tart berries, were a particular favorite, especially during the summer months when the bushes in her garden were overflowing. They weren’t just a treat; they were a symbol of love, warmth, and the simple joy of sharing good food with family. Each bite is a reminder of those cherished moments, a little piece of Mimi’s magic I’m thrilled to share with you.
Recipe Overview
- Prep Time: 20 minutes
- Cook Time: 20 minutes
- Total Time: 40 minutes
- Servings: 8
- Dietary Type: Vegetarian
Ingredients
Scones
- 2 cups flour
- 1/4 cup sugar
- 2 teaspoons baking powder
- 1/8 teaspoon salt
- 6 tablespoons chilled butter, cut into pieces
- 1 large egg, lightly beaten
- 1 teaspoon vanilla
- 1/2 cup cream, plus 2 tablespoons cream
Berries
- 1 cup raspberries
Egg Wash for Tops
- 1 large egg, slightly beaten
- 1 tablespoon cream
Equipment Needed
- Large bowl
- Small bowl
- Pastry blender (or two knives)
- Lightly floured surface
- Baking sheet
- Optional: Second baking sheet for preventing browning
Instructions
-
Preheat your oven to 400-425 degrees Fahrenheit (200-220 degrees Celsius). Position an oven rack in the middle of the oven. If you are concerned about the bottoms browning too quickly, place one baking sheet on top of another.
-
In a large bowl, whisk together the flour, sugar, baking powder, and salt. Ensure all ingredients are evenly distributed for a consistent rise.
-
Using a pastry blender (or two knives if you don’t have one), cut the chilled butter into the dry ingredients. Work quickly, keeping the butter cold, until the mixture resembles coarse crumbs. This step is crucial for creating those flaky layers in the scones.
-
Gently fold the raspberries into the flour mixture. Be careful not to crush the berries, as this can cause the color to bleed and make the scones soggy. Even distribution is key.
-
In a small bowl, combine the 1/2 cup of cream, beaten egg, and vanilla; mix well. This wet mixture will bind the dry ingredients together.
-
Add the cream mixture to the flour mixture and stir until just combined; do not overmix. The dough should be slightly shaggy. Overmixing will develop the gluten in the flour, resulting in tough scones.
-
Knead the dough gently on a lightly floured board, being careful of the berries. You want to bring the dough together without working it too much. A few gentle folds should suffice.
-
Roll or pat the dough into a circle that is about 7 inches round and about 1 1/2 inches thick. Aim for even thickness to ensure consistent baking.
-
Cut the circle in half and each half into four pie-shaped wedges. You should now have eight scones.
-
Place the scones on a baking sheet. Ensure they have some space between them for even browning.
-
In a small bowl, whisk together the remaining egg and tablespoon of cream.
-
Brush the tops of the scones with the egg wash. This will give them a beautiful golden-brown color and a slight sheen.
-
Bake in the preheated oven on the middle rack for about 20 minutes, or until nicely browned. Keep a close eye on them, as baking times can vary depending on your oven. The scones are done when a toothpick inserted into the center comes out clean.
-
Remove from oven and allow to cool slightly before serving.
Expert Tips & Tricks
- Keep Ingredients Cold: The colder the butter, the flakier the scones. Consider chilling your dry ingredients as well for optimal results.
- Don’t Overmix: Overmixing is the enemy of tender scones. Mix until just combined, and don’t worry if there are a few streaks of flour.
- Freeze for Later: Unbaked scones can be frozen for up to a month. Simply freeze them on a baking sheet until solid, then transfer to a freezer bag. Bake from frozen, adding a few extra minutes to the baking time.
- Use a Biscuit Cutter: For perfectly uniform scones, use a biscuit cutter instead of cutting wedges. Just be sure to gently press straight down and avoid twisting, which can seal the edges and prevent them from rising properly.
- Prevent Browning: As mentioned above, putting one cookie sheet on top of another helps reduce browning on the bottom. You can also try lining your baking sheet with parchment paper.
Serving & Storage Suggestions
Mimi’s raspberry scones are best enjoyed warm, straight from the oven. Serve them with a dollop of whipped cream, a spoonful of your favorite jam, or simply on their own to savor the delicate flavor. Leftover scones can be stored in an airtight container at room temperature for up to 2 days. For longer storage, refrigerate them for up to 4 days, or freeze them for up to 2 months. To reheat, warm them in a low oven (around 300°F/150°C) for a few minutes, or microwave them briefly.
Nutritional Information
| Nutrient | Amount per Serving | % Daily Value |
|---|---|---|
| Calories | 302 kcal | – |
| Calories from Fat | 149 kcal | – |
| Total Fat | 16.6 g | 25% |
| Saturated Fat | 9.9 g | 49% |
| Cholesterol | 92.2 mg | 30% |
| Sodium | 228.8 mg | 9% |
| Total Carbohydrate | 33 g | 10% |
| Dietary Fiber | 1.9 g | 7% |
| Sugars | 7.1 g | – |
| Protein | 5.5 g | 11% |
Variations & Substitutions
- Other Berries: Feel free to substitute other berries for the raspberries. Blueberries, blackberries, or even chopped strawberries would work beautifully.
- Lemon Zest: Add a teaspoon of lemon zest to the dry ingredients for a bright, citrusy twist.
- Gluten-Free: Substitute a gluten-free all-purpose flour blend for the regular flour. You may need to add a little extra liquid to achieve the right consistency.
- Vegan: Replace the butter with a vegan butter substitute, the egg with a flax egg (1 tablespoon ground flaxseed mixed with 3 tablespoons water), and the cream with a plant-based cream or milk.
- Chocolate Chips: Fold in 1/2 cup of chocolate chips for a decadent treat.
FAQs (Frequently Asked Questions)
Q: Can I make the dough ahead of time?
A: Yes, you can prepare the dough, shape the scones, and then refrigerate them for up to 24 hours before baking. Add a few minutes to the baking time.
Q: My scones are dry. What did I do wrong?
A: Overmixing the dough is the most common cause of dry scones. Be sure to mix only until just combined.
Q: Can I use frozen raspberries?
A: Yes, you can use frozen raspberries, but don’t thaw them before adding them to the dough. Gently fold them in while still frozen to prevent them from bleeding too much.
Q: How do I know when the scones are done?
A: The scones are done when they are nicely browned on top and a toothpick inserted into the center comes out clean.
Q: Can I add a glaze to these scones?
A: Absolutely! A simple glaze made with powdered sugar and milk or lemon juice would be a delicious addition.
Final Thoughts
Mimi’s raspberry scones are more than just a recipe; they’re a connection to the past, a taste of home, and a celebration of simple pleasures. I hope you’ll give them a try and experience the joy that these little bites of sunshine can bring. Feel free to experiment with different variations and make them your own. And most importantly, share them with someone you love! Let me know how yours turn out, and what variations you tried – happy baking!