
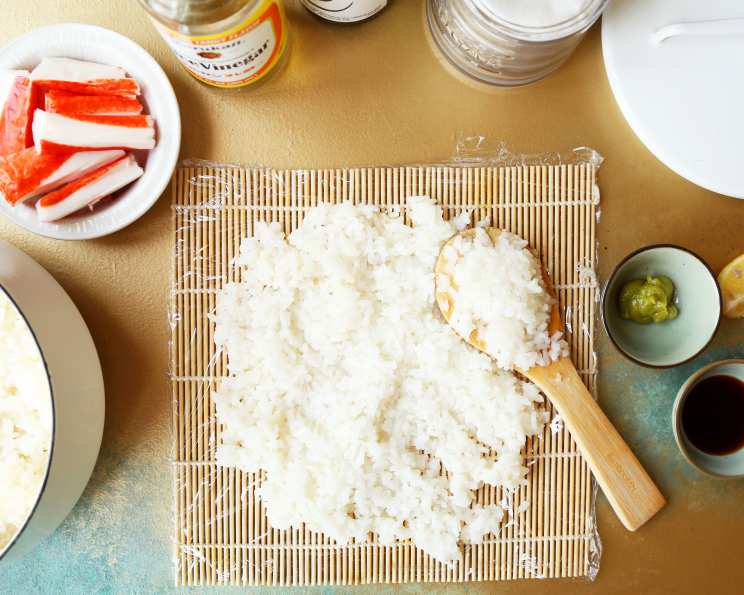
Minado’s Perfect Sushi Rice: A Legacy of Flavor
The first time I tasted truly exceptional sushi rice, it was at a small, unassuming restaurant tucked away in a bustling city. The texture was unlike anything I’d experienced—each grain distinct yet clinging perfectly, a subtle sweetness balanced by a delicate tang. It wasn’t just rice; it was the foundation of every perfect bite, the silent hero that elevated simple fish to a culinary masterpiece. That experience ignited my passion for understanding the art of sushi rice, a quest that led me to explore techniques both ancient and modern, always striving for that same ethereal quality.
Recipe Overview
- Prep Time: 1 hour 30 minutes
- Cook Time: 15 minutes
- Rest Time: 10 minutes
- Total Time: 1 hour 55 minutes
- Yields: 4 cups rice
- Dietary Type: Gluten-Free
Ingredients
- 2 cups sushi rice
- 2 cups water
- 4 tablespoons rice vinegar
- 3 tablespoons sugar
- 2 teaspoons salt
- 2 tablespoons mirin
- 1 piece kelp leaf (optional, approximately 2 inches long)
Equipment Needed
- Fine-mesh strainer
- Medium saucepan with a tight-fitting lid
- Mixing bowl
- Glass dish or hangiri (wooden sushi rice tub)
- Spatula or rice paddle (shamoji)
- Fan (optional, for cooling)
Instructions
-
Rinse the rice: Place the sushi rice in a fine-mesh strainer. Unlike the directions on most packages, rinse the rice only 3-5 times. The water does not need to run completely clear. The goal is to remove excess surface starch without washing away too much flavor.
-
Drain the rice: After rinsing, place the rice in the strainer to drain thoroughly. This step is crucial for achieving the correct moisture content in the cooked rice. In the winter months, allow the rice to drain for 1 hour. In the summer, reduce the draining time to 30 minutes. This adjustment accounts for the differing humidity levels.
-
Prepare the vinegar mixture: While the rice is draining, combine the rice vinegar, sugar, salt, and mirin in a mixing bowl. Whisk well until the sugar and salt are completely dissolved. This mixture, known as sushi-zu, is what gives sushi rice its signature flavor. Set aside.
-
Cook the rice: If using kelp (kombu), lightly wipe it clean with a damp cloth to remove any surface salt. Cut small slits into the kelp to help release its umami flavor into the water. Place the kelp in a medium saucepan with the water.
-
Add the rice: Add the drained rice to the saucepan with the water and kelp.
-
Bring to a boil: Bring the mixture quickly to a boil over medium-high heat. Once boiling, immediately reduce the heat to a very low simmer.
-
Simmer and cover: Cover the pot tightly with a lid. It is absolutely crucial that you do not lift the lid or disturb the rice during the cooking process.
-
Cook time: Cook the rice for exactly 15 minutes.
-
Rest the rice: After 15 minutes, remove the pot from the heat. However, do not remove the lid. Allow the rice to rest, undisturbed, for 10 minutes. This resting period allows the steam to redistribute evenly throughout the rice, ensuring a consistent texture.
-
Cool and season: After resting, remove the lid. Transfer the rice to a glass dish or a hangiri (wooden sushi rice tub). Gently loosen the rice with a spatula or rice paddle.
-
Incorporate the vinegar mixture: While lightly fanning the rice (this helps to cool it quickly and evenly), gradually add the vinegar mixture. Use a gentle cutting motion with the spatula to mix the vinegar into the rice, being careful not to crush or break the grains. The goal is to coat each grain evenly with the sushi-zu.
-
Serve: Ideally, sushi rice is best used when it is at body temperature.
Expert Tips & Tricks
- Rice Quality Matters: The quality of your sushi rice directly impacts the final result. Opt for short-grain Japanese rice specifically labeled “sushi rice” for the best texture and flavor.
- Temperature Control: Precise temperature control is essential. A rapid boil followed by a gentle simmer ensures even cooking.
- Hangiri Advantage: If you have access to a hangiri, the wooden tub helps to absorb excess moisture, resulting in perfectly textured rice. If using a glass bowl, be mindful not to overmix.
- Don’t Overwash: Over-rinsing the rice can remove too much starch, leading to a drier, less cohesive texture. Follow the recommended rinsing instructions carefully.
- Fan with Purpose: Fanning the rice not only cools it but also helps to evaporate excess moisture and allows the vinegar to penetrate evenly.
- Adjust Seasoning: Taste the rice after adding the vinegar mixture and adjust the seasoning to your preference. Some prefer a slightly sweeter or more tangy flavor.
Serving & Storage Suggestions
Serve the sushi rice immediately, ideally at body temperature, for optimal flavor and texture. It’s the perfect base for nigiri, maki rolls, and chirashi bowls.
Leftover sushi rice can be stored in an airtight container in the refrigerator for up to 2 days. To reheat, gently microwave the rice with a damp paper towel on top to prevent it from drying out. Avoid freezing sushi rice, as it will significantly alter the texture.
Sushi rice is best consumed fresh, as the flavor and texture degrade over time.
Nutritional Information
| Nutrient | Amount per Serving | % Daily Value |
|---|---|---|
| Calories | 382.5 kcal | N/A |
| Calories from Fat | 4 g | 1% |
| Total Fat | 0.5 g | 0% |
| Saturated Fat | 0.1 g | 0% |
| Cholesterol | 0 mg | 0% |
| Sodium | 1218.9 mg | 50% |
| Total Carbohydrate | 85.5 g | 28% |
| Dietary Fiber | 2.6 g | 10% |
| Sugars | 9.6 g | N/A |
| Protein | 6.3 g | 12% |
Note: Nutritional information is an estimate and may vary based on specific ingredients and preparation methods.
Variations & Substitutions
- Brown Sushi Rice: While not traditional, you can adapt this recipe for brown sushi rice. Increase the cooking time to about 45 minutes and adjust the water ratio as needed.
- Maple Syrup: For a more natural sweetness, substitute the sugar in the vinegar mixture with an equal amount of maple syrup.
- Citrus Zest: Add a touch of grated lemon or yuzu zest to the rice while cooling for a bright, aromatic twist.
- Vegetarian Mirin Alternative: If you are strictly vegetarian and unsure about the origins of your mirin, consider omitting it or using a small amount of sake with a pinch of sugar to mimic its flavor.
FAQs (Frequently Asked Questions)
Q: Why is draining the rice so important?
A: Draining the rice after rinsing removes excess surface moisture, which is crucial for achieving the right consistency when cooked. Too much water will result in sticky, mushy rice.
Q: Can I use a rice cooker instead of a saucepan?
A: While a rice cooker can be used, it might not replicate the exact results of this method. If using a rice cooker, follow its instructions but still adhere to the rinsing and draining steps outlined in the recipe.
Q: What is the purpose of the kelp leaf?
A: Kelp (kombu) adds a subtle umami flavor to the rice, enhancing its overall taste. It’s optional, but highly recommended for a more authentic sushi rice experience.
Q: How can I tell if the rice is cooked properly?
A: The rice should be tender and slightly sticky, with each grain retaining its shape. There should be no excess water remaining in the pot after cooking.
Q: Why shouldn’t I lift the lid while the rice is cooking?
A: Lifting the lid releases steam and heat, disrupting the cooking process and potentially leading to unevenly cooked rice. The trapped steam helps to cook the rice evenly.
Final Thoughts
Crafting perfect sushi rice is an art form that requires patience and attention to detail. This recipe, passed down through generations of sushi chefs, provides a solid foundation for achieving that coveted balance of flavor and texture. Don’t be afraid to experiment and adjust the recipe to your personal preferences. The most important thing is to enjoy the process and savor the delicious results. So gather your ingredients, embrace the technique, and embark on your own sushi rice journey. Share your creations and feedback with us – we’d love to see what you come up with!