
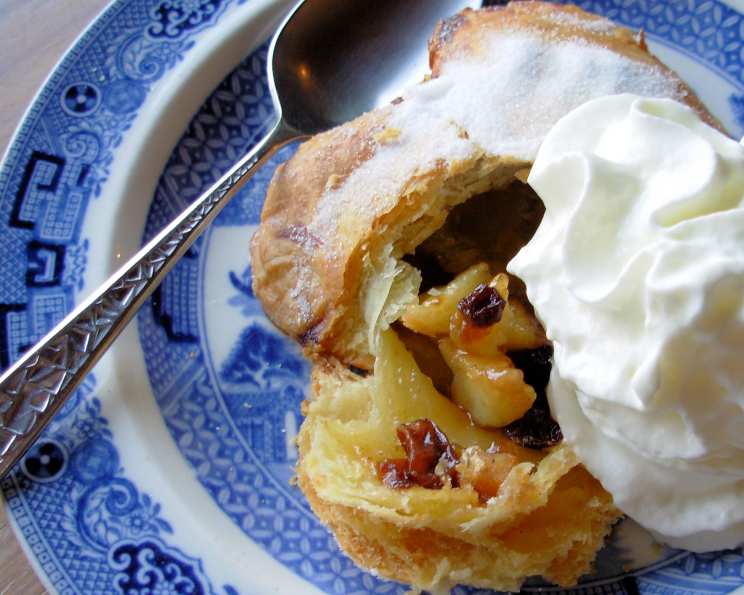
Mincemeat Apple Pie: A Taste of Autumn Tradition
There’s something magical about the scent of a pie baking in the oven, especially when that pie is a Mincemeat Apple Pie. I still remember my grandmother, her hands dusted with flour, carefully layering the crust in her well-worn pie dish. The aroma of spiced apples and rich mincemeat would fill her cozy kitchen, creating a feeling of warmth and anticipation that heralded the beginning of the holiday season. Even now, every time I make this pie, I’m transported back to those cherished moments, surrounded by family and the simple joy of sharing homemade goodness.
Recipe Overview
- Prep Time: 20 minutes
- Cook Time: 45 minutes
- Total Time: 1 hour 5 minutes
- Servings: 8
- Yield: 1 pie
- Dietary Type: Not specified
Ingredients
- 2 unbaked pie crusts
- 2 cups mincemeat
- 2 cups apples, peeled and sliced
Equipment Needed
- 9-inch pie dish
- Pastry brush (optional)
- Baking sheet (optional)
Instructions
-
Prepare the Pie Crust: Either make your favorite double pie crust recipe from scratch or use store-bought crusts. If using store-bought, let the crusts sit at room temperature for about 15 minutes to make them easier to handle.
-
Line the Pie Dish: Gently unroll or place one pie crust into a 9-inch pie dish. Press the crust firmly against the bottom and sides of the dish. Trim any excess crust hanging over the edge. You can crimp the edges for a decorative look or simply press them with a fork.
-
Combine the Filling: In a medium bowl, combine the mincemeat and sliced apples. Gently stir to ensure the apples are evenly coated with the mincemeat. This mixing is where the magic begins, mingling the sweet and spicy flavors that define this classic pie.
-
Fill the Pie: Pour the mincemeat and apple mixture into the pie crust-lined dish, spreading it evenly. The filling should come almost to the top of the crust.
-
Top with the Second Crust: Carefully unroll or place the second pie crust over the filling. Trim any excess crust, leaving about an inch overhang. Crimp the edges of the top and bottom crusts together to seal, creating a decorative border. You can use a fork to press the edges together or create a more elaborate crimped design with your fingers.
-
Vent the Crust: Cut several slits in the top crust using a sharp knife. These slits allow steam to escape during baking, preventing the crust from puffing up and becoming soggy. You can create simple straight lines or more decorative patterns.
-
(Optional) Egg Wash: For a golden-brown and glossy crust, brush the top of the pie with a beaten egg or milk before baking. This step is optional but adds a beautiful finish.
-
Bake the Pie: Preheat your oven to 450°F (232°C). Place the pie in the preheated oven and bake for 15 minutes. This initial high heat helps to set the crust quickly and prevent it from becoming soggy.
-
Reduce Heat and Continue Baking: After 15 minutes, reduce the oven temperature to 350°F (175°C) and continue baking for another 30 minutes, or until the crust is golden brown and the filling is bubbling. Keep a close eye on the pie during the last 15 minutes of baking to prevent the crust from burning. If the edges start to brown too quickly, you can cover them with strips of aluminum foil.
-
Cool Completely: Once the pie is done, remove it from the oven and let it cool completely on a wire rack before slicing and serving. This cooling period is crucial for the filling to set properly.
Expert Tips & Tricks
- Preventing a Soggy Bottom Crust: To avoid a soggy bottom crust, you can blind-bake the bottom crust before adding the filling. To blind-bake, line the crust with parchment paper, fill with pie weights or dried beans, and bake at 375°F (190°C) for 15 minutes. Remove the weights and parchment paper, and bake for another 5 minutes, or until the crust is lightly golden.
- Adding Extra Flavor: For an extra layer of flavor, consider adding a tablespoon of butter or a splash of brandy to the mincemeat and apple mixture before filling the pie.
- Freezing for Later: Mincemeat Apple Pie can be assembled and frozen before baking. Wrap the unbaked pie tightly in plastic wrap and then in aluminum foil. When ready to bake, thaw the pie in the refrigerator overnight and bake as directed. You might need to add a few extra minutes to the baking time.
Serving & Storage Suggestions
Mincemeat Apple Pie is delicious served warm or at room temperature. A dollop of whipped cream, a scoop of vanilla ice cream, or a drizzle of caramel sauce makes a perfect accompaniment.
To store leftover pie, cover it loosely with plastic wrap or store it in an airtight container. It will keep at room temperature for up to 2 days, in the refrigerator for up to 5 days, or in the freezer for up to 2 months. To reheat, bake in a preheated oven at 350°F (175°C) for 10-15 minutes, or until warmed through. Individual slices can be reheated in the microwave.
Nutritional Information
| Nutrient | Amount per Serving | % Daily Value |
|---|---|---|
| Calories | 466.1 kcal | N/A |
| Calories from Fat | N/A | 29% |
| Total Fat | 15.1 g | 23% |
| Saturated Fat | 3.7 g | 18% |
| Cholesterol | 0 mg | 0% |
| Sodium | 259.7 mg | 10% |
| Total Carbohydrate | 79.9 g | 26% |
| Dietary Fiber | 3.3 g | 13% |
| Sugars | 42.1 g | 168% |
| Protein | 3.1 g | 6% |
Note: Nutritional information is an estimate and may vary depending on specific ingredients and preparation methods.
Variations & Substitutions
- Gluten-Free: Use a gluten-free pie crust recipe or a store-bought gluten-free crust.
- Vegan: Ensure the mincemeat is vegan-friendly (some contain suet). Use a vegan pie crust recipe or a store-bought vegan crust.
- Different Apples: Experiment with different apple varieties, such as Granny Smith, Honeycrisp, or Braeburn, for varying levels of tartness and sweetness.
- Nutty Crust: Add chopped nuts, such as pecans or walnuts, to the pie crust dough for a nutty flavor and texture.
FAQs (Frequently Asked Questions)
Q: Can I use homemade mincemeat for this pie?
A: Absolutely! Homemade mincemeat will add a personal touch and often has a richer, more complex flavor than store-bought versions. Just ensure it’s cooled before filling the pie.
Q: Can I prepare the pie ahead of time?
A: Yes, you can assemble the pie a day in advance and store it in the refrigerator until ready to bake. Add a few minutes to the baking time.
Q: My crust is browning too quickly. What should I do?
A: If the crust starts to brown too quickly, cover the edges with strips of aluminum foil to prevent burning.
Q: Can I use a different type of fruit in this pie?
A: While it’s a Mincemeat Apple Pie, you can experiment with other fruits like pears or cranberries for a slightly different flavor profile.
Q: How do I know when the pie is done?
A: The pie is done when the crust is golden brown and the filling is bubbling. A knife inserted into the center of the filling should come out relatively clean (some juice is okay).
Final Thoughts
Mincemeat Apple Pie is more than just a dessert; it’s a celebration of tradition, flavor, and the joy of sharing. Don’t be intimidated by the idea of making a pie from scratch – it’s a rewarding experience that will fill your home with warmth and delicious aromas. Give this recipe a try, and let the comforting flavors of mincemeat and apples transport you to cherished memories and cozy autumn evenings. Feel free to adapt the recipe to your liking, and be sure to share your creations and feedback with me. After all, the best recipes are those that are shared and enjoyed with loved ones!