
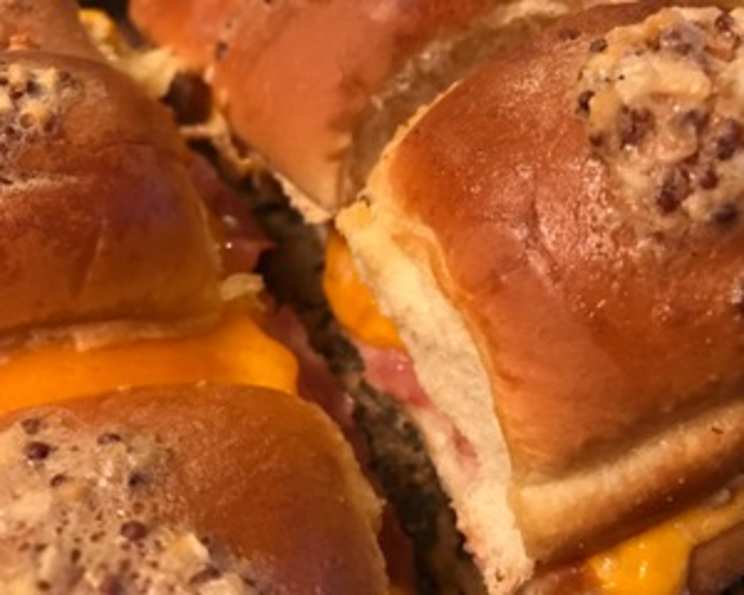
Mini Baked Ham (And Cheese) Sandwiches: A Crowd-Pleasing Classic
The aroma of these mini baked ham and cheese sandwiches instantly transports me back to family gatherings. I can almost see my Aunt Carol, her apron dusted with flour, pulling a pan of these golden-brown beauties from the oven. The combination of the sweet Hawaiian rolls, savory ham and cheese, and that irresistible buttery glaze was always a highlight, eagerly devoured by kids and adults alike. Every bite was a comforting explosion of flavors, a reminder of shared laughter and the simple joys of good food.
Recipe Overview
- Prep Time: 15 minutes
- Cook Time: 15-20 minutes
- Total Time: 30-35 minutes
- Servings: 12
- Yield: 12 sandwiches
- Dietary Type: Not specified
Ingredients
- 1 lb deli ham (shaved or thinly sliced)
- 1 lb Swiss cheese (thinly sliced)
- ½ cup (1 stick) butter
- 1 ½ tablespoons Dijon mustard (or gourmet deli mustard)
- 1 ½ teaspoons Worcestershire sauce
- 1 ½ teaspoons minced onions, dried
- 1 package King’s Hawaiian Original Hawaiian Sweet Dinner Rolls (12 pack)
Equipment Needed
- 9×13 inch baking pan
- Small saucepan or microwave-safe bowl
- Whisk or fork
- Knife
Instructions
- Preheat your oven to 350 degrees Fahrenheit (175 degrees Celsius).
- In a small saucepan or microwave-safe bowl, melt the butter. Be careful not to burn it.
- Remove the melted butter from the heat and mix in the Dijon mustard, Worcestershire sauce, and dried minced onions. Whisk or stir well to combine thoroughly. This mixture will create a flavorful glaze for the sandwiches.
- Using a long, serrated knife, carefully cut the entire pack of Hawaiian sweet rolls in half horizontally, keeping all the top halves together and all the bottom halves together. This creates a single “slab” of tops and a single “slab” of bottoms.
- Place the bottom half of the rolls in a 9×13 inch baking pan. Ensure the bottom halves cover the entire pan surface.
- Layer the deli ham evenly over the bottom half of the rolls. Make sure to distribute the ham so each roll gets a good portion.
- Next, layer the Swiss cheese evenly over the ham. Ensure the cheese covers the ham completely, creating a delicious, melty layer.
- Carefully place the top half of the rolls back on top of the ham and cheese. Align the tops so they match the bottoms.
- Slowly drizzle the butter mixture evenly over the top of the rolls, making sure the dried minced onions are distributed across the surface. The butter mixture will soak into the rolls, adding flavor and richness.
- At this point, you have the option to refrigerate the assembled sandwiches overnight for enhanced flavor infusion. Alternatively, you can bake them right away.
- Bake uncovered in the preheated oven for 15-20 minutes, or until the tops of the rolls are golden brown and the cheese is melted and bubbly.
- Once finished, remove the baking pan from the oven and let the sandwiches cool slightly. Then, separate the individual sandwiches along the perforations of the rolls for serving.
Expert Tips & Tricks
- For even more flavor, consider adding a thin layer of your favorite flavored mayonnaise or aioli to the bottom rolls before adding the ham and cheese. A garlic aioli or a spicy mayo can add a unique twist.
- To prevent the bottom rolls from getting soggy, you can lightly toast them in the oven for a few minutes before adding the ham and cheese.
- If you prefer a softer crust, cover the sandwiches with foil during the first half of the baking time, then remove the foil for the last few minutes to allow the tops to brown.
- Don’t be afraid to experiment with different types of cheese. Provolone, Monterey Jack, or even a pepper jack would all be delicious.
- If you are short on time, use pre-shredded cheese to save on prep time.
- For a more elegant presentation, use a pizza cutter to slice the baked sandwiches into smaller squares or rectangles, making them perfect for appetizers or party snacks.
Serving & Storage Suggestions
These mini baked ham and cheese sandwiches are best served warm, right after they come out of the oven. They are perfect for parties, potlucks, game day gatherings, or even a quick weeknight meal.
Leftover sandwiches can be stored in an airtight container in the refrigerator for up to 3 days. To reheat, wrap the sandwiches in foil and bake in a preheated oven at 350 degrees Fahrenheit (175 degrees Celsius) for about 10-15 minutes, or until heated through. Alternatively, you can microwave them for a shorter amount of time, but the rolls may become a bit soggy.
These sandwiches can also be frozen for longer storage. Wrap each sandwich individually in plastic wrap, then place them in a freezer-safe bag or container. They can be frozen for up to 2 months. To reheat, thaw the sandwiches in the refrigerator overnight, then bake as directed above.
Nutritional Information
| Nutrient | Amount per Serving | % Daily Value |
|---|---|---|
| Calories | 275.4 kcal | N/A |
| Calories from Fat | 193 g | 70% |
| Total Fat | 21.5 g | 33% |
| Saturated Fat | 12.7 g | 63% |
| Cholesterol | 76.7 mg | 25% |
| Sodium | 661.8 mg | 27% |
| Total Carbohydrate | 3.8 g | 1% |
| Dietary Fiber | 0.6 g | 2% |
| Sugars | 0.6 g | 2% |
| Protein | 16.6 g | 33% |
Note: Nutritional information is an estimate and can vary based on specific ingredients and preparation methods.
Variations & Substitutions
- Meat Variations: Feel free to substitute the ham with roast beef, turkey, or even salami. For a vegetarian option, consider using marinated and thinly sliced portobello mushrooms or a combination of roasted vegetables.
- Cheese Variations: Cheddar, American, provolone, mozzarella, or Monterey Jack cheese can all be used in place of Swiss.
- Bread Variations: While Hawaiian sweet rolls are the classic choice, you can also use other types of slider buns or even small croissants.
- Spice It Up: Add a pinch of red pepper flakes to the butter mixture for a little heat.
- Garlic Lovers: Add 1/2 teaspoon of garlic powder or 1 clove of minced garlic to the butter mixture.
FAQs (Frequently Asked Questions)
Q: Can I make these ahead of time?
A: Absolutely! Assembling the sandwiches ahead of time and refrigerating them overnight allows the flavors to meld together even more. Just bake them when you’re ready to serve.
Q: Can I use a different type of mustard?
A: Yes, feel free to experiment with different mustards, such as honey mustard, spicy brown mustard, or even a grainy Dijon mustard. The choice is yours!
Q: What if I don’t have dried minced onions?
A: You can substitute with 1 tablespoon of finely chopped fresh onion or onion powder. If using fresh onion, sauté it lightly in the butter before adding the other ingredients.
Q: Can I freeze these after they are baked?
A: Yes, you can freeze them after baking, but the rolls may become slightly softer upon thawing and reheating. For best results, wrap each sandwich individually before freezing.
Q: My rolls are getting too brown on top. What should I do?
A: If the rolls are browning too quickly, you can tent the baking pan with aluminum foil for the last few minutes of baking. This will prevent them from burning while still allowing the cheese to melt.
Final Thoughts
These mini baked ham and cheese sandwiches are a guaranteed crowd-pleaser for any occasion. Their simplicity, combined with the irresistible combination of sweet, savory, and cheesy flavors, makes them a true comfort food classic. Whether you’re hosting a party, packing a picnic, or simply looking for a quick and easy weeknight meal, this recipe is sure to become a family favorite. So go ahead, gather your ingredients, and prepare to enjoy a bite-sized explosion of deliciousness! Don’t hesitate to share your own variations and feedback – I’m always eager to hear how you make this recipe your own. Consider pairing these sandwiches with a crisp green salad or a bowl of creamy tomato soup for a complete and satisfying meal.