
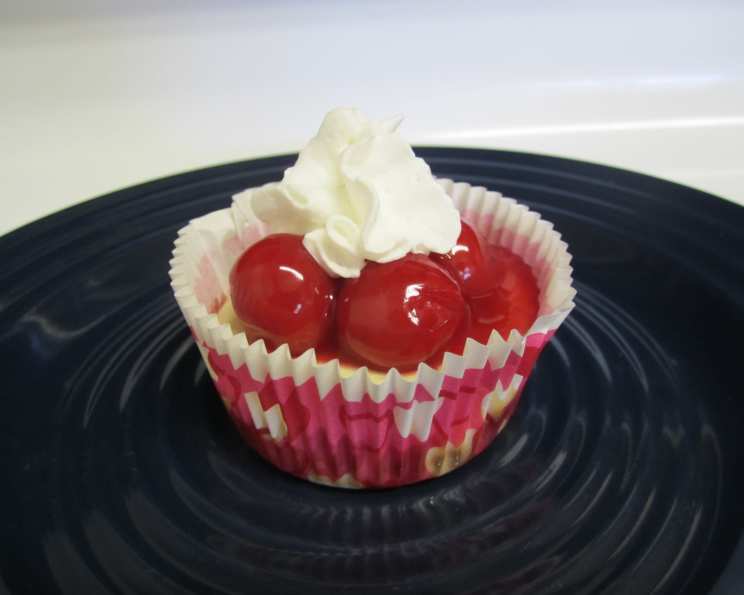
Mini Cherry Cheesecakes with Vanilla Wafer Crusts
The scent of vanilla always takes me back to my grandmother’s kitchen. She wasn’t a fancy baker, but her simple desserts, full of love and good ingredients, were legendary in our family. I remember one summer afternoon, she let me help her make mini cheesecakes for a family gathering. The tiny vanilla wafer crusts, the creamy filling, and the bright red cherry topping – it was pure joy in every bite and a memory I cherish. These Mini Cherry Cheesecakes with Vanilla Wafer Crusts are a tribute to her and those sweet, simple moments.
Recipe Overview
- Prep Time: 20 minutes
- Cook Time: 15-20 minutes
- Total Time: 45 minutes
- Servings: 24
- Yield: 24 mini cheesecakes
- Dietary Type: Not specified
Ingredients
- 2 (8 ounce) packages cream cheese, softened
- ¼ cup sugar
- 2 large eggs
- 1 tablespoon lemon juice
- 2 teaspoons vanilla
- 24 vanilla wafers
- 1 (21 ounce) can cherry pie filling (optional)
Equipment Needed
- Mixer (stand or hand)
- Regular sized muffin pan or cupcake tins
- Paper baking cups
- Measuring cups and spoons
Instructions
-
Preheat your oven to 375 degrees F (190 degrees C). This temperature allows the cheesecakes to bake evenly and prevents cracking.
-
In a large bowl, using your mixer, beat the softened cream cheese until it is smooth and creamy. Make sure your cream cheese is properly softened; otherwise, you’ll end up with lumpy cheesecakes.
-
Gradually add the sugar to the cream cheese and continue beating until the mixture is light and fluffy. Don’t overbeat at this stage, as it can incorporate too much air, which can cause the cheesecakes to deflate after baking.
-
Add the eggs one at a time, beating well after each addition. Beating well after each egg ensures they are fully incorporated into the mixture. Overmixing after adding the eggs can also lead to cracking, so mix just until combined.
-
Stir in the lemon juice and vanilla. These ingredients add brightness and depth of flavor to the cheesecake filling. Ensure everything is mixed well.
-
Line a regular-sized muffin pan or cupcake tins with paper baking cups. The paper liners make removing the cheesecakes much easier and prevent them from sticking to the pan.
-
Place one vanilla wafer in the bottom of each paper-lined cup. These wafers will form the crust of your mini cheesecakes. Ensure they are placed flat for an even base.
-
Carefully fill each cup about 2/3 full with the cream cheese mixture. Avoid overfilling, as the cheesecakes will rise slightly during baking.
-
Bake in the preheated oven for 15 to 20 minutes, or until the cheesecakes are set. The centers should be slightly jiggly but not liquid. Start checking them at 15 minutes to prevent overbaking.
-
Once the cheesecakes are still warm, top each with a tablespoon of cherry pie filling (if desired). The warmth helps the filling adhere to the cheesecake.
-
Chill the cheesecakes in the refrigerator for at least 2 hours before serving. Chilling allows the cheesecakes to set completely and enhances their flavor.
Expert Tips & Tricks
- Preventing Cracks: To avoid cracks on the surface, try baking the cheesecakes in a water bath. Place the muffin tin inside a larger baking pan and add hot water to the larger pan until it reaches about halfway up the sides of the muffin tin. This creates a humid environment in the oven, which helps to prevent cracking.
- Softening Cream Cheese Quickly: If you forget to take out the cream cheese ahead of time, you can soften it quickly by microwaving it in 15-second intervals, checking and flipping it each time, until it is soft enough to beat smoothly.
- Enhancing the Flavor: For a richer, more complex flavor, try adding a pinch of salt to the cream cheese mixture. Salt enhances the sweetness and other flavors in the cheesecake.
- Perfectly Even Baking: Rotate the muffin tin halfway through the baking time to ensure that the cheesecakes bake evenly.
- Cookie Crumb Crust: If you don’t have vanilla wafers, you can use crushed graham crackers or other cookies mixed with melted butter for the crust.
- Lemon Zest: Adding a teaspoon of lemon zest to the cream cheese mixture enhances the lemon flavor and adds a lovely aroma.
Serving & Storage Suggestions
These Mini Cherry Cheesecakes are best served chilled. Arrange them on a platter for an elegant presentation or serve them individually in dessert cups.
Store leftover cheesecakes in an airtight container in the refrigerator for up to 3-4 days. They can also be frozen for up to 2 months. To freeze, place the cheesecakes on a baking sheet lined with parchment paper and freeze until solid. Then, transfer them to a freezer-safe container or bag. Thaw them in the refrigerator before serving.
They can sit at room temperature for no more than two hours, especially if they have a dairy filling.
Nutritional Information
| Nutrient | Amount per Serving | % Daily Value |
|---|---|---|
| Calories | 108.3 kcal | N/A |
| Calories from Fat | 72g | 67% |
| Total Fat | 8 g | 12% |
| Saturated Fat | 4.1 g | 20% |
| Cholesterol | 36.3 mg | 12% |
| Sodium | 85.1 mg | 3% |
| Total Carbohydrate | 7.2 g | 2% |
| Dietary Fiber | 0.1 g | 0% |
| Sugars | 2.8 g | 11% |
| Protein | 1.9 g | 3% |
Variations & Substitutions
- Gluten-Free: Use gluten-free vanilla wafers or make a crust using gluten-free graham crackers.
- Dairy-Free: Substitute the cream cheese with a dairy-free cream cheese alternative.
- Other Fruit Toppings: Instead of cherry pie filling, try using blueberry, strawberry, or raspberry pie filling. Fresh berries are also a delicious option.
- Chocolate Swirl: Swirl melted chocolate into the cream cheese mixture before baking for a chocolate cheesecake.
- Pumpkin Spice: Add pumpkin puree and pumpkin pie spice to the cream cheese mixture for a seasonal twist.
- Key Lime: Substitute the lemon juice with lime juice and add lime zest for a refreshing key lime cheesecake.
FAQs (Frequently Asked Questions)
Q: Can I make these cheesecakes ahead of time?
A: Absolutely! These cheesecakes can be made up to 2-3 days in advance and stored in the refrigerator. In fact, they often taste better after a day or two as the flavors meld together.
Q: My cheesecakes cracked while baking. What did I do wrong?
A: Cracking can occur due to overbaking or rapid temperature changes. Try baking the cheesecakes in a water bath or reducing the oven temperature slightly. Avoid opening the oven door frequently during baking.
Q: Can I use a different type of cookie for the crust?
A: Yes, you can use any type of cookie that you like, such as graham crackers, Oreos, or shortbread cookies. Just make sure to adjust the baking time accordingly.
Q: How do I know when the cheesecakes are done?
A: The cheesecakes are done when the edges are set and the centers are slightly jiggly. They will continue to set as they cool.
Q: Can I freeze these cheesecakes?
A: Yes, these cheesecakes freeze well. Place them on a baking sheet lined with parchment paper and freeze until solid. Then, transfer them to a freezer-safe container or bag. Thaw them in the refrigerator before serving.
Final Thoughts
I hope you enjoy making these Mini Cherry Cheesecakes as much as I do. They’re a simple yet satisfying dessert that’s perfect for any occasion. Don’t be afraid to experiment with different toppings and variations to create your own signature cheesecake. Share your creations and feedback with me – I’d love to hear how they turn out! These cheesecakes pair wonderfully with a cup of coffee or a glass of sweet dessert wine. Happy baking!