
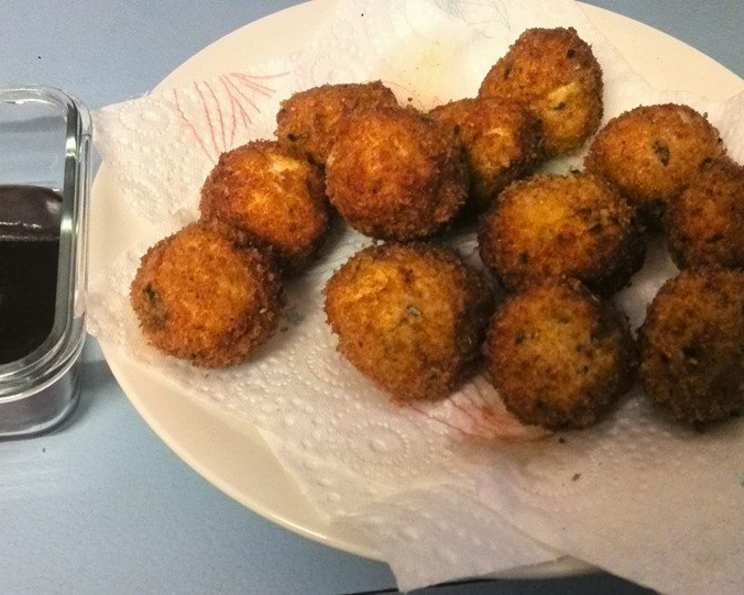
Bite-Sized Bliss: Mastering the Art of Mini Chicken Kiev
My grandmother, a woman whose kitchen was a perpetual haven of warmth and tantalizing aromas, had a knack for making even the simplest dishes feel like a celebration. I remember being a child, perched on a stool, utterly mesmerized as she crafted these delightful Mini Chicken Kievs. The aroma of garlic butter sizzling in the pan, the satisfying golden-brown crust, and the burst of flavor with every bite – it was pure magic. These weren’t just appetizers; they were edible memories, each one whispering stories of family gatherings and shared laughter. Now, I’m thrilled to share her recipe, passed down through generations, so you too can create these delicious morsels and build your own cherished memories.
Recipe Overview
- Prep Time: 20 minutes
- Cook Time: 20 minutes
- Total Time: 40 minutes
- Yields: 8 mini kievs
- Serves: 2-4
- Dietary Type: Not specified (Contains gluten and dairy)
Ingredients
- 200 g ground chicken
- 1 teaspoon garlic powder
- 1 teaspoon onion powder
- 1 teaspoon parsley
- 1/3 cup breadcrumbs
- 1/4 cup flour
- 1/3 cup milk
- 1/2 cup breadcrumbs
- 1 teaspoon parsley
- 100 g garlic butter
- 1/4 cup oil, to fry (vegetable or canola oil recommended)
Equipment Needed
- Mixing bowl
- Small pan for shallow frying
- Oven
- Baking sheet
- Paper towels
Instructions
- In a mixing bowl, combine the ground chicken, garlic powder, onion powder, parsley, and 1/3 cup of breadcrumbs. Mix thoroughly until all ingredients are evenly distributed. This forms the base of your mini Kievs.
- Divide the chicken mixture into eight equal portions. Gently shape each portion into a rough oval ball, approximately 2 inches long, 1 inch wide, and 1 inch thick. These don’t need to be perfect; a rustic shape adds to their charm.
- Using your finger, carefully poke a hole in the center of each chicken oval. This is where the magic happens.
- Take the garlic butter (make sure it’s chilled but pliable) and divide it into eight equal portions. Spoon approximately 1 teaspoon of garlic butter into the hole of each chicken oval.
- Carefully cover up the garlic butter with the surrounding chicken mixture, ensuring that it is completely sealed within the oval. This is crucial to prevent the butter from leaking out during cooking.
- Place the 1/4 cup of flour in a shallow dish. Lightly coat each chicken oval in the flour, shaking off any excess. This will help the milk and breadcrumbs adhere properly.
- In a separate shallow dish, pour the 1/3 cup of milk. In another shallow dish, combine the 1/2 cup of breadcrumbs with 1 teaspoon of parsley.
- Dip each floured chicken oval into the milk, ensuring it’s evenly coated. Then, dredge it in the breadcrumb and parsley mixture, pressing gently to help the breadcrumbs stick.
- For an extra crispy coating, re-dip each oval in the milk again, followed by a second coating of the breadcrumb and parsley mixture. This double-coating is the secret to a truly irresistible crunch.
- In a small pan, heat the 1/4 cup of oil over medium heat. Once the oil is hot, carefully place the mini Kievs in the pan and shallow fry until they are golden brown on all sides. This should take approximately 3-4 minutes per side. Be careful not to overcrowd the pan; fry in batches if necessary.
- While the mini Kievs are frying, preheat your oven to 180°C (350°F).
- Once the mini Kievs are golden brown, transfer them to a baking sheet. Place the baking sheet in the preheated oven for 10 minutes to ensure the chicken is fully cooked through.
- Remove the mini Kievs from the oven and place them on a plate covered with paper towels to remove any excess oil.
- Serve immediately and enjoy the explosion of flavor!
Expert Tips & Tricks
- Chill the garlic butter: Freezing the garlic butter for 15 minutes before filling the chicken helps it stay solid during the initial frying stage. This prevents it from melting too quickly and leaking out.
- Double breading is key: Don’t skip the second dip in milk and breadcrumbs. This creates a thicker, crispier crust that perfectly complements the juicy chicken and garlic butter filling.
- Don’t overcrowd the pan: Overcrowding the pan when frying will lower the oil temperature, resulting in soggy, unevenly cooked Kievs. Fry in batches for best results.
- Use a thermometer: The internal temperature of the chicken should reach 74°C (165°F) to ensure it’s fully cooked. Use a meat thermometer to check the temperature if you’re unsure.
- Make ahead: You can prepare the mini Kievs up to the point of frying and store them in the refrigerator for up to 24 hours. This is a great way to save time when entertaining.
Serving & Storage Suggestions
Serve your Mini Chicken Kievs immediately while they are hot and crispy. They make a fantastic appetizer, a delightful addition to a buffet, or even a fun and flavorful main course served with a side salad or roasted vegetables. For an extra touch of elegance, garnish with a sprig of fresh parsley or a lemon wedge.
Leftover Mini Chicken Kievs can be stored in an airtight container in the refrigerator for up to 3 days. To reheat, bake them in a preheated oven at 180°C (350°F) for 10-15 minutes, or until heated through. You can also reheat them in a microwave, but the crust may not be as crispy. Freezing is not recommended as the texture can change.
Nutritional Information
| Nutrient | Amount per Serving | % Daily Value |
|---|---|---|
| Calories | 630 kcal | N/A |
| Total Fat | 34g | 52% |
| Saturated Fat | 6g | 29% |
| Cholesterol | 76mg | 25% |
| Sodium | 428mg | 17% |
| Total Carbohydrate | 48g | 16% |
| Dietary Fiber | 3g | 10% |
| Sugars | 4g | N/A |
| Protein | 31g | 61% |
Variations & Substitutions
- Spicy Kievs: Add a pinch of red pepper flakes to the breadcrumb mixture for a hint of spice.
- Herbaceous Kievs: Experiment with different herbs in the breadcrumb mixture, such as thyme, rosemary, or oregano.
- Gluten-Free Kievs: Use gluten-free breadcrumbs and flour for a gluten-free version.
- Cheese-Filled Kievs: Add a small cube of cheese (such as mozzarella or cheddar) to the garlic butter filling for an extra cheesy surprise.
- Turkey Kievs: Substitute ground turkey for the ground chicken for a leaner option.
FAQs (Frequently Asked Questions)
Q: Can I use regular butter instead of garlic butter?
A: Yes, you can, but the garlic butter adds a significant amount of flavor. If using regular butter, consider adding some minced garlic and parsley to it.
Q: My garlic butter keeps leaking out during frying. What am I doing wrong?
A: Ensure the garlic butter is well chilled and the chicken mixture completely seals it. A double breadcrumb coating also helps prevent leakage.
Q: Can I bake these instead of frying them?
A: While frying gives them the best crispy texture, you can bake them. Bake at 180°C (350°F) for about 20-25 minutes, or until golden brown and cooked through.
Q: How do I know when the chicken is cooked through?
A: The internal temperature of the chicken should reach 74°C (165°F). Use a meat thermometer to check the temperature at the thickest part of the Kiev.
Q: Can I make these ahead of time and freeze them?
A: While freezing is possible, it can affect the texture. It’s best to prepare them up to the point of frying, then refrigerate for up to 24 hours, or bake them fresh.
Final Thoughts
These Mini Chicken Kievs are more than just a recipe; they’re a culinary adventure waiting to happen. Embrace the process, enjoy the aromas that fill your kitchen, and don’t be afraid to experiment with your own creative twists. Whether you’re hosting a party, preparing a family meal, or simply craving a comforting bite, these little morsels are sure to bring joy to your table. So go ahead, gather your ingredients, and let the magic begin! And when you’ve perfected your own version, I’d love to hear about it – share your experiences and any variations you’ve tried!