
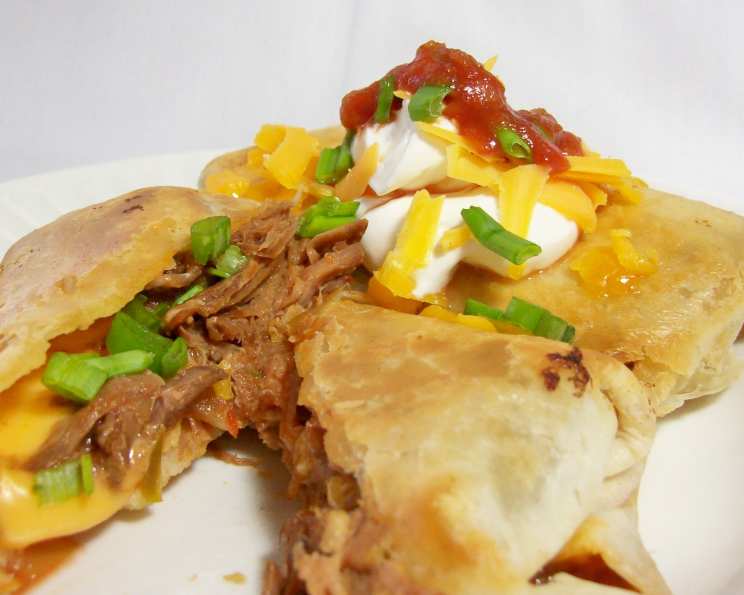
Sizzling Mini Chimichangas: A Fiesta in Every Bite
The aroma of sizzling oil and melting cheese always takes me back to my college days. Late-night study sessions were invariably fueled by impromptu chimichanga feasts, cobbled together with whatever leftovers we could find. These weren’t fancy, gourmet affairs, but they were always delicious – a warm, comforting reminder that even the simplest ingredients can create magic. Now, I’ve refined that rustic recipe into these Mini Chimis. They’re quick, easy, and perfect for a snack, appetizer, or even a light meal. These bite-sized bundles of flavor are sure to become a new favorite!
Recipe Overview
- Prep Time: 10 minutes
- Cook Time: 10 minutes
- Total Time: 20 minutes
- Servings: 4
- Yield: 4 mini chimichangas
- Dietary Type: Varies (see variations)
Ingredients
- ¾ – 1 cup shredded cooked beef
- 4 tablespoons of your favorite salsa
- 6 tablespoons shredded sharp cheddar cheese, divided
- 4 flour tortillas (6 inch)
- ¼ cup vegetable oil
- 4 tablespoons salsa (optional, for serving)
- 4 tablespoons sour cream (optional, for serving)
- 2 tablespoons chopped green onions, divided (optional, for serving)
Equipment Needed
- Microwave
- Skillet
- Measuring cups and spoons
Instructions
-
In a microwave-safe bowl, combine the shredded cooked beef and 4 tablespoons of your favorite salsa. Microwave until heated through. This usually takes about 1-2 minutes, depending on your microwave. Set aside. You want the mixture warm, not scorching hot, for easy handling.
-
Warm the flour tortillas in a dry skillet or microwave. This will make them more pliable and prevent them from tearing when you fold them. A few seconds in the microwave, wrapped in a damp paper towel, does the trick.
-
Divide the warmed roast beef and salsa mixture into four equal portions. Place each portion slightly off-center onto a flour tortilla. This allows for easier folding.
-
Top each portion of the roast beef/salsa mixture with 1 ½ tablespoons of shredded cheddar cheese. Don’t overfill the tortillas, or they will be difficult to close.
-
Fold each tortilla around the filling, tucking in the sides to prevent the filling from spilling out during cooking. You want to create a tightly sealed packet. Think of it as wrapping a small burrito. Ensure that none of the filling escapes from either end. This step is crucial to prevent the chimichangas from falling apart in the skillet.
-
In a skillet, heat the vegetable oil over medium heat. The oil is ready when it shimmers slightly and a drop of water flicked into the pan sizzles. Be careful not to overheat the oil, as this can cause the chimichangas to burn quickly.
-
Carefully place the folded tortillas (seam-side down first) into the hot oil. Cook on all sides until golden brown and crispy. This should take about 2-3 minutes per side. Monitor the heat and adjust as needed to prevent burning. The goal is a golden-brown, crispy exterior with a warm, melted cheese interior.
-
Remove the mini chimichangas from the skillet and place them on a paper towel-lined plate to drain excess oil.
-
If desired, serve immediately with optional toppings: salsa, sour cream, and chopped green onions.
Expert Tips & Tricks
- Crispy Perfection: For extra crispy chimichangas, brush the outside of the tortillas with a little melted butter or oil before frying.
- Cheese Matters: Use freshly shredded cheese for the best melting and flavor. Pre-shredded cheese often contains cellulose, which can prevent it from melting smoothly.
- Make Ahead: The filling can be prepared a day in advance and stored in the refrigerator. This allows the flavors to meld together and saves time on the day of serving.
- Preventing Leaks: Tightly folding the tortillas is key to preventing leaks. If you find that the tortillas are cracking, lightly moisten the edges with water before folding to help them seal.
- Oven-Baked Option: For a healthier alternative, bake the chimichangas in a preheated oven at 375°F (190°C) for 10-15 minutes, or until golden brown and crispy. Brush with oil before baking.
Serving & Storage Suggestions
Serve these Mini Chimis immediately while they are hot and crispy. Offer a variety of toppings, such as salsa, sour cream, guacamole, and pico de gallo, to allow guests to customize their own.
Leftover chimichangas can be stored in an airtight container in the refrigerator for up to 3 days. To reheat, bake in a preheated oven at 350°F (175°C) for 10-15 minutes, or until heated through and crispy. Microwaving is not recommended as it can make the tortillas soggy. You can also reheat them in a skillet with a little oil.
For longer storage, chimichangas can be frozen. Wrap each chimichanga individually in plastic wrap, then place them in a freezer-safe bag or container. They can be stored in the freezer for up to 2 months. To reheat from frozen, bake in a preheated oven at 375°F (190°C) for 20-25 minutes, or until heated through and crispy.
Nutritional Information
| Nutrient | Amount per Serving | % Daily Value |
|---|---|---|
| Calories | 309 kcal | 15% |
| Total Fat | 18g | 28% |
| Saturated Fat | 7g | 35% |
| Cholesterol | 30mg | 10% |
| Sodium | 520mg | 22% |
| Total Carbohydrate | 23g | 8% |
| Dietary Fiber | 2g | 8% |
| Sugars | 2g | – |
| Protein | 13g | 26% |
Note: Nutritional information is an estimate and may vary based on specific ingredients and cooking methods.
Variations & Substitutions
- Vegetarian Chimis: Substitute the shredded beef with seasoned black beans, refried beans, or a mixture of vegetables like corn, peppers, and onions.
- Spicy Chimis: Add a pinch of cayenne pepper or a dash of hot sauce to the beef and salsa mixture. You can also use a spicier salsa.
- Chicken Chimis: Use shredded cooked chicken instead of beef. Consider adding some taco seasoning for extra flavor.
- Cheese Variations: Experiment with different types of cheese, such as Monterey Jack, pepper jack, or a Mexican cheese blend.
- Gluten-Free Chimis: Use gluten-free flour tortillas to make this recipe gluten-free.
- Vegan Chimis: Use vegan cheese, substitute the beef with plant-based crumbles, and top with vegan sour cream and salsa.
- Sweet Chimis: For a dessert version, fill the tortillas with apple pie filling and cinnamon sugar. Fry as directed and serve with a scoop of vanilla ice cream.
FAQs (Frequently Asked Questions)
Q: Can I use larger tortillas for this recipe?
A: Yes, you can use larger tortillas, but you will need to adjust the amount of filling accordingly. You may also need to increase the cooking time slightly.
Q: How can I prevent the tortillas from tearing when folding?
A: Warming the tortillas before folding makes them more pliable and less likely to tear. You can also lightly moisten the edges with water to help them seal.
Q: Can I freeze these chimichangas after cooking?
A: Yes, you can freeze cooked chimichangas. Allow them to cool completely, then wrap them individually in plastic wrap and place them in a freezer-safe bag or container.
Q: What’s the best way to reheat these chimichangas?
A: The best way to reheat them is in the oven at 350°F (175°C) for 10-15 minutes, or until heated through and crispy.
Q: Can I make these in an air fryer?
A: Yes! Preheat your air fryer to 375°F (190°C). Lightly brush the chimichangas with oil and cook for 8-10 minutes, flipping halfway through, until golden brown and crispy.
Final Thoughts
These Mini Chimichangas are a delightful and versatile dish that’s perfect for any occasion. From quick weeknight dinners to fun appetizers for a party, they’re sure to be a hit. Don’t be afraid to experiment with different fillings and toppings to create your own signature version. So, gather your ingredients, get cooking, and share the deliciousness with your friends and family! These pair exceptionally well with a refreshing margarita or a crisp Mexican beer. I encourage you to try this recipe and let me know what you think – happy cooking!