
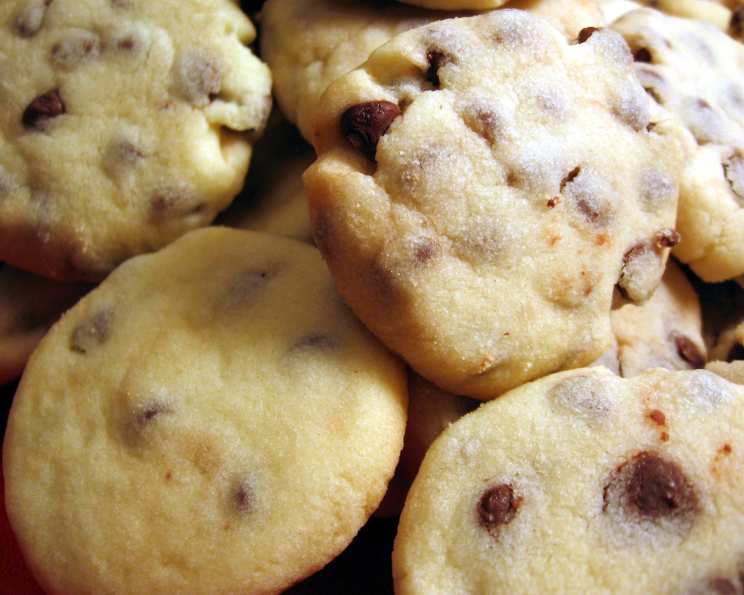
Mini Chip Butter Cookies (Eggless)
The scent of baking cookies has always been a portal back to my childhood, specifically to my grandmother’s cozy kitchen. I remember standing on a rickety stool, mesmerized as she effortlessly mixed ingredients, her hands moving with a practiced grace. While her cookies were legendary, these mini chip butter cookies remind me of the sheer joy of baking because you can make them easily with kids. There’s something so satisfying about forming those tiny balls of dough, knowing that in just a few minutes, they’ll transform into golden, melt-in-your-mouth treats.
Recipe Overview
- Prep Time: 15 minutes
- Cook Time: 9-11 minutes
- Total Time: 24-26 minutes
- Yields: 30-40 cookies
- Dietary Type: Vegetarian
Ingredients
- 2 ¼ cups all-purpose flour
- ½ teaspoon salt
- 1 ¼ cups butter, softened
- 1 cup icing sugar
- 2 teaspoons vanilla
- 1 ½ cups mini chocolate chips
Equipment Needed
- Mixing bowls
- Measuring cups and spoons
- Cookie sheets
- Bottom of a glass or measuring cup
- Sifter
- Cooling rack
Instructions
- Begin by sifting together the all-purpose flour and salt in a mixing bowl. This step is crucial for ensuring a light and airy texture.
- In a separate bowl, cream together the softened butter and gradually beat in the icing sugar and vanilla. Continue mixing until the mixture is light and fluffy. This step will ensure the cookies have the desired tenderness. Using an electric mixer will speed up this process and give you the best results. Make sure the butter is truly softened; if it’s too cold, it won’t cream properly.
- Gradually add the dry ingredients (flour and salt mixture) to the wet ingredients (butter, sugar, and vanilla mixture) a little at a time. Blend until just smooth. Avoid overmixing, as this can lead to tough cookies. Mix until just combined to maintain a tender crumb.
- Add the mini chocolate chips to the dough and gently fold them in until evenly distributed. Be sure to scrape down the sides of the bowl to ensure all the chocolate chips are incorporated.
- Form the dough into 1-inch balls. A small cookie scoop can help ensure uniform size. Place the balls on ungreased cookie sheets, leaving a little space between each cookie.
- Flatten each ball into a 2-inch round using the bottom of a glass or measuring cup that has been dipped in flour. Dipping the glass in flour prevents the dough from sticking and ensures a clean, even flattening.
- Bake in a preheated oven at 325°F (160°C) for 9-11 minutes, or until the edges are just lightly browned. Keep a close eye on them, as baking times can vary depending on your oven. The cookies should be pale golden on top.
- Remove the cookie sheets from the oven and let the cookies cool on the sheets for a few minutes before transferring them to a cooling rack to cool completely. This prevents them from breaking while they are still soft.
Expert Tips & Tricks
- For extra flavor, try using browned butter. Brown the butter in a saucepan over medium heat until it turns a nutty brown color and has a toasty aroma. Let it cool slightly before creaming it with the sugar.
- If your dough is too soft to handle, chill it in the refrigerator for about 30 minutes before forming the balls.
- To ensure even baking, use a convection oven or rotate the cookie sheets halfway through the baking time.
- For a more intense chocolate flavor, use dark chocolate chips or a combination of dark and milk chocolate chips.
- Add a pinch of sea salt on top of each cookie before baking for a sweet and salty contrast.
- Make ahead: The dough can be made ahead of time and stored in the refrigerator for up to 3 days, or frozen for up to 3 months. Thaw the dough completely before baking.
- If your cookies spread too thin while baking, try chilling the dough longer or adding a tablespoon or two of flour to the dough.
- If you’re out of vanilla extract, you can substitute almond extract or even a tablespoon of bourbon for a unique twist.
Serving & Storage Suggestions
These mini chip butter cookies are perfect served with a glass of cold milk, a cup of hot cocoa, or a scoop of vanilla ice cream. They also make a wonderful addition to a cookie platter or gift basket.
- Storage: Store the cooled cookies in an airtight container at room temperature for up to 5 days.
- Freezing: For longer storage, freeze the cookies in an airtight container for up to 3 months. Let them thaw at room temperature before serving. You can also freeze the unbaked dough balls and bake them directly from frozen, adding a few minutes to the baking time.
- Reheating: If you want to warm up the cookies, you can heat them in a microwave for a few seconds or in a low oven (around 200°F) for a few minutes.
Nutritional Information
| Nutrient | Amount per Serving | % Daily Value |
|---|---|---|
| Calories | 160 kcal | 8% |
| Total Fat | 10g | 15% |
| Saturated Fat | 6g | 32% |
| Cholesterol | 20mg | 6% |
| Sodium | 94mg | 3% |
| Total Carbohydrate | 17g | 5% |
| Dietary Fiber | 1g | 3% |
| Sugars | 9g | 34% |
| Protein | 1g | 2% |
Note: Nutritional information is an estimate and may vary based on specific ingredients and portion sizes.
Variations & Substitutions
- Gluten-Free: Substitute the all-purpose flour with a gluten-free blend for a gluten-free version. Be sure to use a blend that is designed for baking.
- Dairy-Free: Use a dairy-free butter alternative and dairy-free chocolate chips to make these cookies dairy-free.
- Nutty: Add chopped nuts like walnuts, pecans, or almonds to the dough for added flavor and texture.
- Spice it up: Add a pinch of cinnamon, nutmeg, or cardamom to the dough for a warm, spiced flavor.
- Citrus Zest: Add the zest of an orange or lemon to the dough for a bright, citrusy flavor.
- Different Chips: Experiment with different types of chips, such as white chocolate chips, peanut butter chips, or butterscotch chips.
FAQs (Frequently Asked Questions)
Q: Can I use regular chocolate chips instead of mini chocolate chips?
A: Yes, you can, but mini chocolate chips are recommended for their even distribution in the cookie. If using regular-sized chips, you might want to chop them slightly.
Q: Why do I need to sift the flour?
A: Sifting the flour helps to remove any lumps and aerate it, which results in a lighter and more tender cookie.
Q: Can I freeze the cookie dough?
A: Absolutely! Form the dough into balls, place them on a baking sheet, and freeze until solid. Then, transfer the frozen dough balls to a freezer bag and store them for up to 3 months. Bake directly from frozen, adding a few extra minutes to the baking time.
Q: My cookies spread too thin. What did I do wrong?
A: This could be due to a few reasons. Make sure your butter wasn’t too soft, and try chilling the dough before baking. Also, ensure your oven is at the correct temperature.
Q: Can I reduce the amount of sugar in the recipe?
A: While you can reduce the sugar, it will affect the texture and sweetness of the cookies. Start by reducing it by a quarter and see if you like the results.
Final Thoughts
I hope this recipe brings as much joy to your kitchen as it has to mine. These Mini Chip Butter Cookies are a testament to the fact that simple ingredients, when combined with love and care, can create something truly special. So, gather your ingredients, preheat your oven, and let the aroma of freshly baked cookies fill your home. And don’t forget to share your creations and experiences – I’d love to hear how they turn out! Enjoy!