
Mini Cupcake Tin Pies: A Delicious Bite-Sized Dessert
I remember baking pies with my grandmother during the holidays. The aroma of cinnamon and baked apples filled her cozy kitchen, and the warmth from the oven seemed to hug us as we worked. We’d make everything from scratch, her wrinkled hands expertly crimping the edges of the crust. While I love the tradition of a full-sized pie, these mini cupcake tin pies capture all that nostalgic flavor in a perfectly portioned, delightfully customizable package, perfect for sharing (or not!).
Recipe Overview
- Prep Time: 20 minutes
- Cook Time: 35 minutes
- Total Time: 55 minutes
- Servings: 24 mini pies
- Yield: 24 mini pies
- Dietary Type: Vegetarian
Ingredients
- 2 (14.1 ounce) packages refrigerated pie crusts
- 2 (21 ounce) cans pie filling (apple, cherry, blueberry, etc.)
- 1 large egg, whisked
Equipment Needed
- Cupcake/Muffin tin (24-count)
- Non-stick cooking spray
- 4-inch cookie cutter or lid
- Small cookie cutters (optional, for decoration)
- Pastry brush
- Butter knife
Instructions
-
Begin by preparing your baking station. Preheat your oven to 350 degrees F (175 degrees C). Lightly coat your 24-count muffin tin with non-stick cooking spray. This step is crucial to prevent the mini pies from sticking and ensures easy removal after baking.
-
Unroll one of the refrigerated pie crusts on a lightly floured surface. Using a 4-inch cookie cutter or a similarly sized lid, cut out circles of dough. You should aim to get at least 12 circles from each pie crust. Re-roll any leftover scraps to maximize your yield.
-
Gently press one dough circle into each muffin tin cup, ensuring it fits snugly against the bottom and sides. Be careful not to stretch the dough too thin, as this could lead to breakage during baking.
-
Spoon the pie filling of your choice into each dough-lined cup, filling it almost to the top – about 1/4 cup per mini pie. Feel free to mix and match fillings for a variety of flavors! Using a consistent measurement ensures even baking and prevents overflow.
-
Now, prepare the tops for your mini pies. Unroll the second refrigerated pie crust and repeat the process of cutting out dough circles.
-
Get creative with the top crusts! You can simply place a full circle over each filling, or you can cut out decorative shapes using small cookie cutters. Autumn-themed shapes like leaves or stars add a festive touch. Alternatively, create a simple lattice design by cutting the dough into strips and weaving them over the filling.
-
Regardless of your chosen design, gently place the dough toppers onto the filled mini pies. If using a full circle, be sure to cut a few slits in the top to allow steam to escape during baking, preventing the crust from puffing up too much.
-
In a small bowl, whisk the egg until it’s smooth. Using a pastry brush, lightly brush the tops of each mini pie with the whisked egg. This will give the crusts a beautiful golden-brown color and a slightly glossy finish.
-
Carefully place the muffin tin into the preheated oven and bake for 30-40 minutes, or until the filling is bubbling and the crusts are golden brown. Keep a close eye on them, as baking times can vary depending on your oven.
-
Once baked, remove the muffin tin from the oven and let the mini pies cool in the tin for at least 15 minutes. This allows the filling to set slightly and makes them easier to remove.
-
After cooling, use a butter knife to gently loosen the edges of each mini pie before carefully lifting them out of the muffin tin. Serve warm or at room temperature.
Expert Tips & Tricks
- Prevent a Soggy Bottom: To avoid a soggy crust, try blind-baking the crusts for about 5 minutes before adding the filling.
- Enhance the Flavor: Add a pinch of cinnamon, nutmeg, or lemon zest to your pie filling for an extra layer of flavor.
- Get Ahead: You can prepare the dough circles and pie fillings ahead of time. Store them separately in the refrigerator until ready to assemble and bake.
- Even Baking: Rotate the muffin tin halfway through the baking time to ensure even browning.
- Fixing Cracked Crusts: If the crusts crack slightly during baking, don’t worry! Simply brush them with a little melted butter or a glaze made from powdered sugar and milk after they’ve cooled.
Serving & Storage Suggestions
These mini pies are delicious served warm, at room temperature, or even chilled. They make a delightful addition to dessert platters, potlucks, or holiday gatherings.
- Serving: Dust with powdered sugar or top with a dollop of whipped cream or a scoop of ice cream for an extra-special treat.
- Storage: Store leftover mini pies in an airtight container at room temperature for up to 2 days, or in the refrigerator for up to 5 days. For longer storage, freeze them for up to 2 months.
- Reheating: To reheat, bake in a preheated oven at 350°F (175°C) for 10-15 minutes, or until warmed through. You can also microwave them in short bursts, but be careful not to overheat them.
Nutritional Information
(Estimated per serving, based on apple pie filling)
| Nutrient | Amount per Serving | % Daily Value |
|---|---|---|
| Calories | 180 kcal | 9% |
| Total Fat | 9g | 14% |
| Saturated Fat | 3g | 15% |
| Cholesterol | 15mg | 5% |
| Sodium | 150mg | 7% |
| Total Carbohydrate | 22g | 7% |
| Dietary Fiber | 1g | 4% |
| Sugars | 12g | – |
| Protein | 2g | 4% |
Variations & Substitutions
- Gluten-Free: Use gluten-free pie crust for a gluten-free version.
- Vegan: Use a vegan pie crust recipe and a fruit filling that doesn’t contain any animal products (many canned fillings are already vegan). You can also substitute the egg wash with a mixture of plant-based milk and a touch of maple syrup.
- Crumb Topping: Instead of a traditional crust, top the pies with a buttery crumb topping made from flour, oats, butter, and sugar.
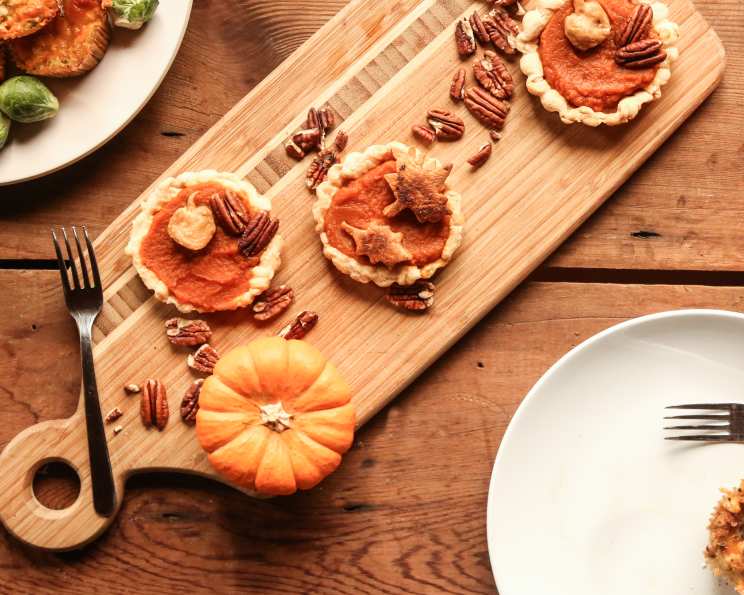
- Seasonal Fillings: Experiment with different fillings based on the season. Try pumpkin pie filling in the fall, berry fillings in the summer, or citrus fillings in the winter.
- Savory Pies: These muffin tins are also great for making savory pies! Try fillings like chicken pot pie, shepherd’s pie, or quiche.
FAQs (Frequently Asked Questions)
Q: Can I use homemade pie crust instead of store-bought?
A: Absolutely! Homemade pie crust will add an extra touch of deliciousness to your mini pies. Just be sure to roll it out thinly enough to fit into the muffin tin cups.
Q: What if my pie crusts start to brown too quickly?
A: If the crusts are browning too rapidly, tent the muffin tin with aluminum foil during the last 10-15 minutes of baking.
Q: Can I freeze these mini pies?
A: Yes, you can! Allow them to cool completely before wrapping them individually in plastic wrap and placing them in a freezer-safe bag or container.
Q: My filling is too runny. What can I do?
A: If your filling seems too runny, you can add a tablespoon of cornstarch or tapioca starch to thicken it up before baking.
Q: How do I prevent the crust from shrinking during baking?
A: Chilling the dough circles in the muffin tin for about 15 minutes before baking can help prevent shrinking. Also, avoid overworking the dough.
Final Thoughts
These Mini Cupcake Tin Pies are a testament to the fact that great things often come in small packages. They’re fun to make, easy to customize, and guaranteed to bring a smile to everyone who tries them. So, gather your ingredients, preheat your oven, and get ready to bake up a batch of these delightful little treats! Don’t forget to share your creations and any variations you try – happy baking!