
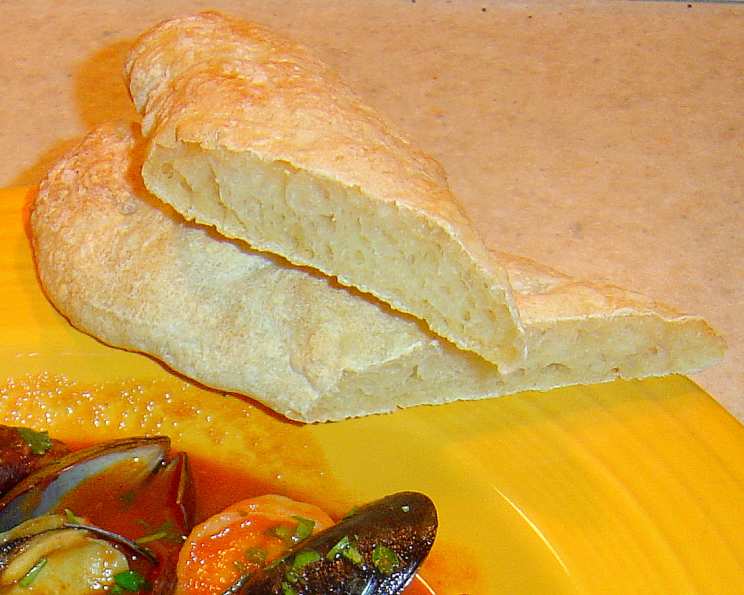
Mini French Bread Loaves: A Baker’s Duet
The aroma of baking bread is, for me, the ultimate comfort. I still remember watching my grandmother, her hands dusted with flour, pull perfectly crusty loaves from her ancient oven. That yeasty scent filled her kitchen and, for a little girl, transformed it into a magical place. Now, decades later, with an empty nest and fewer mouths to feed, the challenge is creating that same deliciousness on a smaller scale. These mini French bread loaves are the perfect solution – a taste of nostalgia, freshly baked, and just enough for my husband and me to enjoy.
Recipe Overview
- Prep Time: 15 minutes
- Cook Time: 15 minutes
- Rise Time: 5 hours (minimum)
- Total Time: 5 hours, 30 minutes
- Servings: 2
- Yield: 2 mini loaves
- Dietary Type: Vegetarian
Ingredients
- 3/4 cup bread flour, plus 2 Tablespoons, plus more as needed and for dusting work surface
- 1/2 teaspoon salt (I use fine sea salt)
- 1/4 teaspoon fast rise yeast
- Olive oil, for greasing the bowl
- 1/4 cup plus 3 tablespoons water
Equipment Needed
- Food processor
- Medium-size mixing bowl
- Plastic wrap
- Cutting board or work surface
- Baking sheet
- Clean spray bottle
Instructions
-
Begin by combining the dry ingredients. In a food processor, place the 3/4 cup plus 2 Tablespoons bread flour, the 1/2 teaspoon salt, and the 1/4 teaspoon fast rise yeast. Process for just 3 seconds to thoroughly blend everything together.
-
With the machine running continuously, gradually add the wet ingredients. Slowly pour 1/4 cup plus 3 tablespoons water through the feed tube of the food processor. Process until the dough comes together and forms a cohesive mass, this should take approximately 20 seconds.
-
Assess the dough’s consistency. The ideal dough should be somewhat sticky and appear slightly difficult to knead by hand. If the dough seems too dry and isn’t holding together well, add additional water, one tablespoon at a time. After each tablespoon addition, process the dough for another 5 seconds to allow the water to incorporate fully.
-
Prepare the dough for its first rise. Lightly grease a medium-size mixing bowl with olive oil. This will prevent the dough from sticking during the rising process.
-
Transfer the dough to the prepared bowl. Place the dough in the greased bowl and turn it over a few times to ensure it’s evenly coated with the olive oil.
-
Cover the bowl. Cover the bowl loosely with plastic wrap. This creates a humid environment that encourages the yeast to thrive.
-
Allow the dough to rise. Let the dough rise at room temperature until it has nearly doubled in bulk. This first rise will take approximately 2 to 3 hours. The exact time will depend on the temperature of your room.
-
Punch down the dough. After the first rise, gently punch down the dough to release the built-up gases.
-
Second rise. Allow the dough to rise again until it has nearly doubled in bulk, about 2 hours. This second rise contributes significantly to the bread’s final flavor and texture.
-
Divide and shape. Lightly sprinkle a cutting board or clean work surface with a little flour. Turn the dough out onto the floured surface. Using a sharp knife or dough cutter, carefully divide the dough into 2 equal pieces.
-
Shape the mini loaves. Gently shape each piece of dough into a ball. If the dough is too sticky to handle easily, sprinkle it with a little flour.
-
Prepare for the final rise. Place the shaped balls of dough on an ungreased baking sheet. Sprinkle a little flour over each round to prevent the plastic wrap from sticking during the final rise.
-
Cover and rise again. Cover the dough balls lightly with plastic wrap and let them rise until they have nearly doubled in bulk. This final rise should take approximately 1 to 1 1/2 hours.
-
Preheat the oven. As the dough rises for the last time, preheat your oven to 400 degrees F (200 degrees C). Place a rack in the center of the oven.
-
Prepare for a crisp crust. For a truly crisp crust, fill a clean spray bottle with water. Just before you slide the baking sheet into the oven, quickly spritz the inside of the oven with water. This creates steam, which helps develop that desirable crust.
-
Bake the bread. Bake the bread rounds until they are golden and crusty, approximately 10 minutes.
-
Achieve an extra-crusty loaf (optional). If you prefer an even crustier loaf, turn off the oven after the initial 10 minutes of baking. Leave the bread in the oven with the door closed for an additional 5 minutes.
-
Cool the bread. Transfer the baked bread to a wire rack to cool completely.
-
Serve and enjoy. Serve the mini French bread loaves warm or at room temperature.
Expert Tips & Tricks
- The Secret to a Great Crust: The key to a truly exceptional crust lies in the moisture. The initial spritz of water into the oven is crucial, but you can also place a pan of hot water on the bottom rack of the oven during baking for even more steam.
- Don’t Overknead: Overkneading can result in a tough loaf. The food processor does a great job of quickly bringing the dough together, so avoid processing for too long.
- Temperature Matters: Yeast thrives in a warm environment. Ensure your water is lukewarm, not hot, to avoid killing the yeast. Also, a slightly warm room will encourage faster rising.
- Adjust for Humidity: On humid days, you may need to use slightly less water in your dough.
Serving & Storage Suggestions
These mini French bread loaves are best served fresh, on the day they are baked. Their crusty exterior and soft interior make them ideal for dipping in olive oil, serving alongside soup, or using as a base for bruschetta. If you happen to have any leftovers, store them in an airtight container at room temperature for up to one day. Because these loaves contain no fat, they tend to dry out quickly. To refresh slightly stale bread, lightly dampen the crust with water and reheat in a 350°F (175°C) oven for a few minutes. Freezing is not recommended as it will significantly affect the texture.
Nutritional Information
| Nutrient | Amount per Serving | % Daily Value |
|---|---|---|
| Calories | 172 kcal | N/A |
| Fat | 0.5g | 0% |
| Saturated Fat | 0.1g | 0% |
| Cholesterol | 0mg | 0% |
| Sodium | 582.6mg | 24% |
| Carbohydrate | 36g | 11% |
| Dietary Fiber | 1.4g | 5% |
| Sugars | 0.1g | 0% |
| Protein | 5g | 10% |
Note: Nutritional information is an estimate and may vary based on specific ingredients and preparation methods.
Variations & Substitutions
- Herb-Infused: Add a tablespoon of dried herbs, such as rosemary, thyme, or oregano, to the flour mixture for a fragrant twist.
- Garlic Bread: Brush the baked loaves with garlic-infused olive oil while still warm for a delicious garlic bread variation.
- Whole Wheat: Substitute up to half of the bread flour with whole wheat flour for a nuttier flavor and added fiber.
- Sourdough Starter: For a tangy sourdough flavor, replace half of the fast-rise yeast with 1/4 cup of active sourdough starter. You may need to adjust the water content slightly.
- Seeded Crust: Before the final rise, brush the dough with water and sprinkle with sesame seeds, poppy seeds, or everything bagel seasoning.
FAQs (Frequently Asked Questions)
Q: Why does the recipe call for bread flour instead of all-purpose flour?
A: Bread flour has a higher protein content, which helps develop more gluten and creates a chewier texture with a crisp crust, ideal for French bread.
Q: Can I use active dry yeast instead of fast-rise yeast?
A: Yes, but you’ll need to proof the active dry yeast in warm water first. Use the same amount (1/4 teaspoon) and let it sit in 1/4 cup of the recipe’s water for 5-10 minutes until foamy before adding it to the flour.
Q: My dough isn’t rising properly. What could be the problem?
A: Several factors can affect rising: the yeast could be old or inactive, the water might be too hot (killing the yeast), or the room temperature might be too cold. Ensure your yeast is fresh and the water is lukewarm.
Q: How do I know when the bread is done baking?
A: The bread is done when it’s golden brown and sounds hollow when you tap it on the bottom. An internal temperature of around 200-210°F (93-99°C) is also a good indicator.
Q: Can I make the dough ahead of time and bake it later?
A: Yes, you can prepare the dough through the first rise and then refrigerate it for up to 24 hours. Punch it down, shape it, and let it rise again before baking.
Final Thoughts
These mini French bread loaves are more than just a recipe; they’re an invitation to slow down, savor the simple pleasures of life, and fill your kitchen with the comforting aroma of freshly baked bread. Don’t be intimidated by the rising times – they’re what give the bread its incredible flavor. So, preheat your oven, dust off your apron, and embark on this delightful baking adventure. I hope these loaves bring as much joy to your table as they do to mine. Share your creations with me – I’d love to see your beautiful, crusty loaves! Enjoy them alongside a hearty soup, a simple salad, or simply with a drizzle of good olive oil. Bon appétit!