
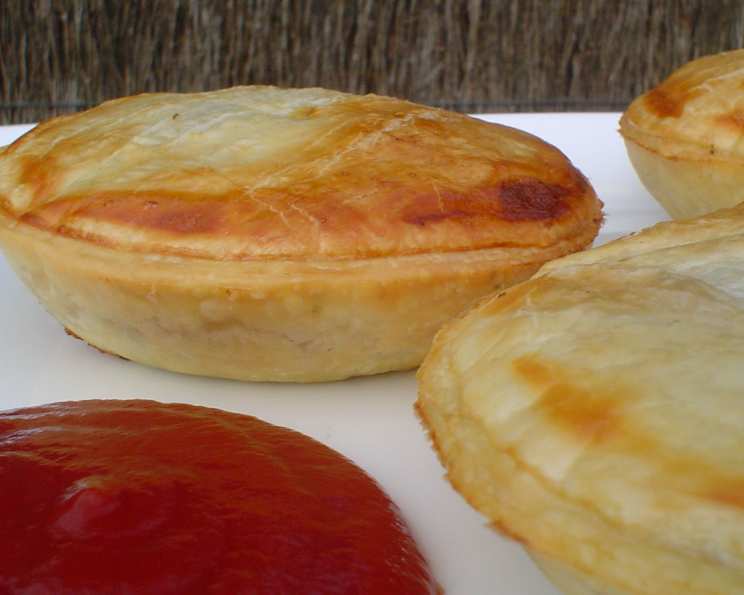
Mini Meat Pies: A Bite-Sized Taste of Down Under
I have the fondest memories of the local bakery back home, where the aroma of freshly baked goods filled the air. But nothing could beat the comforting scent of meat pies wafting from the oven. Their flaky crust and savory filling were a perfect midday treat, or a quick and satisfying dinner. These mini versions bring back all those heartwarming memories, and are perfect for sharing (if you can resist eating them all yourself!).
Recipe Overview
- Prep Time: 20 minutes
- Cook Time: 25 minutes
- Total Time: 45 minutes
- Yields: 24 mini pies
- Dietary Type: Omnivore
Ingredients
- 6 sheets pre-rolled shortcrust pastry
- 2 small tomatoes, sliced
- ½ teaspoon dried oregano leaves
For the Filling:
- 1 tablespoon oil
- 1 onion, chopped
- 2 garlic cloves, crushed
- 500g beef mince
- 2 tablespoons plain flour
- 375ml beef stock
- 80ml tomato sauce
- 2 teaspoons Worcestershire sauce
- ½ teaspoon mixed herbs
Equipment Needed
- 2 x 12-hole patty tins
- 7 cm round cutter (optional, for traditional pies)
- Large heavy-based pan
- Fork
Instructions
-
Preheat your oven to 200°C (392°F).
-
Prepare the pastry: If making traditional pies (with a lid), cut the shortcrust pastry into 48 circles using a 7 cm round cutter. If making uncovered pies, cut just 24 circles.
-
Prepare the patty tins: Lightly grease two 12-hole patty tins. Gently press 24 pastry circles into the prepared tins, ensuring they fit snugly and evenly.
-
Begin the filling: Heat the oil in a large, heavy-based pan over medium heat. Add the chopped onion and crushed garlic and cook for about 2 minutes, or until the onion becomes soft and translucent.
-
Brown the mince: Increase the heat to high. Add the beef mince to the pan. Stir continuously for about 5 minutes, breaking up any large lumps with a fork, until the mince is well browned and all the liquid has evaporated. This step is crucial for developing a rich, savory flavor.
-
Add flour: Reduce the heat to medium. Sprinkle the plain flour over the browned mince. Stir continuously until the flour is thoroughly combined and no white patches remain. Cook for about 1 minute, stirring constantly. This creates a roux, which will help to thicken the sauce.
-
Incorporate liquids and herbs: Gradually pour in the beef stock, tomato sauce, and Worcestershire sauce, stirring continuously to prevent any lumps from forming. Add the mixed herbs.
-
Simmer the filling: Bring the mixture to a boil while stirring. Once boiling, reduce the heat to low and simmer gently for about 5 minutes, or until the filling has thickened to your desired consistency. Stir occasionally to prevent sticking and ensure even cooking.
-
Cool the filling: Remove the pan from the heat and allow the meat filling to cool slightly before assembling the pies. This prevents the pastry from becoming soggy.
-
Assemble the pies: Divide the cooled meat filling evenly among the pastry-lined patty tins, filling each one generously.
-
Add tomato and oregano: Top each mini pie with two half-slices of fresh tomato. Sprinkle a pinch of dried oregano leaves over the tomato slices.
-
Bake: Place the patty tins in the preheated oven and bake for approximately 25 minutes, or until the pastry is golden brown and crisp. Keep an eye on them – ovens vary, so they may need a little less or more time.
-
For traditional pies (optional): If making pies with a lid, place the remaining pastry rounds over the tomato and oregano topping. Seal the edges by brushing them with beaten egg before baking to ensure a golden crust.
-
Serve: Allow the mini meat pies to cool slightly in the patty tins before carefully removing them. Serve hot, and enjoy!
Expert Tips & Tricks
- Prevent a Soggy Bottom: To avoid a soggy pastry base, blind-bake the pastry shells for about 10 minutes before adding the filling. Simply line the pastry-lined tins with baking paper and fill with baking beans or rice. Remove the paper and beans before adding the filling and baking.
- Enhance the Flavor: For a richer flavor, consider adding a splash of red wine or a teaspoon of balsamic vinegar to the meat filling during the simmering stage.
- Make-Ahead Option: The meat filling can be prepared a day in advance and stored in the refrigerator. This saves time on the day you plan to bake the pies.
- Golden Brown Crust: For a perfectly golden-brown crust, brush the pastry with a beaten egg or milk before baking.
- Pastry Troubleshoot: If your pastry cracks or tears while pressing it into the tins, simply patch it up with small pieces of extra pastry. The filling will hold everything together during baking.
- Spice It Up: Add a pinch of chili flakes or a dash of your favorite hot sauce to the meat mixture for an extra kick.
- Vegetarian Adaption: Replace the beef mince with plant-based mince and beef stock with vegetable stock for a vegetarian version.
Serving & Storage Suggestions
These mini meat pies are best served hot, straight from the oven. They make a fantastic appetizer, snack, or light meal. Garnish with a sprig of fresh parsley or a dollop of tomato relish for an extra touch.
- Room Temperature: Do not leave at room temperature for more than 2 hours.
- Refrigeration: Store leftover pies in an airtight container in the refrigerator for up to 3 days.
- Freezing: For longer storage, freeze the baked pies in a single layer on a baking sheet until solid, then transfer them to a freezer-safe bag or container. They can be frozen for up to 2 months. Reheat in a preheated oven at 180°C (350°F) until heated through and the pastry is crisp. Alternatively, you can reheat them in a microwave, but the pastry may become slightly softer.
Nutritional Information
Note: Nutritional information is an estimate and may vary based on specific ingredients and portion sizes.
| Nutrient | Amount per Serving | % Daily Value |
|---|---|---|
| Calories | 294 kcal | – |
| Calories from Fat | 177 kcal | 60% |
| Total Fat | 19.7 g | 30% |
| Saturated Fat | 5.4 g | 27% |
| Cholesterol | 14.8 mg | 4% |
| Sodium | 319.7 mg | 13% |
| Total Carbohydrate | 22.2 g | 7% |
| Dietary Fiber | 1.9 g | 7% |
| Sugars | 0.7 g | 2% |
| Protein | 6.8 g | 13% |
Variations & Substitutions
- Gluten-Free: Use gluten-free shortcrust pastry for a gluten-free version.
- Different Meats: Substitute the beef mince with lamb, pork, or even chicken mince for a different flavor profile.
- Vegetables: Add finely diced carrots, peas, or celery to the meat filling for added nutrition and texture.
- Spicy: Add a pinch of cayenne pepper or a finely chopped chili to the filling for a spicy kick.
- Cheese Topping: Sprinkle grated cheese over the tomato and oregano topping before baking for a cheesy twist.
- Mushroom Filling: Replace half of the beef mince with finely chopped mushrooms for a more earthy flavor.
FAQs (Frequently Asked Questions)
Q: Can I use puff pastry instead of shortcrust pastry?
A: While shortcrust pastry is traditional, you can use puff pastry for a flakier pie. However, keep in mind that puff pastry tends to rise more, so you may need to adjust the baking time and temperature.
Q: How do I prevent the pastry from shrinking during baking?
A: To minimize pastry shrinkage, avoid overworking the dough and ensure the pastry is well-chilled before baking. Blind baking the shells can also help.
Q: Can I make these pies ahead of time and freeze them?
A: Yes! Mini meat pies freeze beautifully. Bake them completely, let them cool, and then wrap them individually in plastic wrap before freezing in a freezer-safe container.
Q: What is the best way to reheat frozen meat pies?
A: Reheat frozen pies in a preheated oven at 180°C (350°F) until heated through and the pastry is crisp, about 20-30 minutes.
Q: Can I use store-bought pie filling?
A: While homemade filling is always best, you can use store-bought pie filling in a pinch. Just be sure to adjust the seasonings to your liking.
Final Thoughts
These Mini Meat Pies are a delightful way to bring a little Aussie comfort to your kitchen. Don’t be intimidated – they’re surprisingly easy to make, and the aroma alone is worth the effort! Experiment with different fillings, crusts, and toppings to create your own signature version. Once you’ve mastered these, try pairing them with a crisp salad or a dollop of your favorite chutney for a complete meal. Let me know in the comments how yours turn out!