
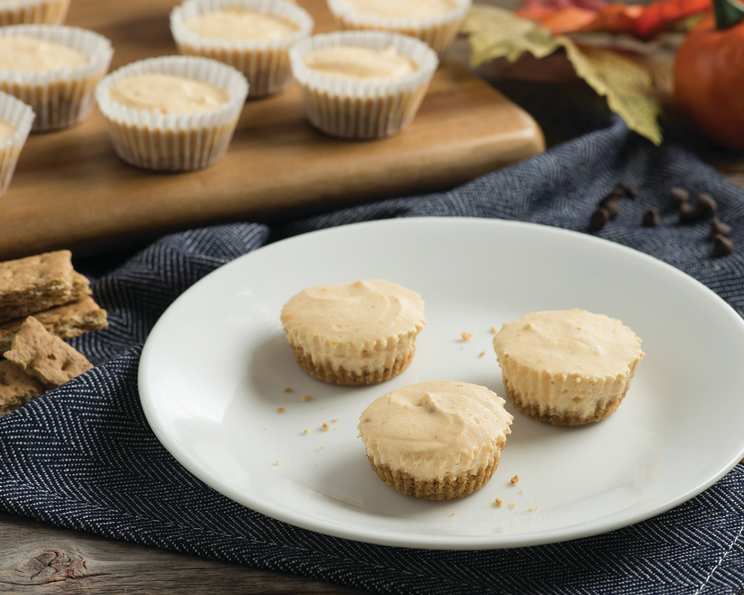
Mini No-Bake Pumpkin Cheesecakes: A Bite-Sized Autumn Dream
I can still remember the first time I tasted pumpkin cheesecake. It was Thanksgiving at my Aunt Carol’s house, and amidst the sea of pies, casseroles, and roast turkey, these miniature pumpkin cheesecakes were tucked away on a side table. One bite, and I was transported. The creamy, spiced filling combined with the buttery graham cracker crust was pure autumn magic, and I’ve been chasing that perfect bite ever since. These Mini No-Bake Pumpkin Cheesecakes are my attempt to recreate that memory in an even more accessible and adorable form – no oven required!
Recipe Overview
- Prep Time: 10 minutes
- Total Time: 3 hours 10 minutes
- Servings: 24
- Yields: 24 cheesecakes
- Dietary Type: Vegetarian
Ingredients
- 3/4 cup graham cracker crumbs
- 2 tablespoons melted butter
- 4 ounces cream cheese, at room temperature
- 1/4 cup granulated sugar
- 1/4 cup pure pumpkin puree
- 1/4 teaspoon pumpkin pie spice
- 1/2 cup whipping cream
- Mini chocolate chips (optional)
Equipment Needed
- 24-cup mini muffin tin
- Paper liners
- Medium bowl
- Electric mixer
- Small spoon or fingers
Instructions
-
Start by lining a 24-cup mini muffin tin with paper liners. This will make removing the cheesecakes a breeze later on and will also provide a neat and tidy presentation.
-
Next, prepare the crust. In a bowl, combine the graham cracker crumbs with the melted butter. Stir well until the crumbs are evenly moistened. The mixture should resemble wet sand.
-
Divide the graham cracker mixture between the 24 liners. You’ll need about 1 teaspoon of the mixture for each liner.
-
Use a small spoon or your fingers to press the mixture firmly into the liners. Be careful not to press out the folds of the paper liners. Creating a compact crust at this stage is crucial for supporting the creamy filling.
-
Chill the crusts in the refrigerator while you prepare the filling. This will help them to firm up and prevent them from becoming soggy.
-
In a medium bowl, using an electric mixer, beat the cream cheese with the granulated sugar until smooth and fluffy. This should take about 1 to 2 minutes. Ensure that the cream cheese is at room temperature to prevent lumps.
-
Beat in the pumpkin puree and pumpkin pie spice. Mix until well combined and the batter is a uniform orange color. The pumpkin puree adds that signature autumnal flavor, while the pumpkin pie spice brings warmth and depth.
-
Clean the beaters of your electric mixer thoroughly. This is essential to ensure that the whipped cream forms stiff peaks properly. Any traces of fat or other ingredients can interfere with the whipping process.
-
In a separate bowl, whip the whipping cream until it forms stiff peaks. This should take about 1 to 2 minutes, depending on the speed of your mixer. Be careful not to overwhip, as this can cause the cream to curdle.
-
Gently fold the whipped cream into the cream cheese mixture. It’s important to fold gently to avoid deflating the whipped cream. This will ensure a light and airy cheesecake filling.
-
Spoon the filling over the prepared graham cracker bases, filling each liner to the top.
-
If desired, top each cheesecake with a few mini chocolate chips. This adds a touch of sweetness and visual appeal.
-
Chill the mini cheesecakes in the refrigerator until firm, about 3 hours. This is essential for the filling to set properly.
-
Serve chilled and enjoy the taste of fall in every bite!
Expert Tips & Tricks
- Room Temperature Cream Cheese: Ensure your cream cheese is at room temperature for a smooth, lump-free filling. If you’re short on time, you can microwave it in 10-second intervals, but be careful not to melt it.
- Spice Adjustment: Adjust the amount of pumpkin pie spice to your liking. If you prefer a more intense flavor, add a pinch more. You can also add a dash of cinnamon or nutmeg for a unique twist.
- Crust Variations: For a richer crust, use digestive biscuits instead of graham crackers. Alternatively, you can add a tablespoon of brown sugar to the graham cracker crumbs for a caramel-like flavor.
- Whipped Cream Stability: To stabilize the whipped cream and prevent it from weeping, add a teaspoon of cornstarch or powdered sugar while whipping.
- Easy Release: If you don’t have paper liners, lightly grease the muffin tin with non-stick cooking spray before adding the crust. This will make it easier to remove the cheesecakes.
- Make-Ahead Magic: Prepare the mini cheesecakes up to 2 days in advance and store them in the refrigerator. This makes them a perfect stress-free dessert for parties or gatherings.
- Filling Consistency: If the filling seems too thin, add a tablespoon of powdered sugar to thicken it slightly.
Serving & Storage Suggestions
These Mini No-Bake Pumpkin Cheesecakes are best served chilled, straight from the refrigerator. Arrange them on a decorative platter or cake stand for an elegant presentation. You can also garnish them with a sprinkle of cinnamon, a dollop of whipped cream, or a drizzle of caramel sauce.
Store any leftover cheesecakes in an airtight container in the refrigerator for up to 3 days. While they can be frozen, the texture may change slightly upon thawing. If you choose to freeze them, wrap them individually in plastic wrap before placing them in a freezer-safe container. Thaw overnight in the refrigerator before serving.
Nutritional Information
| Nutrient | Amount per Serving | % Daily Value |
|---|---|---|
| Calories | 61.3 kcal | N/A |
| Calories from Fat | 42 kcal | 69% |
| Total Fat | 4.7 g | 7% |
| Saturated Fat | 2.7 g | 13% |
| Cholesterol | 14.5 mg | 4% |
| Sodium | 38.1 mg | 1% |
| Total Carbohydrate | 4.5 g | 1% |
| Dietary Fiber | 0.1 g | 0% |
| Sugars | 3.1 g | 12% |
| Protein | 0.6 g | 1% |
Note: Nutritional information is an estimate and may vary based on specific ingredients and portion sizes.
Variations & Substitutions
- Gluten-Free: Use gluten-free graham crackers for the crust to make this recipe gluten-free.
- Dairy-Free: Substitute dairy-free cream cheese and whipped cream alternatives to make this recipe dairy-free. Ensure the products are designed for whipping and firming up.
- Spice it Up: Add a pinch of ground ginger, cloves, or cardamom to the pumpkin pie spice blend for a more complex flavor profile.
- Crustless Option: For a truly no-bake experience, skip the crust altogether and simply spoon the filling into small dessert cups or glasses.
- Maple Syrup: Replace the granulated sugar with maple syrup for a more natural sweetness. Start with 2 tablespoons and adjust to taste.
- Gingerbread Crust: Use gingerbread cookies, crushed, as the base for a festive winter twist.
FAQs (Frequently Asked Questions)
Q: Can I use a different type of cookie for the crust?
A: Absolutely! Digestive biscuits, gingersnaps, or even chocolate wafers would all work well as a substitute for graham crackers. Adjust the amount of butter accordingly, depending on the cookie’s fat content.
Q: How do I prevent the graham cracker crust from becoming soggy?
A: Firmly pressing the crust into the liners and chilling it before adding the filling is key. The melted butter helps to bind the crumbs together and create a barrier against moisture.
Q: Can I make these ahead of time?
A: Yes, these cheesecakes are perfect for making ahead. Store them in an airtight container in the refrigerator for up to 2 days.
Q: My filling is too runny. What can I do?
A: Make sure your cream cheese is firm and that you whip the whipping cream until stiff peaks form. If the filling is still too runny, add a tablespoon of powdered sugar and mix until thickened.
Q: Can I freeze these cheesecakes?
A: While you can freeze them, the texture may change slightly upon thawing. Wrap them individually in plastic wrap before placing them in a freezer-safe container for best results.
Final Thoughts
These Mini No-Bake Pumpkin Cheesecakes are the perfect way to celebrate the flavors of fall without spending hours in the kitchen. They’re simple to make, incredibly delicious, and guaranteed to be a crowd-pleaser. Whether you’re hosting a Thanksgiving gathering or simply craving a sweet treat, these bite-sized delights are sure to satisfy. I encourage you to give this recipe a try and share your own creative variations. Enjoy!