
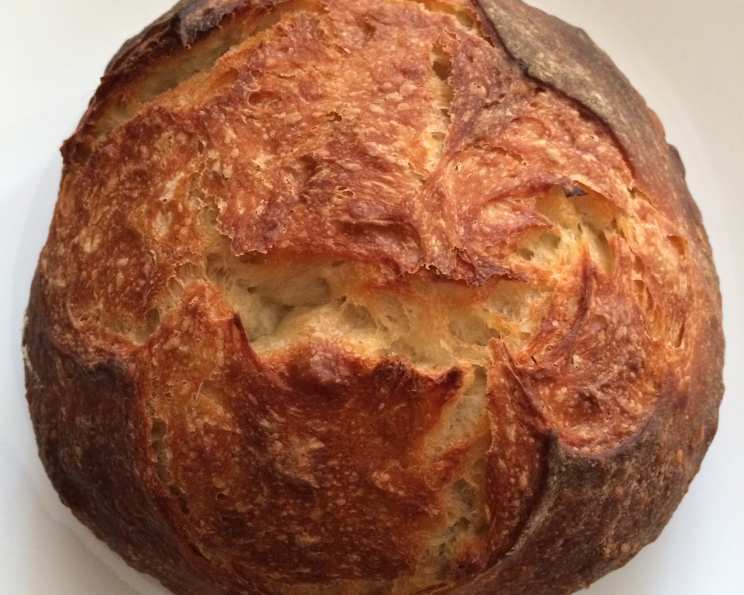
The Joy of Simple Bread: Mini No-Knead Boule
There’s something profoundly comforting about the smell of baking bread. I remember as a child, the anticipation of walking into my grandmother’s kitchen and being greeted by the warm, yeasty aroma of her homemade loaves. She always let me “help” (which mostly involved making a floury mess), and those moments instilled in me a lifelong love for baking. This Mini No-Knead Boule brings back those memories – it’s rustic, simple, and creates a crusty, flavorful bread that’s perfect for any occasion. It’s a slice of pure comfort, made easy.
Recipe Overview
- Prep Time: 5 minutes
- Cook Time: 35 minutes
- Rest Time: 13-25 hours
- Servings: 2
- Yield: 1 small loaf
- Dietary Type: Vegetarian
Ingredients
- 1 1⁄2 cups (7.5 ounces) all-purpose flour
- 1 1⁄2 teaspoons kosher salt or 1 1/2 teaspoons sea salt
- 1⁄4 teaspoon instant dry yeast
- 1 tablespoon honey
- 3⁄4 cup room-temperature water
Equipment Needed
- Medium-sized bowl
- Wooden spoon
- Plastic wrap
- Baking sheet
- Parchment paper
- Sharp knife or razor
- Large, deep, oven-safe pot or aluminum roasting pan
- Wire rack
Instructions
-
In a medium-sized bowl, combine all the ingredients: all-purpose flour, salt, instant dry yeast, honey, and room-temperature water.
-
Stir the ingredients with a wooden spoon until a shaggy blob of dough forms. It’s important not to overmix the dough at this stage. Just ensure that all the dry ingredients are incorporated into the water.
-
Cover the bowl tightly with plastic wrap. This creates a humid environment that encourages the yeast to work its magic.
-
Let the dough sit at room temperature for 12-24 hours. The duration depends on the room temperature; a warmer room will expedite the process. You’ll know it’s ready when the dough has doubled in size and is bubbly on top.
-
One hour before you’re ready to bake, gently pour the dough onto a lightly floured work surface. Be careful not to deflate the dough too much.
-
With lightly floured hands, gently form the dough into a ball. Do this by pulling the edges of the dough towards the middle, creating tension on the surface.
-
Place the dough ball seam-side down on a piece of parchment paper that is placed on a baking sheet. This makes it easy to transfer the dough into the hot pot later.
-
Dust the top of the dough with a little flour. This helps create a beautiful crust.
-
Cover the dough ball loosely with plastic wrap and let it rise at room temperature for about 1 hour. The dough should double in size and, when poked gently with a finger, should not readily spring back. If it springs back quickly, it needs more time to rise.
-
Preheat your oven to 450°F (232°C). Make sure your oven is fully preheated before baking for the best results.
-
When the dough is ready to bake, use a sharp knife or razor to make a 3-inch slash about 1/2 inch deep across the top of the dough. This allows the bread to expand properly in the oven.
-
Carefully cover the dough ball with an upside-down large, deep, oven-safe pot or an aluminum roasting pan. Ensure the edges of the pot or pan are flush with the baking sheet so that no steam can escape. The trapped steam is crucial for creating a wonderfully crusty loaf.
-
Place the baking sheet in the preheated oven and bake for 25 minutes with the pot on.
-
After 25 minutes, carefully remove the pot or pan. Reduce the oven temperature to 400°F (204°C).
-
Continue baking for 10 more minutes, or until the bread is deeply golden brown and the internal temperature measures between 205-215°F (96-102°C). Use a digital thermometer to check the internal temperature for accurate results.
-
Immediately transfer the bread to a wire rack to cool completely. Allow it to cool for at least 2 hours before slicing and serving. This prevents the bread from becoming gummy.
Expert Tips & Tricks
- Dough Hydration: The dough is quite wet, which is key to the bread’s texture. Don’t be tempted to add more flour unless it’s absolutely unmanageable.
- Proofing Time: The proofing time varies depending on the temperature of your kitchen. Keep an eye on the dough and adjust accordingly.
- Scoring: A sharp knife is essential for scoring. If you don’t have a lame (baker’s blade), a very sharp serrated knife works well.
- Oven Temperature: Ovens can vary, so keep an eye on your bread and adjust the baking time as needed. If the crust is browning too quickly, lower the temperature slightly.
- Steam is Key: Don’t skip the pot or roasting pan! The steam is what creates the signature crust of a boule. If you don’t have a pot large enough, you can place a baking sheet with hot water on the rack below the bread to create steam.
Serving & Storage Suggestions
This Mini No-Knead Boule is delicious served warm with butter, olive oil and balsamic vinegar, or as a side to soups and stews. It’s also perfect for sandwiches or toast.
To store leftovers, wrap the bread tightly in plastic wrap or place it in an airtight container. It will stay fresh at room temperature for 2-3 days. For longer storage, you can freeze the bread for up to 2 months. Thaw it completely before reheating. To reheat, wrap the bread in foil and warm it in a 350°F (175°C) oven for about 10-15 minutes, or until heated through.
Nutritional Information
| Nutrient | Amount per Serving | % Daily Value |
|---|---|---|
| Calories | 374.8 kcal | N/A |
| Calories from Fat | 8 g | 2% |
| Total Fat | 1 g | 1% |
| Saturated Fat | 0.1 g | 0% |
| Cholesterol | 0 mg | 0% |
| Sodium | 1749.3 mg | 72% |
| Total Carbohydrate | 80.4 g | 26% |
| Dietary Fiber | 2.7 g | 10% |
| Sugars | 8.9 g | N/A |
| Protein | 9.9 g | 19% |
Note: Nutritional information is an estimate and may vary based on specific ingredients and preparation methods.
Variations & Substitutions
- Whole Wheat Boule: Replace up to half of the all-purpose flour with whole wheat flour for a nuttier flavor and increased fiber.
- Herb Infused: Add 1-2 tablespoons of dried herbs, such as rosemary, thyme, or oregano, to the dough for an aromatic twist.
- Garlic & Cheese: Mix in 1/2 cup of grated cheese (such as parmesan or cheddar) and 1-2 cloves of minced garlic into the dough before the first rise.
- Seed Topped: Sprinkle the top of the dough with sesame seeds, poppy seeds, or sunflower seeds before baking for added texture and flavor.
- Spelt Flour: Substitute some or all of the all-purpose flour with spelt flour for a slightly sweeter, nuttier flavor.
FAQs (Frequently Asked Questions)
Q: Can I use active dry yeast instead of instant dry yeast?
A: Yes, but you’ll need to activate the active dry yeast first. Dissolve it in a small amount of warm water with a pinch of sugar, let it sit for 5-10 minutes until foamy, and then add it to the other ingredients.
Q: What if I don’t have a Dutch oven or oven-safe pot?
A: You can use an aluminum roasting pan or even a large stainless steel bowl. The key is to create a tight seal to trap the steam. If you don’t have anything suitable, try placing a baking sheet with hot water on the rack below the bread to create steam.
Q: My dough didn’t double in size after 12 hours. What should I do?
A: The rising time depends on the temperature of your kitchen. If it’s cold, it may take longer. Give it more time, up to 24 hours. You can also try placing the dough in a slightly warmer spot, like near a warm oven.
Q: Why is my boule flat and dense?
A: This could be due to several factors, including using old yeast, not letting the dough rise long enough, or deflating the dough too much when shaping it. Make sure your yeast is fresh, allow the dough ample time to rise, and handle it gently.
Q: Can I make the dough ahead of time and bake it later?
A: Yes, you can retard the dough in the refrigerator after the first rise. After the initial 12-24 hour rise at room temperature, punch down the dough, shape it, and place it on the parchment paper. Cover it well with plastic wrap and refrigerate for up to 24 hours. Let it come to room temperature for about an hour before baking.
Final Thoughts
This Mini No-Knead Boule is a testament to the fact that simple ingredients and straightforward techniques can yield incredibly delicious results. It’s a perfect bread for beginners and experienced bakers alike. So, gather your ingredients, embrace the process, and enjoy the delightful aroma of freshly baked bread filling your home. Don’t hesitate to experiment with different variations to make it your own. And, most importantly, share your baking adventures and creations with those you love!