
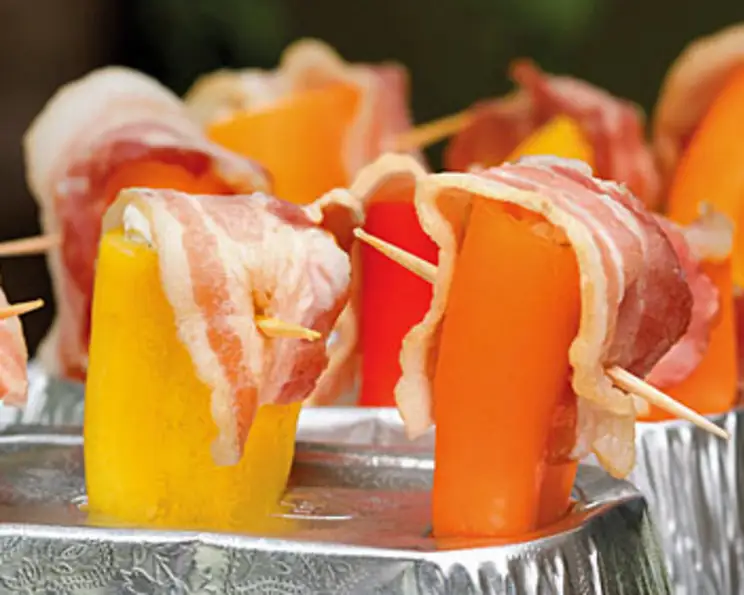
Mini Peppers Stuffed With Cheese and Topped With Bacon – Grilled
I can still picture my grandfather, apron tied tight, carefully tending to his grill on summer evenings. The aroma of sizzling bacon always hung heavy in the air, a siren call to the entire neighborhood. While he was a master of burgers and steaks, his hidden gem, and my absolute favorite, was his stuffed mini peppers. He’d let me help him core the peppers, a task I took with utmost seriousness, knowing that soon, I’d be biting into a little flavor bomb of sweet pepper, smoky bacon, and creamy cheese. These grilled mini peppers always bring me right back to those sun-drenched evenings, full of laughter and the simple joy of good food shared with family.
Recipe Overview
- Prep Time: 15 minutes
- Cook Time: 10-20 minutes
- Total Time: 25-35 minutes
- Servings: 6
- Yields: 12 peppers
- Dietary Type: Gluten-Free
Ingredients
- 12 red, yellow, and orange sweet mini bell peppers
- ½ cup garlic & herb spreadable cheese (we like Alouette)
- 6 slices bacon, halved
Equipment Needed
- Disposable aluminum pan
- Small knife or corer
- Quart-size Ziploc bag
- Grill
- Toothpicks
Instructions
-
First, prepare a pan to hold the peppers upright during grilling. A disposable aluminum pan works great. Turn the pan upside down and carefully cut holes, just large enough to hold the peppers securely, across the surface. This will keep the peppers from tipping over and spilling their cheesy goodness.
-
Wash the mini bell peppers thoroughly. Using a small knife or a corer, carefully remove the stem from each pepper. Then, cut a thin slice off the top of each pepper to create an opening for stuffing. This step requires a gentle hand to avoid damaging the pepper.
-
Using the knife or a small spoon, clean out the membrane and seeds from the inside of each pepper. Removing the seeds and membranes will ensure the filling is the star of the show and prevents any bitterness.
-
Prepare the cheese filling. Fill a quart-size Ziploc bag with the garlic & herb spreadable cheese. Press out any excess air and seal the bag tightly.
-
Snip off one corner of the Ziploc bag with scissors. This creates a makeshift piping bag for easy filling. Be sure to start with a small snip; you can always make the opening larger if needed.
-
Fill each mini bell pepper generously with the cheese mixture from the Ziploc bag. Squeeze the bag gently to control the flow of cheese, ensuring each pepper is uniformly filled. Place each filled pepper onto the prepared aluminum pan, using the holes to keep them upright.
-
Cut each slice of bacon in half.
-
Wrap each half-slice of bacon across the top of a cheese-filled pepper. Secure the bacon by inserting a toothpick through the top half of the pepper and the bacon itself. This will keep the bacon in place as it cooks and crisps up.
-
Preheat your grill to medium heat.
-
Place the pan of stuffed peppers onto the preheated grill. Grill for 10-20 minutes, or until the bacon is crisp and the cheese is melted and bubbly. Keep a close eye on the bottoms of the peppers to prevent burning. The grilling time will vary depending on the heat of your grill, so check them frequently.
-
Remove the grilled peppers from the grill and let them cool slightly before serving. The cheese will be very hot right off the grill.
-
Serve warm and enjoy!
Expert Tips & Tricks
- Make-Ahead Magic: These peppers can be assembled ahead of time and refrigerated for up to 24 hours before grilling. This is a great way to save time when entertaining.
- Cheese Swaps: If you can’t find garlic & herb spreadable cheese, feel free to use cream cheese mixed with minced garlic and your favorite herbs like chives, parsley, or dill. A little grated Parmesan cheese mixed in adds a nice salty touch.
- Bacon Bliss: For extra crispy bacon, partially cook the bacon in a pan before wrapping it around the peppers. This will give it a head start on crisping up on the grill.
- Grill Master Move: If your grill has hot spots, rotate the pan of peppers occasionally to ensure even cooking.
- Preventing Burns: If the bottoms of the peppers are browning too quickly, move the pan to a cooler part of the grill or reduce the heat slightly. You can also place a piece of aluminum foil underneath the pan to deflect some of the heat.
- Jalapeño Heat: For a spicy kick, swap out some of the sweet mini peppers with jalapeños! Be sure to wear gloves when handling jalapeños, and remove the seeds and membranes for a milder heat.
Serving & Storage Suggestions
These grilled stuffed mini peppers are best served warm, right off the grill. They make a fantastic appetizer for cookouts, parties, or even a light lunch. Arrange them artfully on a platter, garnished with a sprinkle of fresh herbs like parsley or chives.
Leftovers can be stored in an airtight container in the refrigerator for up to 3 days. To reheat, you can microwave them in short bursts until warmed through, or bake them in a preheated oven at 350°F (175°C) for about 5-10 minutes. Reheating on the grill is also an option, but watch them carefully to prevent burning. While freezing is possible, the texture of the peppers may change slightly upon thawing.
Nutritional Information
| Nutrient | Amount per Serving | % Daily Value |
|---|---|---|
| Calories | 84.2 kcal | – |
| Calories from Fat | 36 kcal | – |
| Total Fat | 4 g | 6% |
| Saturated Fat | 1.3 g | 6% |
| Cholesterol | 5.4 mg | 1% |
| Sodium | 73.8 mg | 3% |
| Total Carbohydrate | 11.1 g | 3% |
| Dietary Fiber | 4 g | 16% |
| Sugars | 5.7 g | – |
| Protein | 3 g | 5% |
Note: Nutritional information is an estimate and may vary based on specific ingredients and preparation methods.
Variations & Substitutions
- Spicy Peppers: For a fiery twist, use a combination of sweet mini peppers and jalapeños or other hot peppers.
- Cheese Variations: Experiment with different types of cheese, such as goat cheese, feta cheese, or even a spicy pepper jack cheese.
- Meat Lovers: Add cooked sausage, chorizo, or ground beef to the cheese filling for a heartier appetizer.
- Vegetarian Option: Instead of bacon, top the peppers with a sprinkle of smoked paprika or a drizzle of balsamic glaze. You could even use a vegetarian bacon substitute.
- Italian Style: Add sun-dried tomatoes, basil, and mozzarella cheese to the filling for an Italian-inspired flavor.
- Mediterranean Flair: Incorporate Kalamata olives, artichoke hearts, and feta cheese for a Mediterranean twist.
- Seasonality: In the fall, try using a pumpkin spice cream cheese for a seasonal treat.
FAQs (Frequently Asked Questions)
Q: Can I use regular-sized bell peppers instead of mini peppers?
A: Yes, you can, but you’ll need to adjust the cooking time accordingly. Larger peppers will take longer to cook through. Also, you may need to cut the bacon slices into smaller pieces to fit on top.
Q: How do I prevent the cheese from melting out of the peppers?
A: Make sure to not overfill the peppers with cheese. Also, keep the grill temperature at medium heat to prevent the cheese from melting too quickly.
Q: Can I bake these in the oven instead of grilling them?
A: Absolutely! Bake them in a preheated oven at 375°F (190°C) for 15-20 minutes, or until the bacon is crisp and the cheese is melted.
Q: What if I don’t have a Ziploc bag for piping the cheese?
A: You can use a spoon to fill the peppers, but it might be a little messier. Alternatively, you can use a pastry bag with a wide tip.
Q: Can I use different types of bacon?
A: Yes, you can use any type of bacon you like, such as turkey bacon, thick-cut bacon, or even flavored bacon. Just be mindful of the cooking time, as thicker bacon will take longer to crisp up.
Final Thoughts
These grilled mini peppers stuffed with cheese and topped with bacon are a guaranteed crowd-pleaser. They’re easy to make, bursting with flavor, and incredibly versatile. Don’t be afraid to experiment with different cheese and topping combinations to create your own signature version. So fire up that grill, gather your ingredients, and get ready to experience a little bite of summer heaven! I can’t wait to hear what variations you come up with – be sure to share your creations! And, why not serve these alongside some grilled chicken or fish for a complete and delicious meal? Enjoy!