
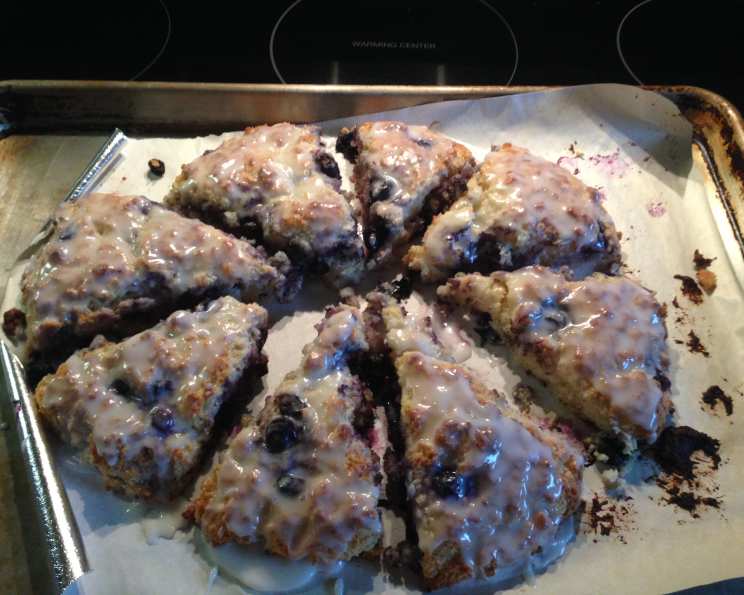
Mini Vanilla Scones (Like Starbucks)
My first job was at a small local coffee shop, and I quickly became addicted to the morning ritual of a warm scone and a latte. The vanilla scones were always my favorite. The delicate crumb, the sweet vanilla fragrance, and that simple glaze – they were the perfect treat to start the day. After moving away, I missed those scones dearly, especially the mini versions from Starbucks. I set out to recreate them, and after much experimentation, I think I’ve captured that same delightful flavor and texture.
Recipe Overview
- Prep Time: 10 minutes
- Cook Time: 15 minutes
- Total Time: 25 minutes
- Yields: 16 mini scones
- Dietary Type: Vegetarian
Ingredients
Dry Ingredients:
- 2 cups all-purpose flour (2 cups weigh 9 oz)
- 2 teaspoons baking powder
- ½ teaspoon baking soda
- ½ teaspoon salt
- ½ cup sugar
- 5 tablespoons unsalted butter, cold, cut into pieces (5 TBL weigh 70 g)
Wet Ingredients:
- 1 cup regular full-fat sour cream
- 1 large egg yolk
- 2 teaspoons vanilla extract
Glaze:
- 1 ½ cups powdered sugar
- Water, as needed
Equipment Needed
- Medium bowl
- Whisk
- Box grater
- Fork
- Spatula
- Parchment paper
- Baking sheet
- Pastry brush
- Mini scone pan (optional)
Instructions
-
Preheat your oven to 400°F (200°C). Make sure your oven rack is in the center position for even baking.
-
In a medium bowl, whisk together the flour, baking powder, baking soda, salt, and sugar. Whisking ensures that the leavening agents (baking powder and baking soda) are evenly distributed throughout the flour.
-
Now for the butter! I use a method that mimics using a pastry cutter but with less cleanup. Grate a block of cold butter against the large holes of a box grater and weigh the butter ribbons to get the amount you need (1 TBL butter = 14 grams, so 5 TBL = 70 grams). The cold butter is crucial; it creates pockets of fat within the dough, which melt during baking and produce a flaky, tender scone.
-
Toss the butter ribbons with the flour mixture. This prevents the butter from clumping together and helps it distribute more evenly. Use two knives (or a pastry cutter if you have one) to cut the flour-coated ribbons into ¼-inch pieces. This is where you’re aiming for pea-sized pieces of butter – they don’t have to be perfect!
-
In a separate bowl, whisk together the sour cream, egg yolk, and vanilla extract until blended. The sour cream adds moisture and a characteristic tang that elevates these scones. The egg yolk enriches the dough and contributes to a slightly softer texture. Do not substitute with low-fat sour cream!
-
Add the sour cream mixture to the flour-butter mixture and stir with a fork until a dough forms a cohesive ball. Use a spatula to get any dry bits fully incorporated. It may not seem to have enough liquid at first, but the dough will eventually come together. Don’t overmix; you want to maintain those butter pockets for flakiness.
-
Place the sticky dough onto a parchment-lined (or ungreased) baking sheet and pat into a disk about 1-inch in height. Cut the dough into wedges but do not separate. Or scoop the dough into a mini scone pan if available. The yield will vary depending on how big you slice the wedges. Aim for about 16 mini scones.
-
Bake for 15 minutes or until golden brown on top. Keep a close eye on them! Ovens vary, and you want them to be nicely browned but not burnt.
-
While the scones are baking, prepare the glaze. In a medium bowl, place the powdered sugar and add water one teaspoon at a time, mixing vigorously until smooth and runny. You want a consistency that’s thin enough to brush easily but thick enough to adhere to the scones.
-
Use a pastry brush to apply a thin layer of glaze over the hot scones. Brushing rather than drizzling gives a smoother appearance and requires less glaze. You can glaze them while they are still on the baking sheet.
-
Serve immediately. Store cooled scones in an airtight container.
Expert Tips & Tricks
- Keep everything cold: The colder the ingredients, especially the butter, the better the texture of your scones. Consider chilling the dry ingredients and sour cream for 15 minutes before starting.
- Don’t overmix: Overmixing develops the gluten in the flour, resulting in tough scones. Mix just until the dough comes together.
- Grate frozen butter: For an even flakier scone, freeze the butter for 15 minutes before grating.
- Add zest: For an extra burst of flavor, add the zest of one lemon or orange to the dry ingredients.
- Reheat: If your scones are a little dry the next day, pop them in a 350°F oven for a few minutes to warm them up.
Serving & Storage Suggestions
These mini vanilla scones are best served warm, straight from the oven, with a cup of coffee or tea. They make a delightful addition to brunch or a sweet treat for an afternoon snack.
To store, place cooled scones in an airtight container at room temperature for up to 2 days. For longer storage, freeze the scones in a freezer-safe bag or container for up to 2 months. To reheat frozen scones, thaw them at room temperature and then warm them in a 350°F oven for 5-10 minutes.
Nutritional Information
| Nutrient | Amount per Serving | % Daily Value |
|---|---|---|
| Calories | 189.6 kcal | N/A |
| Calories from Fat | 61 g | 33% |
| Total Fat | 6.9 g | 10% |
| Saturated Fat | 4.1 g | 20% |
| Cholesterol | 28.5 mg | 9% |
| Sodium | 170.5 mg | 7% |
| Total Carbohydrate | 30.1 g | 10% |
| Dietary Fiber | 0.4 g | 1% |
| Sugars | 17.9 g | 71% |
| Protein | 2.1 g | 4% |
Note: Nutritional information is an estimate and may vary depending on specific ingredients and portion sizes.
Variations & Substitutions
- Lemon Vanilla Scones: Add 1 tablespoon of lemon zest to the dry ingredients.
- Orange Vanilla Scones: Add 1 tablespoon of orange zest to the dry ingredients.
- Almond Vanilla Scones: Add ¼ teaspoon of almond extract to the wet ingredients.
- Chocolate Chip Vanilla Scones: Gently fold in ½ cup of mini chocolate chips into the dough before shaping.
- Gluten-Free Scones: Substitute the all-purpose flour with a gluten-free all-purpose flour blend. Be sure to use a blend that contains xanthan gum for proper binding.
FAQs (Frequently Asked Questions)
Q: Can I use low-fat sour cream?
A: No, full-fat sour cream is essential for the proper texture and flavor of these scones. Low-fat sour cream will result in a drier, less flavorful scone.
Q: Can I make the dough ahead of time?
A: Yes! You can prepare the dough, shape it into a disk, wrap it tightly in plastic wrap, and refrigerate it for up to 24 hours. Bake as directed when ready.
Q: What if I don’t have a box grater?
A: You can use a food processor to pulse the cold butter into the flour mixture until it resembles coarse crumbs. Be careful not to over-process.
Q: Can I freeze the baked scones?
A: Yes, baked scones freeze well. Allow them to cool completely before freezing in a freezer-safe bag or container.
Q: Why are my scones dry?
A: Overbaking or using too much flour can lead to dry scones. Be sure to measure the flour accurately and bake until just golden brown. Also, make sure you are using full-fat sour cream.
Final Thoughts
Now that you have the recipe for these delightful mini vanilla scones, I encourage you to give it a try. The process is simple, the ingredients are readily available, and the result is a batch of warm, sweet, and utterly irresistible scones that will rival your favorite coffee shop version. Don’t hesitate to experiment with different flavor variations to personalize them to your liking. And, of course, let me know how they turn out! Pair these scones with a steaming mug of your favorite coffee or tea and savor every bite.