
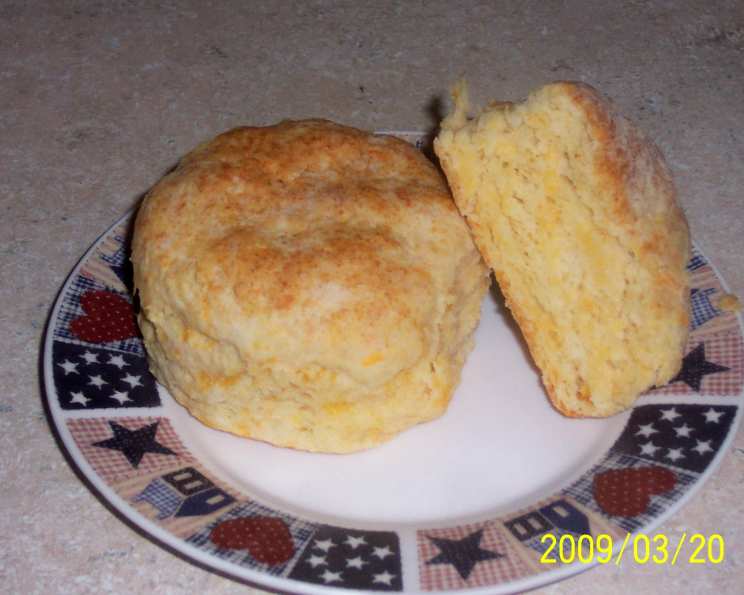
Min’s Cheap, No Buttermilk Biscuits: A Southern Staple
The scent of baking biscuits always transports me back to my grandmother’s kitchen in rural Georgia. I can almost feel the warmth of the wood-burning stove, hear her humming a gospel tune, and taste the golden, fluffy biscuits she’d pull fresh from the oven. Those weren’t fancy, complicated biscuits; they were simple, honest, and made with love – and rarely buttermilk, because, let’s face it, sometimes you just don’t have any on hand! This recipe echoes that same simplicity and resourcefulness, delivering perfect biscuits every time, no buttermilk required.
Recipe Overview
- Prep Time: 10 minutes
- Cook Time: 20-25 minutes
- Total Time: 30-35 minutes
- Servings: 6-8
- Yields: 12-15 biscuits
- Dietary Type: Vegetarian
Ingredients
- 3 cups flour
- 1 teaspoon salt
- 4 teaspoons baking powder
- ½ teaspoon cream of tartar (This is crucial!)
- ½ cup shortening (or ¼ cup butter & ¼ cup shortening)
- 1 ¼ cups milk
- 1 egg
Equipment Needed
- Large Mixing Bowl
- Measuring Cups and Spoons
- Fork or Pastry Blender
- Floured Surface
- Baking Sheet or Cast Iron Skillet
- Biscuit Cutter (or glass)
Instructions
- Preheat your oven to 400 degrees Fahrenheit (200 degrees Celsius). Ensuring the oven is fully heated is key for the biscuits to rise properly.
- In a large mixing bowl, combine the flour, salt, baking powder, and cream of tartar. Whisking these dry ingredients together ensures even distribution and a better rise.
- Cut the shortening (or butter and shortening mixture) into the dry ingredients using a fork or pastry blender. The goal is to create a coarse, crumbly mixture that resembles cornmeal. This step is critical for creating flaky layers in the biscuits. Don’t overmix!
- In a separate bowl, whisk the egg into the milk. This helps to emulsify the mixture, ensuring it incorporates smoothly into the dry ingredients.
- Pour the milk mixture into the bowl with the dry ingredients. Gently stir until just combined. Be careful not to overmix, as this will develop the gluten in the flour and result in tough biscuits. It’s okay if there are still some streaks of flour remaining.
- Turn the dough out onto a lightly floured surface. Gently pat the dough out to a thickness of about ¾ inch. Again, handle the dough as little as possible to maintain tenderness.
- Use a biscuit cutter (or a glass) to cut out the biscuits. Press straight down; avoid twisting the cutter, which can seal the edges and prevent them from rising fully.
- Place the biscuits in a preheated cast iron skillet or on a baking sheet. If using a baking sheet, consider lining it with parchment paper to prevent sticking. For a slightly crustier bottom, the cast iron skillet is preferred.
- Bake for 20-25 minutes, or until the biscuits are light golden brown. Keep a close eye on them, as baking times can vary depending on your oven. They are done when a toothpick inserted into the center comes out clean.
- Remove from the oven and let cool slightly before serving.
Expert Tips & Tricks
- Keep your ingredients cold. Cold butter or shortening creates steam during baking, which helps the biscuits rise and become flaky.
- Don’t overmix the dough. Overmixing develops the gluten in the flour, resulting in tough, dense biscuits. Mix only until the ingredients are just combined.
- Handle the dough gently. Similar to overmixing, excessive handling of the dough can also lead to tough biscuits.
- For extra-tall biscuits, place them close together on the baking sheet. This will encourage them to rise upwards rather than outwards.
- If you don’t have cream of tartar, you can substitute 1 teaspoon of lemon juice or white vinegar for every ½ teaspoon of cream of tartar. However, the cream of tartar really does improve the texture, so try to use it if possible.
- For a richer flavor, brush the tops of the biscuits with melted butter before baking.
- To make ahead, you can prepare the dough up to the cutting stage and refrigerate it for up to 24 hours. Just be sure to wrap it tightly in plastic wrap to prevent it from drying out.
Serving & Storage Suggestions
These biscuits are best served warm, straight from the oven. They’re delicious with butter, jam, honey, or gravy. They also make a great addition to breakfast sandwiches or can be served as a side with soups and stews.
- Room Temperature: Biscuits can be stored at room temperature in an airtight container for up to 2 days. They will be best on the first day.
- Refrigerator: For longer storage, store the biscuits in an airtight container in the refrigerator for up to 5 days.
- Freezer: To freeze, wrap the biscuits individually in plastic wrap and then place them in a freezer bag. They can be stored in the freezer for up to 2 months. To reheat, thaw overnight in the refrigerator or microwave for a few seconds until warmed through.
Nutritional Information
Note: Nutritional information is an estimate and may vary based on specific ingredients and portion sizes.
| Nutrient | Amount per Serving | % Daily Value |
|---|---|---|
| Calories | 425 kcal | N/A |
| Total Fat | 20 g | 31% |
| Saturated Fat | 6 g | 28% |
| Cholesterol | 42 mg | 14% |
| Sodium | 668 mg | 27% |
| Total Carbohydrate | 51 g | 17% |
| Dietary Fiber | 2 g | 6% |
| Sugars | 0 g | 0% |
| Protein | 9 g | 18% |
Variations & Substitutions
- Sweet Biscuits: Add ½ cup sugar and 1 teaspoon cinnamon to the dry ingredients, and 1 teaspoon vanilla extract to the milk mixture. For a berry twist, add about ½ cup of frozen blueberries (leave out the cinnamon for a scone-like flavor).
- Savory Italian Biscuits: Add ½ cup shredded sharp cheddar cheese, ½ teaspoon dry Italian herbs, and 1-2 teaspoons minced garlic to the dry ingredients. Brush the tops with melted butter and sprinkle with Parmesan cheese before baking.
- Breakfast Biscuits: Add ½ cup shredded cheese, 1 cup cooked meat (sausage, bacon, or ham), and 2 cooked/scrambled eggs for take-and-go breakfast biscuits. Mix the cheese, meat, and eggs with the flour before adding the wet ingredients.
- Dairy-Free Biscuits: Substitute the milk with your favorite plant-based milk, such as almond, soy, or oat milk. Ensure the shortening you use is also dairy-free.
- Gluten-Free Biscuits: Substitute the all-purpose flour with a gluten-free all-purpose flour blend. You may need to adjust the amount of liquid depending on the blend you use.
FAQs (Frequently Asked Questions)
Q: Why is cream of tartar important in this recipe?
A: Cream of tartar helps the biscuits rise and stay tender by stabilizing the baking powder and preventing the dough from collapsing. It contributes to a lighter, more delicate texture.
Q: Can I use all butter instead of shortening?
A: While you can use all butter, the biscuits will be more prone to spreading and may not rise as high. Using a combination of butter and shortening provides the best of both worlds: flavor and tenderness.
Q: What if I don’t have a biscuit cutter?
A: A glass with a sharp edge works perfectly well as a biscuit cutter. Just make sure it’s clean and dry.
Q: How can I prevent my biscuits from being dry?
A: Avoid overbaking them. Start checking for doneness around 20 minutes, and remove them from the oven as soon as they’re lightly golden brown.
Q: Can I freeze the biscuit dough before baking?
A: Yes, you can freeze the biscuit dough. After cutting out the biscuits, place them on a baking sheet lined with parchment paper and freeze until solid. Then, transfer them to a freezer bag. Bake directly from frozen, adding a few extra minutes to the baking time.
Final Thoughts
These simple, no-buttermilk biscuits are a testament to the resourcefulness and warmth of Southern cooking. They are a blank canvas for your creativity, whether you crave a sweet treat or a savory side. So, gather your ingredients, preheat your oven, and experience the joy of homemade biscuits. Don’t be afraid to experiment with variations and find your own perfect biscuit recipe. And, most importantly, share your creations with friends and family – because biscuits are always better when shared.