
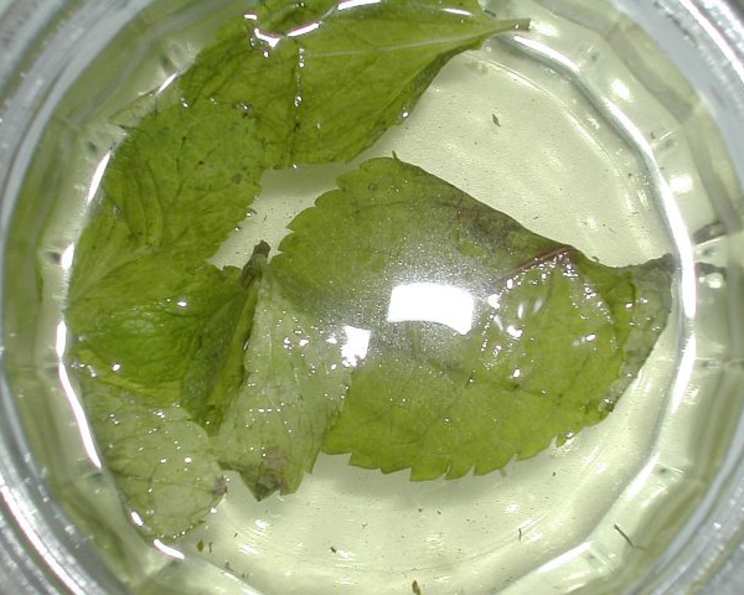
Crafting the Perfect Mint Vinegar: A Chef’s Guide
The memory is as clear as the summer sky: my grandmother, Nana Rose, standing in her sun-drenched garden, carefully clipping sprigs of fresh mint. The aroma, a vibrant blend of sweet and sharp, always signaled the start of something special. She’d use that mint to make everything from iced tea to lamb sauce, but it was her mint vinegar that truly captured my imagination. It wasn’t just a condiment; it was sunshine in a bottle, a vibrant reminder of her love and the bounty of her garden, a tradition I’m excited to share.
Recipe Overview
- Prep Time: 15 minutes
- Cook Time: 0 minutes (Steeping time: 2-3 weeks)
- Total Time: 336 hours and 1 minute
- Yield: 1 cup
- Dietary Type: Vegan, Gluten-Free, Dairy-Free
Ingredients
- 2 cups fresh mint leaves, chopped and bruised
- 1 cup white vinegar
- 3 fresh mint leaves (optional, for decorative purposes)
Equipment Needed
- Measuring cups
- Cutting board
- Knife
- Large jar or container with a tight-fitting lid
- Fine-mesh strainer
- Decorative bottle
Instructions
-
Begin by preparing your fresh mint leaves. Wash them thoroughly and pat them dry with a clean kitchen towel. This step is crucial to remove any dirt or debris that may affect the flavor of your vinegar.
-
Next, chop the mint leaves coarsely. This will help to release their flavorful oils into the vinegar. Once chopped, lightly bruise the leaves. Bruising, which can be done by gently crushing the leaves with the back of a spoon or rolling them between your fingers, further enhances the extraction of their essence.
-
Place the chopped and bruised mint leaves into a clean, large jar or container.
-
Carefully pour the white vinegar over the mint leaves, ensuring that they are completely submerged. The vinegar acts as a solvent, drawing out the aromatic compounds from the mint.
-
Cover the jar tightly with a lid. This is important to prevent evaporation and contamination.
-
Steep the mixture in a cool, dark place for 2-3 weeks. This extended steeping period allows the vinegar to fully infuse with the flavor of the mint. Be patient; the longer it steeps, the more intense the flavor will become.
-
After the steeping period, strain the vinegar through a fine-mesh strainer into a clean bowl or measuring cup. Be sure to press the mint leaves against the strainer with a spoon or spatula to extract every last drop of the infused vinegar. This step maximizes the yield and flavor of your final product.
-
Pour the strained mint vinegar into a decorative bottle.
-
(Optional) Add a few fresh, unbruised mint leaves to the bottle for decorative purposes. This enhances the visual appeal of your homemade mint vinegar, making it a beautiful and thoughtful gift.
Expert Tips & Tricks
- Vinegar Choice: While white vinegar is called for in the recipe, consider using apple cider vinegar for a slightly sweeter and more complex flavor profile.
- Mint Variety: Experiment with different varieties of mint, such as peppermint, spearmint, or chocolate mint, to create unique flavor combinations.
- Sunlight Sensitivity: Avoid steeping the vinegar in direct sunlight, as this can degrade the flavor and color.
- Flavor Intensity: Taste the vinegar after 2 weeks. If the mint flavor isn’t strong enough, continue steeping for another week.
- Clarifying the Vinegar: If your vinegar appears cloudy after straining, you can clarify it by passing it through a coffee filter lined with cheesecloth.
Serving & Storage Suggestions
Mint vinegar is incredibly versatile. It’s excellent as a marinade for chicken or fish, adding a bright, herbaceous note. Use it to deglaze a pan after sautéing vegetables or to create a vibrant vinaigrette for salads. A splash of mint vinegar can also elevate a simple glass of sparkling water or a classic cocktail.
Store your homemade mint vinegar in a cool, dark place. When stored properly, it can last for several months without significant degradation in flavor. No refrigeration is required.
Nutritional Information
Note: Nutritional information is an estimate and may vary based on specific ingredients used.
| Nutrient | Amount per Serving | % Daily Value |
|---|---|---|
| Calories | 86 kcal | N/A |
| Calories from Fat | 4 kcal | N/A |
| Total Fat | 0.5 g | 0% |
| Saturated Fat | 0.1 g | 0% |
| Cholesterol | 0 mg | 0% |
| Sodium | 27.8 mg | 1% |
| Total Carbohydrate | 9.8 g | 3% |
| Dietary Fiber | 4.1 g | 16% |
| Sugars | 1 g | 3% |
| Protein | 1.9 g | 3% |
Variations & Substitutions
- Infused with Herbs: Add other herbs like basil, rosemary, or thyme to the mint for a more complex flavor profile.
- Spicy Kick: Include a small chili pepper during the steeping process for a touch of heat.
- Fruity Notes: Add a few berries, such as raspberries or strawberries, for a subtle fruity undertone. Just be sure to monitor for spoilage.
- Sweetness: Add a teaspoon of honey or maple syrup to the vinegar after straining for a touch of sweetness.
FAQs (Frequently Asked Questions)
Q: Can I use dried mint instead of fresh mint?
A: While fresh mint is recommended for the best flavor, you can use dried mint in a pinch. Use about half the amount of dried mint as you would fresh mint. Keep in mind that the flavor will not be as vibrant.
Q: How long does mint vinegar last?
A: When stored properly in a cool, dark place, mint vinegar can last for several months. The flavor may mellow slightly over time, but it should still be perfectly usable.
Q: Can I use a different type of vinegar?
A: Yes, you can experiment with different types of vinegar, such as apple cider vinegar, rice vinegar, or even red wine vinegar. Each type of vinegar will impart a slightly different flavor to the final product.
Q: What can I use mint vinegar for?
A: Mint vinegar is incredibly versatile. It can be used as a marinade, salad dressing, sauce, or even as a flavoring agent for drinks.
Q: My vinegar turned brown. Is it still safe to use?
A: The vinegar turning brown is a natural process and is generally safe. However, if the vinegar develops an off-putting odor or appears moldy, it’s best to discard it.
Final Thoughts
Making mint vinegar is more than just a recipe; it’s an invitation to connect with the flavors of your garden and create something truly special. It’s a tangible way to capture the essence of summer, bottling the brightness and freshness that only mint can provide. So, I encourage you to try this recipe, experiment with different variations, and share your creations with friends and family. You might just discover your own signature mint vinegar that becomes a cherished tradition for years to come. Enjoy!