
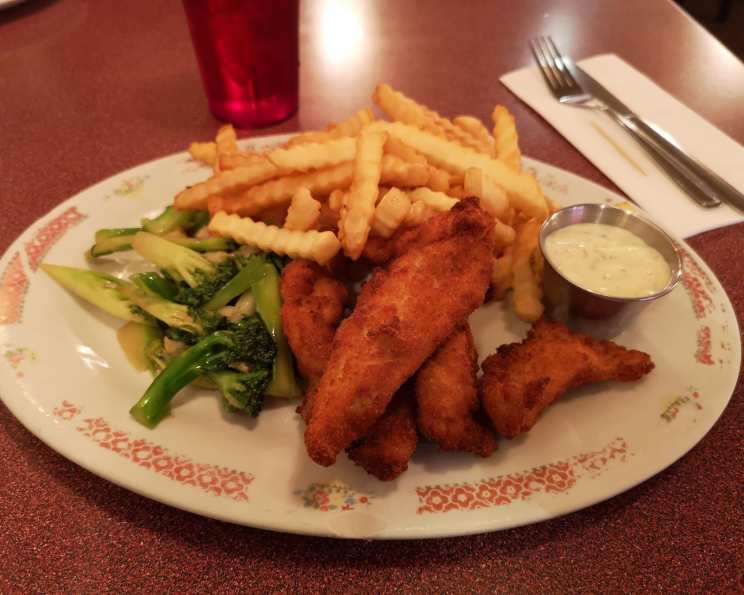
Mitzi’s Chicken Fingers: A Culinary Classic
The scent of these chicken fingers instantly transports me back to childhood family trips. We would always stop at this little unassuming restaurant, and I swear, I could smell those crispy, golden-brown delights before we even parked the car. The first bite was always pure bliss – juicy chicken encased in a perfectly crunchy coating, dipped generously in the sweet and tangy honey-dill sauce. These aren’t just chicken fingers; they’re a cherished memory on a plate.
Recipe Overview
- Prep Time: 20 minutes
- Cook Time: 10-15 minutes (depending on batch sizes)
- Total Time: 30-35 minutes
- Servings: 6-8
- Yield: Varies based on chicken size
- Dietary Type: Not Gluten-Free, Not Dairy-Free (due to mayonnaise in dipping sauce)
Ingredients
For the Honey-Dill Dipping Sauce:
- 1 1/2 cups mayonnaise
- 1/4 cup honey
- 2 tablespoons roughly chopped fresh dill
- 2 tablespoons fresh lemon juice
- 1 tablespoon dry mustard
- Kosher salt, to taste
- Fresh ground black pepper, to taste
For the Chicken Fingers:
- 2 lbs chicken breasts, cut into 3-inch long, 1-inch wide strips (boneless, skinless)
- 1 tablespoon sugar
- 1 tablespoon kosher salt
- 1 tbsp freshly ground black pepper
- 1 1/2 teaspoons garlic powder
- 1 teaspoon paprika
- 1 teaspoon dry mustard
- 1 cup flour
- 4 eggs, lightly beaten
- 3 cups finely ground fresh breadcrumbs or 3 cups panko breadcrumbs
Equipment Needed
- Medium bowl
- Whisk
- Three shallow dishes
- 6-quart Dutch oven
- Deep fry thermometer
- Paper towels
Instructions
-
Prepare the Dipping Sauce: In a medium bowl, whisk together the mayonnaise with the honey, dill, mustard powder, and lemon juice. Season with salt and pepper to your preference. Stir until the sauce is smooth and well combined. Set the honey-dill dipping sauce aside. You can even make this a day ahead for the flavors to meld!
-
Marinate the Chicken: In another medium bowl, toss the chicken strips with the sugar, salt, pepper, garlic powder, paprika, and dry mustard. Ensure the chicken is evenly coated with the spices. This step is crucial for flavorful chicken fingers; let the chicken marinate for at least 15 minutes, or even longer in the refrigerator (up to a few hours) for enhanced flavor.
-
Set Up the Breading Station: Place the flour, lightly beaten eggs, and breadcrumbs (either finely ground fresh breadcrumbs or panko) in three separate shallow dishes. A well-organized breading station makes the process smoother and less messy.
-
Heat the Oil: Pour oil to a depth of 2 inches into a 6-quart Dutch oven. Heat the oil over medium-high heat until a deep fry thermometer reads 325 degrees Fahrenheit. Maintaining the correct oil temperature is vital for achieving golden-brown, crispy chicken fingers without burning them. If you don’t have a deep fry thermometer, test the oil by dropping a small piece of breadcrumb into it; if it sizzles and browns within seconds, the oil is ready.
-
Bread the Chicken: Working in batches, dredge each chicken strip in the flour, shaking off any excess. Next, dip the floured chicken into the eggs, ensuring it is fully coated. Finally, coat the egg-dipped chicken in the breadcrumbs, pressing gently to adhere. Make sure the chicken is completely covered with breadcrumbs for maximum crispiness.
-
Fry the Chicken: Carefully lower the breaded chicken fingers into the hot oil, working in batches to avoid overcrowding the Dutch oven, which can lower the oil temperature. Fry the chicken until it is golden brown and crisp, approximately 3 minutes per batch. Monitor the color closely to prevent burning.
-
Drain and Cool: Using a slotted spoon or spider, transfer the fried chicken fingers to a plate lined with paper towels to drain excess oil. This step is essential for ensuring the chicken fingers are crispy and not greasy.
-
Serve: Serve the hot, crispy chicken fingers immediately with the honey-dill dipping sauce.
Expert Tips & Tricks
- Spice It Up: Add a pinch of cayenne pepper to the flour mixture for a subtle kick.
- Breadcrumb Boost: Mix grated Parmesan cheese into the breadcrumbs for added flavor and a deeper golden color.
- Prevent Soggy Chicken: Ensure the oil temperature is consistent; too low, and the chicken will absorb excess oil and become soggy.
- Marinating Magic: Marinating the chicken in a mixture of buttermilk and hot sauce for at least 30 minutes before breading will tenderize the chicken and add a delicious tang.
- Breading Pro-Tip: Double dip! For an extra crispy coating, dip the chicken in flour, then egg, then breadcrumbs, then egg again, and finally breadcrumbs one last time.
- Oven-Baked Option: For a healthier alternative, you can bake the breaded chicken fingers in a preheated oven at 400°F (200°C) for about 15-20 minutes, flipping halfway through, until golden brown and cooked through. Spray them lightly with cooking oil for extra crispness.
Serving & Storage Suggestions
Serve Mitzi’s Chicken Fingers immediately while they’re hot and crispy alongside the honey-dill dipping sauce. Arrange them artfully on a platter with a side of coleslaw or french fries for a complete meal.
Leftover chicken fingers can be stored in an airtight container in the refrigerator for up to 3 days. Reheat them in a preheated oven at 350°F (175°C) for about 10-15 minutes, or until heated through and crispy. You can also reheat them in an air fryer for a similar result. Avoid microwaving, as this will make them soggy.
Freezing is also an option. Allow the cooked chicken fingers to cool completely, then arrange them in a single layer on a baking sheet and freeze for about an hour. Once frozen, transfer them to a freezer-safe bag or container. They can be stored in the freezer for up to 2 months. To reheat, bake them directly from frozen in a preheated oven at 375°F (190°C) for about 20-25 minutes, or until heated through and crispy.
Nutritional Information
| Nutrient | Amount per Serving | % Daily Value |
|---|---|---|
| Calories | 889 kcal | N/A |
| Calories from Fat | 363 g | 41% |
| Total Fat | 40.4 g | 62% |
| Saturated Fat | 8.7 g | 43% |
| Cholesterol | 236.1 mg | 78% |
| Sodium | 2120.5 mg | 88% |
| Total Carbohydrate | 84.3 g | 28% |
| Dietary Fiber | 3.4 g | 13% |
| Sugars | 21.3 g | N/A |
| Protein | 46.2 g | 92% |
Please note that these are approximate values and may vary based on specific ingredients and portion sizes.
Variations & Substitutions
- Gluten-Free: Substitute the all-purpose flour with a gluten-free flour blend and use gluten-free breadcrumbs.
- Dairy-Free Dipping Sauce: Replace the mayonnaise with a vegan mayonnaise alternative.
- Spicy Chicken Fingers: Add a dash of cayenne pepper or hot sauce to the chicken marinade or breadcrumb mixture.
- Herb-Infused Breadcrumbs: Mix in dried herbs like thyme, rosemary, or oregano into the breadcrumbs for an aromatic twist.
- Parmesan Crust: Add grated Parmesan cheese to the breadcrumbs for a cheesy and savory flavor.
- Honey Mustard Dipping Sauce: For a variation on the dipping sauce, use honey mustard instead of honey-dill.
FAQs (Frequently Asked Questions)
Q: Can I use chicken thighs instead of chicken breasts?
A: Yes, you can use boneless, skinless chicken thighs, but the cooking time might need to be slightly adjusted to ensure they are cooked through.
Q: Can I make the chicken fingers ahead of time?
A: You can bread the chicken fingers ahead of time and store them in the refrigerator for up to 24 hours before frying. Make sure to cover them tightly to prevent them from drying out.
Q: What’s the best way to keep the chicken fingers warm if I’m making a large batch?
A: Place the cooked chicken fingers on a wire rack in a preheated oven at 200°F (95°C) to keep them warm and crispy until serving.
Q: Can I use an air fryer instead of deep frying?
A: Absolutely! Air frying is a healthier alternative. Preheat your air fryer to 400°F (200°C) and cook the chicken fingers for about 10-12 minutes, flipping halfway through, until golden brown and cooked through.
Q: What if I don’t have fresh dill for the dipping sauce?
A: You can use dried dill as a substitute, but fresh dill provides a brighter, more vibrant flavor. Use about 1 teaspoon of dried dill for every 1 tablespoon of fresh dill.
Final Thoughts
Mitzi’s Chicken Fingers are more than just a simple recipe; they’re a delightful culinary experience waiting to be rediscovered. I hope this recipe brings as much joy to your table as it has to mine. Don’t be afraid to experiment with different spices and variations to create your own unique twist on this classic dish. And please, share your creations and feedback – I’d love to hear how they turned out! Perhaps pair these golden delights with a refreshing homemade lemonade or a crisp, light beer for the perfect meal. Happy cooking!