
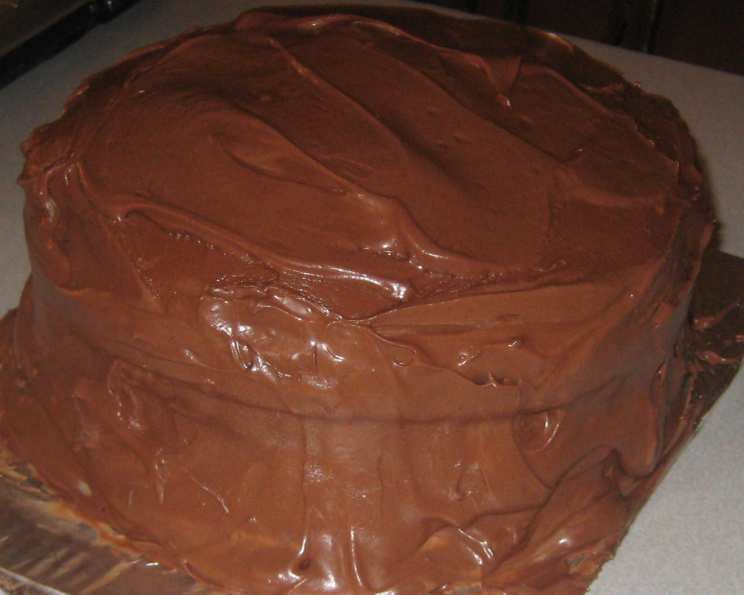
Decadent Mocha Fudge Layer Cake: A Slice of Sweet Nostalgia
My grandmother, bless her heart, wasn’t much of a baker. Her pies were legendary for their hockey-puck crusts, and her cookies often resembled misshapen asteroids. But there was one exception, one single, glorious recipe she absolutely nailed: her mocha fudge layer cake. The aroma of coffee and chocolate, swirling together as it baked, is etched in my memory. Every birthday, every holiday, this cake reigned supreme, a testament to the power of a truly special recipe. And while my grandmother is no longer with us, I carry on her legacy with this recipe – tweaked and perfected, but always true to the spirit of her love-filled creation.
Recipe Overview
- Prep Time: 45 minutes
- Cook Time: 30-35 minutes
- Total Time: 1 hour 15-20 minutes
- Servings: 12
- Yield: 1 cake
- Dietary Type: Not Gluten-Free
Ingredients
For the Cake:
- 3 (1 ounce) squares unsweetened chocolate
- 1/2 cup (1 stick) butter, softened
- 2 1/4 cups firmly packed brown sugar
- 3 eggs
- 1 1/2 teaspoons vanilla extract
- 2 1/4 cups cake flour, sifted
- 2 teaspoons baking soda
- 1/2 teaspoon salt
- 8 ounces sour cream
- 1 cup boiling water
For the Filling:
- 1 1/2 cups whipping cream
- 1 teaspoon vanilla extract
- 1/2 cup powdered sugar, sifted
For the Mocha Frosting:
- 1/2 cup (1 stick) butter, softened
- 5 cups powdered sugar, sifted
- 1/4 cup cocoa
- 1/4 cup brewed coffee, cooled
- 2 teaspoons vanilla extract
- 2 tablespoons whipping cream (optional, for thinning)
Equipment Needed
- Two 8-inch round cake pans
- Mixing bowls
- Electric mixer
- Sifter
- Rubber spatula
- Wire racks
- Measuring cups and spoons
- Toothpick
- Saucepan or microwave-safe bowl (for melting chocolate)
- Offset spatula or knife for frosting
Instructions
-
Prepare the Chocolate: Begin by melting the unsweetened chocolate. You can do this in a double boiler over simmering water or in a microwave-safe bowl in 30-second intervals, stirring in between, until smooth. Set aside to cool slightly. It’s crucial that the chocolate is not too hot when you add it to the batter, as this can cook the eggs.
-
Cream Butter and Sugar: In a large mixing bowl, cream together the softened butter and brown sugar using an electric mixer. Beat until the mixture is light and fluffy. This process incorporates air into the batter, resulting in a tender cake.
-
Incorporate Eggs and Vanilla: Add the eggs one at a time, beating well after each addition. This ensures that each egg is fully incorporated and helps to create a smooth emulsion. Stir in the vanilla extract and the cooled, melted chocolate. Mix until well combined.
-
Combine Dry Ingredients: In a separate bowl, sift together the cake flour, baking soda, and salt. Sifting the flour is essential for a light and airy cake.
-
Alternate Wet and Dry Ingredients: Gradually add the dry ingredients to the creamed mixture, alternating with the sour cream. Begin and end with the flour mixture. Mix until just combined; be careful not to overmix, as this can develop the gluten in the flour and result in a tough cake.
-
Stir in Boiling Water: Stir in the boiling water. The batter will be thin. Don’t be alarmed; this is normal. The hot water helps to bloom the cocoa in the chocolate and creates a moist, fudgy texture.
-
Prepare Cake Pans: Grease and flour two 8-inch round cake pans. This will prevent the cakes from sticking to the pans and ensure easy removal. You can also line the bottoms of the pans with parchment paper rounds for extra insurance.
-
Bake the Cakes: Pour the batter evenly into the prepared cake pans. Bake in a preheated oven at 350°F (175°C) for 30 to 35 minutes, or until a toothpick inserted into the center comes out clean.
-
Cool the Cakes: Let the cakes cool in the pans for 10 minutes before inverting them onto wire racks to cool completely. This prevents the cakes from sticking to the pans and allows them to retain their shape.
-
Split the Cake Layers: Once the cakes are completely cool, use a long, serrated knife to carefully split each cake layer in half horizontally, creating four layers in total. A cake leveler can also be used for this if you have one.
-
Prepare the Filling: In a chilled mixing bowl, beat the whipping cream, vanilla extract, and powdered sugar together using an electric mixer until soft peaks form. Be careful not to overwhip, as this can turn the cream into butter.
-
Assemble the Cake: Place one cake layer on a serving plate or cake stand. Spread a generous layer of the whipped cream filling over the cake. Repeat with the remaining cake layers and filling, ending with a cake layer on top.
-
Prepare the Mocha Frosting: In a large mixing bowl, beat the softened butter, powdered sugar, cocoa, brewed coffee, and vanilla extract together using an electric mixer until light and fluffy. If the frosting is too thick, add the whipping cream one tablespoon at a time until it reaches the desired consistency.
-
Frost the Cake: Frost the top and sides of the cake with the mocha frosting. You can use an offset spatula or a knife to create a smooth, even finish or a more textured, rustic look.
-
Chill the Cake: Refrigerate the cake for at least 30 minutes before serving to allow the frosting to set. This will also make it easier to slice and serve.
Expert Tips & Tricks
- For a more intense chocolate flavor, add a tablespoon of instant espresso powder to the boiling water.
- If you don’t have cake flour, you can make your own by measuring out 2 1/4 cups of all-purpose flour, removing 4 1/2 tablespoons, and replacing it with 4 1/2 tablespoons of cornstarch. Sift the mixture together several times to ensure it’s well combined.
- To prevent the cake layers from drying out, wrap them tightly in plastic wrap while they cool.
- If your frosting is too sweet, add a pinch of salt to balance the flavors.
- For a decorative touch, sprinkle the frosted cake with chocolate shavings or cocoa powder.
Serving & Storage Suggestions
Serve the mocha fudge layer cake chilled or at room temperature. It pairs perfectly with a cup of coffee, a glass of milk, or a scoop of vanilla ice cream. Leftovers can be stored in an airtight container in the refrigerator for up to 3 days. For longer storage, you can freeze the cake for up to 2 months. Thaw it overnight in the refrigerator before serving.
Nutritional Information
| Nutrient | Amount per Serving | % Daily Value |
|---|---|---|
| Calories | 817 kcal | N/A |
| Total Fat | 36.9g | 56% |
| Saturated Fat | 22.5g | 112% |
| Cholesterol | 146.5mg | 48% |
| Sodium | 475.4mg | 19% |
| Total Carbohydrate | 120.2g | 40% |
| Dietary Fiber | 1.9g | 7% |
| Sugars | 94.1g | N/A |
| Protein | 6.4g | 12% |
Note: Nutritional information is an estimate and may vary based on specific ingredients and portion sizes.
Variations & Substitutions
- Gluten-Free: Substitute the cake flour with a gluten-free all-purpose flour blend. You may also need to add a binder like xanthan gum to help with the structure.
- Dairy-Free: Replace the butter with a dairy-free butter alternative, the sour cream with a dairy-free sour cream substitute, and the whipping cream with a coconut cream alternative.
- Spiced Mocha: Add 1 teaspoon of ground cinnamon and 1/2 teaspoon of ground nutmeg to the dry ingredients for a warm, spiced flavor.
- Chocolate Chips: Fold in 1 cup of chocolate chips to the cake batter for an extra chocolatey treat.
FAQs (Frequently Asked Questions)
Q: Can I make this cake ahead of time?
A: Yes, you can bake the cake layers a day or two in advance and store them tightly wrapped in plastic wrap at room temperature. You can also make the frosting ahead of time and store it in the refrigerator for up to 3 days.
Q: Why is my cake dry?
A: Overbaking is the most common cause of dry cake. Be sure to check the cake for doneness using a toothpick and remove it from the oven as soon as the toothpick comes out clean.
Q: Can I use regular coffee instead of brewed coffee in the frosting?
A: Yes, you can use regular coffee, but make sure it’s cooled before adding it to the frosting.
Q: Can I freeze the frosted cake?
A: Yes, you can freeze the frosted cake. Wrap it tightly in plastic wrap and then in aluminum foil. It can be stored in the freezer for up to 2 months. Thaw it overnight in the refrigerator before serving.
Q: What if my frosting is too thick?
A: Add whipping cream one tablespoon at a time until the frosting reaches the desired consistency.
Final Thoughts
This mocha fudge layer cake is more than just a dessert; it’s a slice of comfort, a taste of nostalgia, and a celebration of simple pleasures. Don’t be intimidated by the number of steps – each one is straightforward and rewarding. I encourage you to give this recipe a try, share it with your loved ones, and create your own sweet memories. Perhaps pair it with a scoop of vanilla bean ice cream and a steaming mug of espresso. And don’t hesitate to share your creations and feedback! Happy baking!