
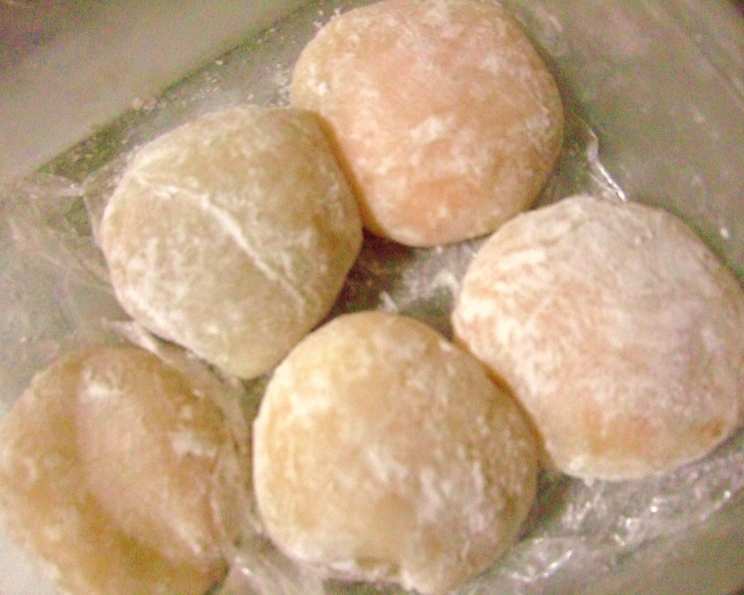
Mochi Ice Cream: A Sweet, Chewy Delight
The first time I tasted mochi ice cream, I was wandering through a bustling night market in Kyoto. The soft, chewy exterior gave way to a burst of cold, creamy mango ice cream, and the combination was pure magic. It was unlike anything I’d ever had – a textural and flavor explosion that instantly transported me to a world of culinary wonder. From that moment on, I was determined to learn the secrets of this delightful treat.
Recipe Overview
- Prep Time: 30 minutes
- Cook Time: 2 minutes 30 seconds
- Total Time: 32 minutes 30 seconds
- Servings: 10
- Yield: 10 mochi ice cream balls
- Dietary Type: Varies based on ice cream used
Ingredients
- 10 scoops of your favorite ice cream (scoop softened ice cream into round balls, and refreeze until hardened)
- 100 g glutinous-rice flour
- 180 ml water
- 50 g sugar
- Cornflour, for dusting
Equipment Needed
- Glass bowl
- Microwave oven
- Plastic wrap
- Chopping board
- Airtight container
Instructions
-
Begin by preparing your ice cream. Scoop 10 balls of your favorite ice cream. Place the scoops on a baking sheet lined with parchment paper and refreeze them until they are very firm – at least 2 hours, or even better, overnight. This step is crucial to prevent the ice cream from melting too quickly when you wrap it in the mochi dough.
-
In a microwave-safe glass bowl, combine 100 g of glutinous rice flour and 180 ml of water. Mix well until you have a smooth paste with no lumps. This mixture will form the base of your mochi dough.
-
Add 50 g of sugar to the mixture and stir until it is completely dissolved. The sugar adds sweetness and helps to create the characteristic chewy texture of mochi.
-
Cover the bowl tightly with plastic wrap. This prevents the mochi from drying out during the cooking process.
-
Microwave the covered bowl on high for 2 minutes. This initial burst of heat will start the cooking process and partially gelatinize the rice flour.
-
Carefully remove the bowl from the microwave (it will be hot!). The mixture will look partially cooked at this stage. Stir well while it is still hot. This helps to distribute the heat evenly and ensure that the mochi cooks properly.
-
Cover the bowl again with plastic wrap and return it to the microwave for another 30 seconds. This final burst of heat will finish the cooking process.
-
Remove the bowl from the microwave and stir well once more. The mochi dough should now be translucent and sticky. If it still looks too wet or uncooked, microwave it for another 10-15 seconds, but be careful not to overcook it.
-
Lay a large sheet of plastic wrap over a chopping board. Generously dust the plastic wrap with cornflour. This is essential to prevent the sticky mochi dough from sticking to the surface and your hands. Don’t be shy with the cornflour!
-
Carefully pour the hot mochi dough onto the prepared plastic wrap. Allow the dough to cool down slightly – enough so that you can handle it without burning yourself, but while it is still pliable.
-
Dust your hands liberally with cornflour. Divide the cooled mochi dough into 10 equal pieces. You can use a knife or a dough scraper to make clean cuts.
-
Working quickly, flatten one piece of dough with your palm into a small circle, about 3-4 inches in diameter. The dough will be very sticky, so make sure to keep your hands and the work surface well-dusted with cornflour.
-
Take one of the frozen ice cream balls and place it in the center of the flattened dough circle. Gently wrap the dough around the ice cream, pinching the edges together to seal it completely.
-
Roll the mochi-covered ice cream ball in more cornflour to prevent sticking.
-
Repeat steps 12-14 with the remaining dough and ice cream balls.
-
Place the finished mochi ice cream balls in an airtight container and refreeze them for at least 1 hour before serving. This will help the mochi dough to firm up and adhere to the ice cream.
Expert Tips & Tricks
- Ice Cream Consistency is Key: Ensure your ice cream is rock-hard before wrapping it. If it’s too soft, it will melt into the mochi, creating a messy result.
- Cornflour is Your Friend: Don’t skimp on the cornflour. It’s what prevents the mochi from sticking everywhere. You can also use potato starch for similar results.
- Microwave Timing: Microwave power varies, so adjust the cooking time accordingly. Look for a translucent, slightly sticky dough. If it’s too dry, add a teaspoon of water and microwave for a few more seconds.
- Dough Temperature: Work with the dough while it’s still warm and pliable, but not so hot that it melts the ice cream.
- Flavor Combinations: Experiment with different ice cream flavors! Green tea, strawberry, and chocolate are all popular choices. You can also add a small amount of flavoring to the mochi dough itself, like a drop of vanilla extract or a pinch of matcha powder.
- Make Ahead: Mochi ice cream can be made well in advance and stored in the freezer for several weeks.
Serving & Storage Suggestions
Serve your homemade mochi ice cream straight from the freezer for the best texture. Allow it to sit at room temperature for a minute or two before eating to soften slightly. Dust with a little extra cornflour or a sprinkle of matcha powder for an elegant presentation.
Store any leftover mochi ice cream in an airtight container in the freezer. They will keep for up to a month, but are best enjoyed within a week or two for optimal freshness and texture. Do not store at room temperature, as the ice cream will melt.
Nutritional Information
| Nutrient | Amount per Serving | % Daily Value |
|---|---|---|
| Calories | 192.6 kcal | N/A |
| Calories from Fat | N/A | 35% |
| Total Fat | 7.4 g | 11% |
| Saturated Fat | 4.5 g | 22% |
| Cholesterol | 29 mg | 9% |
| Sodium | 53.4 mg | 2% |
| Total Carbohydrate | 28.6 g | 9% |
| Dietary Fiber | 0.7 g | 2% |
| Sugars | 19 g | 76% |
| Protein | 2.9 g | 5% |
Note: Nutritional information is an estimate and will vary depending on the specific ice cream used.
Variations & Substitutions
- Gluten-Free: This recipe is naturally gluten-free, as it uses glutinous rice flour.
- Vegan: Use your favorite dairy-free ice cream and ensure that the sugar used is vegan-friendly (some refined sugars are processed using bone char).
- Flavor Variations:
- Matcha Mochi: Add 1-2 teaspoons of matcha powder to the mochi dough for a vibrant green color and earthy flavor.
- Chocolate Mochi: Add 1-2 tablespoons of cocoa powder to the mochi dough for a chocolatey twist.
- Fruit Infusion: Puree a small amount of fruit (like strawberries or mangoes) and add it to the mochi dough for a natural flavor and color.
- Sweet Potato Mochi: Add a little sweet potato powder into the dough for a unique flavor.
FAQs (Frequently Asked Questions)
Q: Why is my mochi dough sticky?
A: Mochi dough is naturally sticky due to the glutinous rice flour. Make sure to use plenty of cornflour when handling it to prevent sticking.
Q: Can I use regular rice flour instead of glutinous rice flour?
A: No, you must use glutinous rice flour (also known as sweet rice flour) to achieve the characteristic chewy texture of mochi. Regular rice flour will not work.
Q: My ice cream is melting too quickly when I wrap it in the mochi dough. What can I do?
A: Make sure your ice cream is very firm, almost rock-hard, before wrapping it. You can also work in a very cold environment, like a chilled kitchen.
Q: How long can I store mochi ice cream in the freezer?
A: Mochi ice cream can be stored in the freezer for up to a month, but it is best enjoyed within a week or two for optimal freshness and texture.
Q: Can I make the mochi dough in advance?
A: It’s best to make the mochi dough fresh, as it can become hard and dry if stored for too long. However, you can prepare the ice cream balls in advance and keep them frozen until you are ready to make the mochi.
Final Thoughts
Mochi ice cream is more than just a dessert; it’s an experience. The delicate chewiness of the mochi combined with the creamy coolness of the ice cream is a delightful sensory journey that will leave you wanting more. Don’t be intimidated by the process – with a little practice and patience, you can easily create these little bites of heaven in your own kitchen. So gather your ingredients, put on some music, and get ready to embark on a mochi-making adventure! And once you’ve mastered the basics, feel free to experiment with different flavors and variations to create your own signature mochi ice cream masterpiece. Share your creations with friends and family, and let them experience the magic of this sweet, chewy delight.