
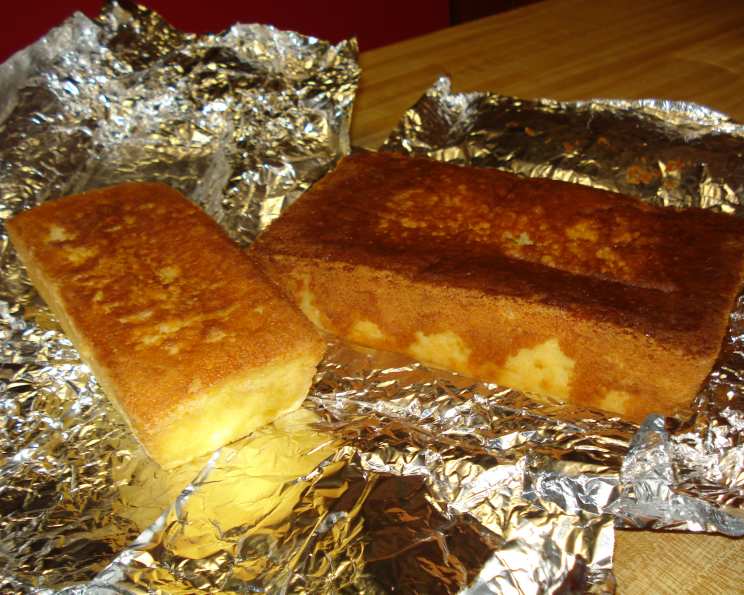
The Irresistible Allure of Heavy Cream Pound Cake
My grandmother, Nana Elsie, was a woman of few words but many delicious cakes. I remember sitting at her kitchen table, the scent of vanilla and butter clinging to the air, as she sliced a thick, golden slab of pound cake. Each bite was a symphony of textures: a slightly crisp exterior giving way to an incredibly moist, dense interior. It wasn’t just a cake; it was a hug from Nana Elsie, a sweet testament to simple ingredients transformed into something extraordinary. It was that cake that began my baking journey, a quest to recreate that perfect, comforting bite. This recipe for Heavy Cream Pound Cake comes incredibly close to her masterpiece, and I’m eager to share it with you.
Recipe Overview
- Prep Time: 20 minutes
- Cook Time: 60-70 minutes
- Total Time: 1 hour 20-30 minutes
- Servings: 10
- Yields: Two Loaves or One Bundt Cake
- Dietary Type: Not specified
Ingredients
- 3 cups granulated sugar
- 1 cup butter, softened (two sticks, no substitutions!)
- 7 large eggs
- 3 cups cake flour
- 1 cup heavy whipping cream
- 2 teaspoons vanilla extract
- Optional: 2 teaspoons lemon juice or 2 teaspoons orange juice
Equipment Needed
- Mixer (stand or hand-held)
- Sifter
- Bundt pan or two loaf pans
- Measuring cups and spoons
- Cooling rack
Instructions
-
Begin by ensuring your butter and eggs are at room temperature. Remove them from the refrigerator about 45 minutes to an hour before you plan to start baking. This is crucial for proper emulsification and a smooth batter.
-
Preheat your oven. This step is slightly unconventional but essential for this recipe’s success. Place your greased and floured Bundt pan or loaf pan(s) in the cold oven. Then, set the temperature to 350 degrees F (175 degrees C).
-
In a large mixing bowl, cream together the granulated sugar and softened butter until the mixture is light and fluffy. This process should take several minutes; don’t rush it. You want the sugar to fully incorporate into the butter.
-
Add the eggs one at a time, mixing well after each addition. This ensures that each egg is fully emulsified into the butter-sugar mixture, creating a stable batter.
-
Sift 1 1/2 cups of the cake flour into the mixture and combine gently until just incorporated. Be careful not to overmix at this stage, as overmixing develops gluten and can result in a tough cake.
-
Add the heavy whipping cream to the batter and stir until well combined. The heavy cream is the secret to the cake’s incredibly moist and dense texture.
-
Sift in the remaining 1 1/2 cups of cake flour and combine until the batter is smooth and free of lumps. Again, avoid overmixing.
-
Stir in the vanilla extract and any optional flavorings you’ve chosen, such as lemon juice or orange juice.
-
With the pan already in the cold oven, the next step is to turn on the heat to 350 degrees F (175 degrees C).
-
Bake for 60-70 minutes, or until a toothpick or cake tester inserted into the center of the cake comes out clean. Keep in mind that the baking time may vary depending on the size and shape of your pan. A smaller pan will require less baking time.
-
Once baked, remove the cake from the oven and let it cool in the pan for at least 15-20 minutes before inverting it onto a wire rack to cool completely.
-
Once the cake is completely cool, store it in an airtight container or wrap it tightly with aluminum foil to maintain its moisture.
Expert Tips & Tricks
- Room Temperature Matters: Using room temperature butter and eggs is non-negotiable for this recipe. It allows for proper emulsification, which creates a smooth batter and a tender crumb.
- Cake Flour is Key: Do not substitute all-purpose flour for cake flour. Cake flour has a lower protein content, which results in a more delicate and tender cake.
- Don’t Overmix: Overmixing develops gluten, leading to a tough cake. Mix until just combined after adding the flour.
- Cold Start: Placing the cake in a cold oven helps it rise more evenly. This technique also contributes to the cake’s signature dense and moist texture.
- Flavor Boost: Experiment with different extracts like almond, maple, or lemon. You can also add a tablespoon of citrus zest for an extra burst of flavor.
- Browning: If the cake starts to brown too quickly, tent it loosely with aluminum foil for the last 15-20 minutes of baking.
Serving & Storage Suggestions
This Heavy Cream Pound Cake is delicious served on its own, but it’s also incredibly versatile. Serve it with a dollop of whipped cream and fresh berries, a scoop of vanilla ice cream, or a drizzle of chocolate ganache. It’s also fantastic toasted and served with butter and jam for breakfast.
To store, wrap the cake tightly in plastic wrap or aluminum foil and store it at room temperature for up to 3 days. For longer storage, you can refrigerate the cake for up to a week, but be aware that it may dry out slightly. You can also freeze the cake for up to 2 months. Thaw it overnight in the refrigerator before serving.
Nutritional Information
(Estimated per serving, based on 10 servings)
| Nutrient | Amount per Serving | % Daily Value |
|---|---|---|
| Calories | 550 kcal | 28% |
| Total Fat | 25g | 38% |
| Saturated Fat | 15g | 75% |
| Cholesterol | 200mg | 67% |
| Sodium | 150mg | 7% |
| Total Carbohydrate | 75g | 25% |
| Dietary Fiber | 0g | 0% |
| Sugars | 50g | N/A |
| Protein | 7g | 14% |
Variations & Substitutions
- Gluten-Free: Substitute the cake flour with a gluten-free all-purpose baking blend. Be sure to check the blend’s ingredients to ensure it contains xanthan gum, which will help bind the cake together.
- Dairy-Free: While the “heavy cream” is essential to the flavor of this particular recipe, it becomes a completely different cake if you substitute it. Using something like coconut cream will change the flavor and texture dramatically.
- Citrus Variations: Use lime juice and zest instead of lemon or orange for a tropical twist.
- Spice Cake: Add 1 teaspoon of ground cinnamon, 1/2 teaspoon of ground nutmeg, and 1/4 teaspoon of ground cloves to the batter for a warm, spiced version.
- Chocolate Chip: Fold in 1 cup of chocolate chips (milk, dark, or white) into the batter before baking.
FAQs (Frequently Asked Questions)
Q: Why do I need to start with a cold oven?
A: Starting with a cold oven helps the cake rise more evenly and prevents a tough crust from forming too quickly. This results in a moist and tender crumb.
Q: Can I use all-purpose flour instead of cake flour?
A: While you can, it’s not recommended. Cake flour has a lower protein content, which results in a more delicate and tender cake. All-purpose flour will make the cake tougher.
Q: My cake cracked on top. What did I do wrong?
A: A cracked top is usually caused by the oven being too hot or the cake being placed too high in the oven. Make sure your oven is properly calibrated and that the cake is positioned in the center of the oven.
Q: How can I tell when the cake is done?
A: The best way to check for doneness is to insert a toothpick or cake tester into the center of the cake. If it comes out clean or with just a few moist crumbs, the cake is done.
Q: Can I freeze this pound cake?
A: Yes, you can freeze the cake for up to 2 months. Wrap it tightly in plastic wrap and then aluminum foil to prevent freezer burn. Thaw it overnight in the refrigerator before serving.
Final Thoughts
This Heavy Cream Pound Cake is more than just a recipe; it’s a journey back to the simple pleasures of Nana Elsie’s kitchen. The rich, dense texture and comforting vanilla flavor make it the perfect treat for any occasion. Don’t be intimidated by the slightly unusual “cold start” baking method; it’s the key to achieving that signature moistness. So, preheat your… well, don’t preheat your oven, gather your ingredients, and bake up a slice of happiness! I can’t wait to hear about your experiences and any creative twists you add to this classic recipe. Enjoy!