
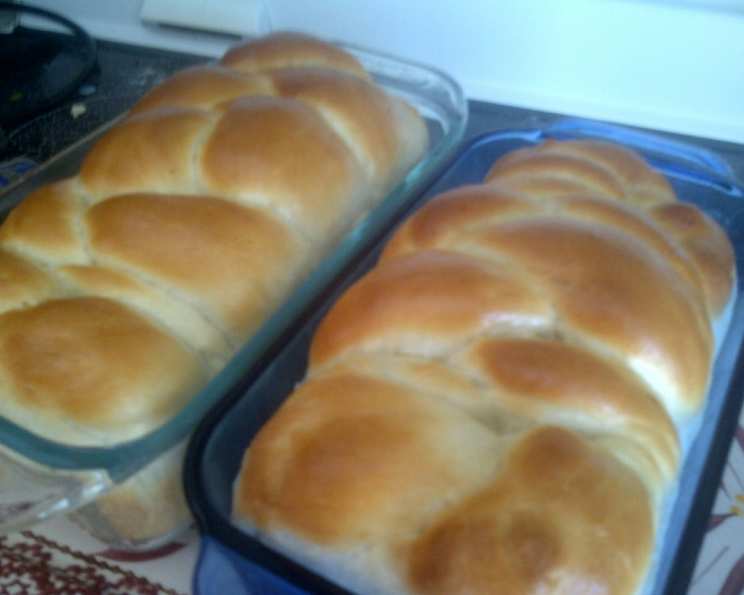
The Soulful Simplicity of Moldovan Bread: A Taste of Home
The scent of baking bread is more than just appealing; it’s a portal. One whiff, and I’m transported back to my grandmother’s sun-drenched kitchen. Though she spoke little English, her hands spoke volumes as she expertly kneaded dough on her well-worn wooden table. The warmth of the oven, the gentle bubbling of yeast, the shared anticipation – these are the flavors of childhood, etched in my memory, forever linked to the simple, satisfying taste of homemade bread. This Moldovan bread, reminiscent of those cherished moments, is an invitation to create your own memories, one delicious slice at a time.
Recipe Overview
- Prep Time: 20 minutes
- Cook Time: 20 minutes
- Total Time: 2 hours 20 minutes
- Servings: Varies
- Yield: 2 loaves
- Dietary Type: Vegetarian
Ingredients
- 2 cups warm water
- 2 tablespoons active dry yeast
- 1 tablespoon sugar
- 4 tablespoons sunflower oil (or other neutral oil)
- 1 teaspoon salt
- 5 cups flour
Equipment Needed
- Large bowl
- Measuring cups and spoons
- Mixing spoon
- Floured surface (or oiled surface)
- Greased bowl
- 2 greased loaf pans
- Oven
Instructions
- In a large bowl, combine the warm water, sugar, yeast, and 1 cup of flour. Mix with a spoon until smooth, creating a slurry.
- Let this mixture stand for about 15 minutes. You should observe the yeast beginning to activate and bubble. This step is crucial for ensuring a good rise.
- Mix in the sunflower oil and salt.
- Gradually add the remaining flour, mixing until it is fully incorporated, and the dough starts to come together. You might not need all 5 cups, so add the last cup gradually.
- Turn the dough out onto a lightly floured (or oiled) surface.
- Knead the dough until it becomes smooth and elastic, approximately 10 minutes. The dough should be firm but not sticky. If it is too sticky, add a little more flour, a tablespoon at a time.
- Place the kneaded dough in a greased bowl, turning to coat. Cover the bowl with a clean cloth or plastic wrap.
- Let the dough rise in a warm place until it has doubled in size. This may take about an hour, but rising time will vary depending on the temperature of your environment.
- Once the dough has doubled, turn it out of the bowl onto a floured surface.
- Gently deflate the dough by kneading it briefly.
- Let the dough rest for 15 minutes to relax the gluten, making it easier to shape.
- Divide the dough into six equal pieces.
- Shape each piece into a rope, about 12-14 inches long.
- Braid three ropes together to form a loaf. Repeat with the remaining three ropes to make the second loaf.
- Place each braided loaf into a greased loaf pan.
- Cover the loaf pans and let the loaves rise again until they are nearly doubled in size, approximately 30-45 minutes.
- Preheat your oven to 400°F (200°C).
- Bake the loaves until they are golden brown, about 20 minutes. A wooden skewer inserted into the center should come out clean.
- Turn the loaves out of the pans immediately and brush them with a little sunflower oil (or other neutral oil) while they are still hot. This will give them a lovely sheen and help keep the crust soft.
Expert Tips & Tricks
- Yeast Activation: Ensure your water is warm (around 105-115°F or 40-46°C) to properly activate the yeast. Too hot, and you’ll kill it; too cold, and it won’t activate.
- Kneading Technique: Proper kneading develops the gluten in the flour, giving the bread its structure. If you don’t knead enough, your bread may be dense.
- Oven Temperature: Ovens can vary, so keep an eye on your bread during baking. If it starts to brown too quickly, tent it with foil.
- Flavor Enhancement: For a richer flavor, try adding a tablespoon of honey or molasses to the dough.
- Shiny Crust: An egg wash (1 egg beaten with 1 tablespoon of water) brushed on before baking will give the bread a beautiful, glossy crust.
Serving & Storage Suggestions
This Moldovan bread is delicious served warm, straight from the oven. It’s perfect with a simple spread of butter, jam, or honey. It also makes a fantastic accompaniment to soups, stews, and salads.
- Storage: Store cooled bread in an airtight container at room temperature for up to 3 days.
- Freezing: For longer storage, wrap the bread tightly in plastic wrap and then in foil, or place in a freezer bag. It can be frozen for up to 2 months.
- Reheating: To reheat frozen bread, thaw it completely and then warm it in a preheated oven at 350°F (175°C) for about 10-15 minutes, or until heated through. You can also slice it and toast it.
Nutritional Information
(Note: Nutritional information is an estimate and may vary based on specific ingredients and portion sizes.)
| Nutrient | Amount per Serving | % Daily Value |
|---|---|---|
| Calories | 240 kcal | 12% |
| Total Fat | 5g | 8% |
| Saturated Fat | 1g | 5% |
| Cholesterol | 0mg | 0% |
| Sodium | 295mg | 12% |
| Total Carbohydrate | 45g | 15% |
| Dietary Fiber | 2g | 8% |
| Sugars | 2g | – |
| Protein | 6g | 12% |
Variations & Substitutions
- Whole Wheat: Substitute up to half of the all-purpose flour with whole wheat flour for a nuttier flavor and added fiber.
- Herbs: Add dried herbs like rosemary, thyme, or oregano to the dough for an aromatic twist. About 1-2 teaspoons should suffice.
- Seeds: Incorporate seeds like sesame, poppy, or sunflower seeds into the dough or sprinkle them on top before baking for added texture and flavor.
- Garlic: Add minced garlic to the dough for a savory flavor.
- Sweet Bread: Increase the sugar to 1/4 cup and add some raisins or dried cranberries for a sweeter version.
FAQs (Frequently Asked Questions)
Q: Can I use instant yeast instead of active dry yeast?
A: Yes, you can. Use the same amount (2 tablespoons). You can skip the initial proofing step and add the instant yeast directly to the flour.
Q: My dough isn’t rising. What could be the problem?
A: The most common reasons are that the yeast is old or the water was too hot, killing the yeast. Make sure your yeast is fresh and the water is lukewarm. Also, ensure the rising environment is warm enough.
Q: Can I make this dough in a bread machine?
A: Yes, most bread machines can handle this type of dough. Follow your bread machine’s instructions for dough settings.
Q: The crust is getting too dark before the inside is cooked. What should I do?
A: Tent the bread with aluminum foil to prevent further browning while the inside continues to bake.
Q: How can I make the braid look more professional?
A: Ensure your dough ropes are of uniform thickness and length. Tuck the ends neatly underneath the loaf before the final rise. You can also watch videos online for braiding techniques.
Final Thoughts
I hope this recipe inspires you to create your own memories in the kitchen, just as my grandmother did for me. Don’t be intimidated by the process; baking bread is a journey, not a destination. Experiment with variations, adjust to your own oven, and most importantly, enjoy the process. Share your creations with loved ones, and let the aroma of freshly baked bread fill your home with warmth and love. Pair it with a hearty bowl of borscht or simply enjoy it with a cup of tea. I encourage you to try this recipe and leave feedback in the comments below! Happy Baking!