
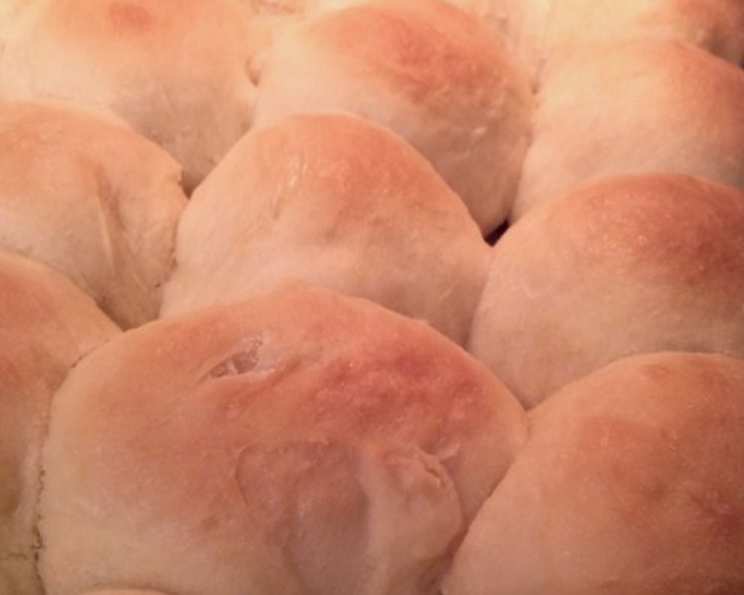
Molly’s Dinner Rolls: A Taste of Home
I remember the first time I tasted a truly exceptional dinner roll. It was at a potluck hosted by my neighbor, Mrs. Gable. Everyone brought their best dish, but the rolls – impossibly soft, slightly sweet, and glistening with melted butter – stole the show. I practically begged her for the recipe, and while she wouldn’t give up that family secret, these rolls remind me of that magical bite. I finally have a worthy substitute that I’m sure everyone will love.
Recipe Overview
- Prep Time: 1 hour 10 minutes
- Cook Time: 18-20 minutes
- Total Time: 1 hour 30-32 minutes
- Yields: 24 rolls
- Dietary Type: Vegetarian
Ingredients
- 1 (2 1/4 teaspoon) package active dry yeast
- 1/3 cup sugar
- 1 cup warm water (about 110 degrees F)
- 1 cup milk, warmed to lukewarm
- 1/3 cup oil
- 1 egg
- 1/2 tablespoon salt
- All-purpose flour (approximately 5 cups)
- 2 tablespoons butter, melted
Equipment Needed
- Mixer (stand or hand mixer)
- Mixing bowls
- Measuring cups and spoons
- Lightly greased or parchment-lined jelly roll pan (or rimmed cookie sheet)
- Plastic wrap
Instructions
- In the bowl of a mixer (or in a large bowl if mixing by hand), combine the yeast, sugar, and warm water. Let this mixture sit for about 5 minutes, or until it becomes bubbly and frothy. This process, called proofing, ensures that the yeast is active and will help the dough rise properly.
- Add the warmed milk to the yeast mixture and mix gently to combine.
- Mix in the oil and egg. Make sure the egg is well incorporated into the liquid ingredients.
- Gradually add 2 cups of flour to the wet ingredients. Mix on low speed (or by hand) until just combined.
- Add the salt and continue mixing.
- Now, add the remaining flour, 1/2 cup at a time, mixing after each addition. The dough is ready when it starts to pull away from the sides of the bowl. You may not need to use all 5 cups of flour; the exact amount will depend on humidity and other factors. Be careful not to add too much flour, as this will result in dry, dense rolls.
- Lightly spray the dough with cooking spray (or lightly oil the bowl). Cover the bowl tightly with plastic wrap or a clean kitchen towel. Place the bowl in a warm place and let the dough rise for about 30 minutes, or until it has doubled in size.
- Once the dough has risen, gently punch it down to release any trapped air. Turn the dough out onto a lightly floured surface.
- Form the dough into rolls. For uniform rolls, you can weigh the dough. Each roll should be about 2 ounces. Shape the dough into balls or other desired shapes.
- Place the shaped rolls onto a lightly greased or parchment-lined jelly roll pan (or rimmed cookie sheet), leaving a little space between each roll.
- Cover the pan loosely with plastic wrap and let the rolls rise again for another 30 minutes. This second rise is crucial for achieving light and airy rolls.
- Preheat your oven to 400 degrees F (200 degrees C).
- Bake the rolls in the preheated oven for 18-20 minutes, or until they are golden brown on top. Keep a close eye on them during the last few minutes of baking to prevent burning. The original recipe suggests 10-12 minutes, but testing has shown it typically takes a bit longer, especially when baking a full batch of 24 rolls on a jelly roll pan.
- You can rotate the pan halfway through baking to ensure even browning, but it’s not strictly necessary.
- While the rolls are still hot from the oven, brush them generously with the melted butter. This will give them a beautiful shine and add richness to the flavor.
Expert Tips & Tricks
- The Proof is in the Yeast: Always check the expiration date on your yeast. If you’re unsure if your yeast is still active, proof it in warm water with a pinch of sugar. If it doesn’t bubble within 5-10 minutes, it’s best to use fresh yeast.
- Warmth is Key: Yeast thrives in a warm environment. To ensure the dough rises properly, place the bowl in a warm spot, such as near a warm oven or in a sunny window.
- Don’t Over-Mix: Over-mixing the dough can develop too much gluten, resulting in tough rolls. Mix until just combined, and then knead only until the dough is smooth and elastic.
- Egg Wash Substitute: If you don’t have an egg on hand, you can brush the rolls with milk or melted butter before baking to help them brown beautifully.
- For Extra Soft Rolls: Cover the rolls with a clean kitchen towel while they cool to trap moisture and keep them extra soft.
Serving & Storage Suggestions
These rolls are best served warm, straight from the oven. They make a wonderful addition to any meal, especially holiday dinners, potlucks, or casual gatherings. They are fantastic alongside soups, stews, salads, or simply enjoyed with a pat of butter or your favorite jam.
To store leftover rolls, let them cool completely and then place them in an airtight container or a resealable plastic bag. They will stay fresh at room temperature for up to 2 days. For longer storage, refrigerate the rolls for up to a week or freeze them for up to 2 months. To reheat, wrap the rolls in foil and warm them in a preheated oven at 350 degrees F (175 degrees C) for about 10-15 minutes, or until heated through. You can also microwave them for a few seconds, but be careful not to over-dry them.
Nutritional Information
| Nutrient | Amount per Serving | % Daily Value |
|---|---|---|
| Calories | 59.1 kcal | N/A |
| Calories from Fat | 41 g | 71% |
| Total Fat | 4.6 g | 7% |
| Saturated Fat | 1.3 g | 6% |
| Cholesterol | 11.7 mg | 3% |
| Sodium | 162.6 mg | 6% |
| Total Carbohydrate | 3.7 g | 1% |
| Dietary Fiber | 0.3 g | 1% |
| Sugars | 2.8 g | 11% |
| Protein | 1.1 g | 2% |
Note: Nutritional information is an estimate and may vary based on specific ingredients and portion sizes.
Variations & Substitutions
- Whole Wheat Rolls: Substitute up to half of the all-purpose flour with whole wheat flour for a nuttier flavor and added fiber.
- Sweet Rolls: Add an extra 1/4 cup of sugar to the dough and sprinkle the tops of the rolls with cinnamon sugar before baking for a delicious sweet treat.
- Herb-Infused Rolls: Add 1-2 tablespoons of chopped fresh herbs, such as rosemary, thyme, or parsley, to the dough for a savory twist.
- Garlic Rolls: Mix minced garlic and melted butter together and brush over the rolls before baking for a flavorful garlic bread alternative.
- Dairy-Free Rolls: Substitute the milk with a plant-based milk alternative, such as almond milk or soy milk.
FAQs (Frequently Asked Questions)
Q: Why aren’t my rolls rising?
A: Several factors can prevent the dough from rising, including inactive yeast, water that is too hot or too cold, or a cold environment. Make sure your yeast is fresh, the water is lukewarm (around 110 degrees F), and the dough is placed in a warm place to rise.
Q: Can I make the dough ahead of time?
A: Yes, you can make the dough ahead of time and refrigerate it for up to 24 hours. After the first rise, punch down the dough and place it in a greased bowl, cover it tightly, and refrigerate. When ready to bake, let the dough come to room temperature for about 30 minutes before shaping and baking.
Q: How do I keep the rolls from drying out?
A: To prevent the rolls from drying out, avoid overbaking them. Bake until they are golden brown on top, but still soft to the touch. Brushing them with melted butter after baking also helps to keep them moist.
Q: Can I freeze the baked rolls?
A: Yes, you can freeze the baked rolls. Let them cool completely, then wrap them tightly in plastic wrap and place them in a freezer-safe bag. They can be frozen for up to 2 months. To reheat, thaw them overnight in the refrigerator and then warm them in a preheated oven at 350 degrees F (175 degrees C) for about 10-15 minutes.
Q: What if I don’t have a mixer?
A: You can absolutely make these rolls by hand! Just be prepared to put in a little extra elbow grease. Follow the same instructions, but mix the ingredients in a large bowl using a wooden spoon or your hands. Knead the dough on a floured surface until it is smooth and elastic.
Final Thoughts
These rolls are truly special. The slight sweetness, the airy texture, and the buttery finish make them irresistible. I encourage you to give them a try and experience the joy of homemade bread. Serve them with your favorite comfort food or share them with loved ones – they’re guaranteed to bring smiles to the table. Don’t be afraid to experiment with different variations to make them your own. And if you have any questions or feedback, please don’t hesitate to share! Happy baking!