
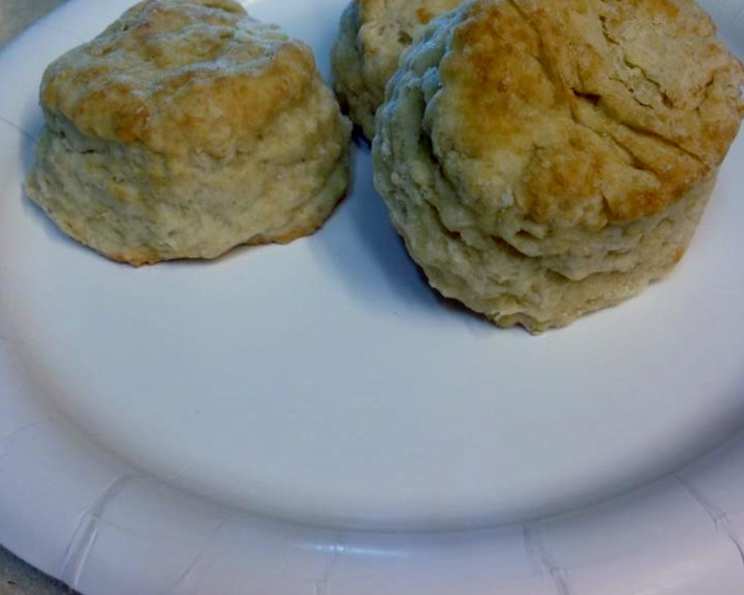
Mom’s Baking Powder Biscuits: A Taste of Home
The scent alone transports me back. Standing in Mom’s cozy kitchen, flour dusting every surface, the rhythmic clatter of her pastry cutter a familiar song. These weren’t just biscuits; they were love, warmth, and Sunday mornings all rolled into one golden-brown bite. I can almost feel the warmth of the oven on my face, and hear her gentle instruction, “Don’t overmix, dear, or they’ll be tough!”
Recipe Overview
- Prep Time: 20 minutes
- Cook Time: 20 minutes
- Total Time: 40 minutes
- Yields: 1 dozen
- Serves: 4-6
- Dietary Type: Vegetarian
Ingredients
- 3 cups flour
- 3 tablespoons baking powder
- 1 teaspoon salt
- 1/4 cup sugar
- 1/4 cup shortening
- 2/3 cup ice cold water
Equipment Needed
- Medium mixing bowl
- Fork
- Pastry cutter (or hands)
- Floured surface
- Biscuit cutter
- Heavily greased baking sheet
Instructions
- In a medium mixing bowl, combine the flour, baking powder, salt, and sugar. Stir gently with a fork to combine the dry ingredients evenly.
- Add the shortening to the flour mixture. Using a pastry cutter, or your fingertips, cut or rub the shortening into the flour until the mixture resembles coarse crumbs or small peas. The key here is to work quickly so the shortening stays cold.
- Gradually add the ice cold water, mixing it into the flour and shortening mixture until just enough water has been added to form a dough. Be careful not to overmix; a slightly shaggy dough is perfect. Overmixing will develop the gluten in the flour, resulting in tough biscuits.
- Turn the dough out onto a lightly floured surface. You have two options here: either gently roll the dough out to about 3/4 inch thickness using a rolling pin, or pat it down with your hands to the desired thickness. I usually opt for the patting method for a more rustic, homemade look.
- Use a biscuit cutter to cut out the biscuits. If you don’t have a biscuit cutter, you can use a sharp knife to cut square or rectangular biscuits.
- Place the cut biscuits onto a heavily greased baking sheet. Ensuring the baking sheet is well-greased will prevent the biscuits from sticking.
- Let the biscuits sit for 20 to 30 minutes before baking. This crucial step allows the baking powder to activate, resulting in a higher, lighter biscuit. Don’t skip this step!
- Preheat your oven to 375°F (190°C). Once the oven is preheated, bake the biscuits for 20 minutes, or until they are golden brown on top.
- Remove the biscuits from the oven and let them cool slightly on the baking sheet before serving.
Expert Tips & Tricks
- Cold Ingredients are Key: The colder your ingredients, especially the shortening and water, the flakier your biscuits will be. Consider chilling the flour and mixing bowl before you start.
- Don’t Overmix: Overmixing develops the gluten in the flour, resulting in tough, dense biscuits. Mix the dough just until it comes together.
- Lamination for Layers: For extra flaky biscuits, try a simple lamination technique. After mixing the dough, gently pat it into a rectangle. Fold the dough in thirds, like a letter, then pat it out again. Repeat this folding and patting process 2-3 times before cutting out the biscuits.
- High Heat: Baking at a slightly higher temperature (375°F) helps the biscuits rise quickly and gives them a golden-brown crust.
- Baking Sheet Placement: Place the baking sheet in the center of the oven for even baking. If your oven tends to bake unevenly, rotate the baking sheet halfway through the baking time.
- Substitute for Shortening: If you don’t have shortening on hand, you can use cold butter, cut into small cubes. Just make sure to work quickly to keep the butter cold.
- Buttermilk Variation: For a tangier biscuit, substitute half of the ice water with buttermilk.
- Freezing Biscuits: These biscuits can be frozen before baking. Place the cut biscuits on a baking sheet lined with parchment paper and freeze until solid. Then, transfer the frozen biscuits to a freezer bag. When ready to bake, bake them directly from frozen, adding a few extra minutes to the baking time.
Serving & Storage Suggestions
Serve these warm biscuits with butter, jam, honey, or alongside your favorite breakfast dishes like scrambled eggs and bacon. They’re also delicious with soups, stews, and chili.
Leftover biscuits can be stored in an airtight container at room temperature for up to 2 days, or in the refrigerator for up to 5 days. To reheat, wrap the biscuits in foil and warm them in a 350°F (175°C) oven for 5-10 minutes, or until heated through. You can also reheat them in the microwave, but they may become slightly softer.
For longer storage, freeze the baked biscuits in an airtight container for up to 2 months. To reheat frozen biscuits, thaw them overnight in the refrigerator or reheat them directly from frozen in a 350°F (175°C) oven for 10-15 minutes.
Nutritional Information
| Nutrient | Amount per Serving | % Daily Value |
|---|---|---|
| Calories | 508 kcal | 25% |
| Total Fat | 14g | 21% |
| Saturated Fat | 3g | 15% |
| Cholesterol | 0mg | 0% |
| Sodium | 1402mg | 59% |
| Total Carbohydrate | 87g | 29% |
| Dietary Fiber | 3g | 12% |
| Sugars | 13g | 26% |
| Protein | 10g | 20% |
Nutritional information is an estimate and may vary based on specific ingredients and preparation methods.
Variations & Substitutions
- Cheese Biscuits: Add 1/2 cup of shredded cheddar cheese to the dry ingredients for cheesy biscuits.
- Herb Biscuits: Stir in 1 tablespoon of chopped fresh herbs, such as rosemary, thyme, or chives, to the dry ingredients.
- Garlic Biscuits: Add 1 teaspoon of garlic powder to the dry ingredients.
- Sweet Biscuits: For a sweeter biscuit, increase the sugar to 1/2 cup.
- Gluten-Free Biscuits: Substitute the all-purpose flour with a gluten-free all-purpose flour blend. You may need to adjust the amount of water slightly to achieve the right dough consistency.
- Vegan Biscuits: Substitute the shortening with a vegan shortening or coconut oil. Ensure your sugar is vegan-friendly (some refined sugars are processed using bone char).
FAQs (Frequently Asked Questions)
Q: Why are my biscuits tough?
A: The most common reason for tough biscuits is overmixing the dough. Overmixing develops the gluten in the flour, resulting in a tough texture. Mix the dough just until it comes together.
Q: Can I use butter instead of shortening?
A: Yes, you can use cold butter cut into small cubes as a substitute for shortening. Make sure to work quickly to keep the butter cold.
Q: Why are my biscuits flat and not rising?
A: This could be due to several factors: old baking powder, not letting the biscuits rest before baking, or not using cold enough ingredients. Make sure your baking powder is fresh, let the biscuits rest for 20-30 minutes before baking, and use ice-cold water and shortening.
Q: Can I make the dough ahead of time?
A: Yes, you can make the dough ahead of time and store it in the refrigerator for up to 24 hours. However, keep in mind that the baking powder will continue to react, so the biscuits may not rise as much if the dough sits for too long.
Q: How do I get golden brown biscuits?
A: Baking at the correct temperature (375°F) and using a well-greased baking sheet will help the biscuits achieve a golden-brown color. You can also brush the tops of the biscuits with melted butter or milk before baking for an even richer color.
Final Thoughts
These biscuits are more than just a recipe; they’re a connection to the past, a taste of comfort, and a reminder of simpler times. I encourage you to try baking these Mom’s Baking Powder Biscuits and experience the joy of sharing them with your loved ones. Don’t be afraid to experiment with variations and make them your own! I’d love to hear about your baking adventures – share your tips and feedback, and let’s keep this tradition alive for generations to come. These biscuits pair perfectly with a hearty breakfast, a comforting bowl of soup, or simply enjoyed with a pat of butter and a warm cup of coffee. Happy baking!