
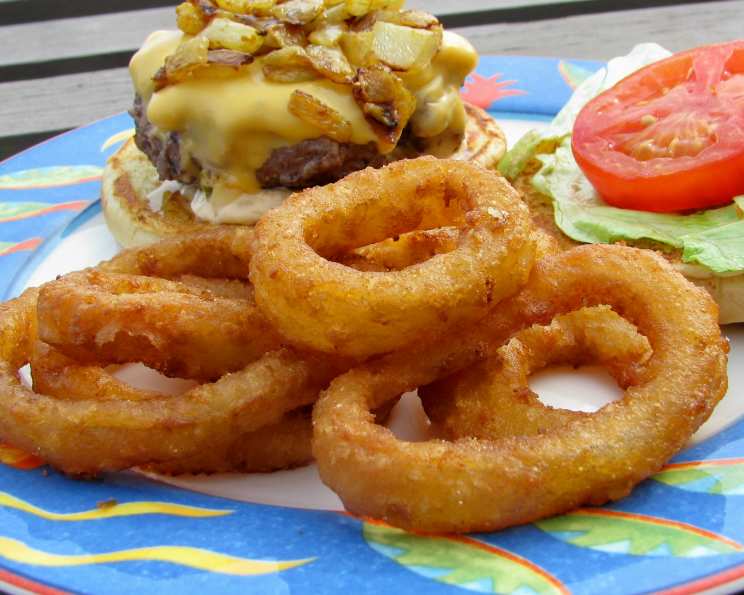
Mom’s French Fried Onion Rings (With Freezing Directions)
My mom wasn’t a fancy cook, but she had a knack for transforming simple ingredients into comfort food. I remember being a picky kid, wrinkling my nose at most vegetables, but when she made these onion rings, I’d devour them by the handful. The sweet onion, the crispy, golden batter – it was pure magic. To this day, the smell of frying onions instantly transports me back to her cozy kitchen, a testament to the power of a truly great recipe.
Recipe Overview
- Prep Time: 20 minutes
- Cook Time: 15-20 minutes
- Total Time: 35-40 minutes
- Servings: 6-8
- Yield: About 4-6 cups of onion rings
- Dietary Type: Vegetarian
Ingredients
- 6 onions
- 1 egg, beaten
- 1 cup milk
- 1 cup flour
- 2 tablespoons flour
- 3 tablespoons oil (vegetable or canola recommended)
- ½ teaspoon salt
- Oil, enough to French fry (vegetable or canola recommended)
Equipment Needed
- Large bowl
- Whisk
- Deep fryer or large, heavy-bottomed pot
- Slotted spoon or spider
- Paper towels
- Baking sheet (for reheating frozen onion rings)
- Freezer bags
Instructions
- Begin by preparing the onions. Slice them thinly into rings, about ¼-inch thick. Gently separate the rings from each other and set them aside.
- In a large bowl, prepare the batter. Whisk together the beaten egg, milk, 1 cup of flour, oil, and salt until the batter is smooth and relatively lump-free. The consistency should be thin enough to coat the onion rings evenly but thick enough to adhere to them. If it seems too thin, add a tablespoon of flour at a time until you reach the desired consistency.
- Place the 2 tablespoons of flour in a separate bowl or shallow dish. This flour is used to lightly dust the onion rings before they are dipped into the batter, which helps the batter adhere better.
- Heat the oil for frying in a deep fryer or a large, heavy-bottomed pot to 350°F (175°C). If you don’t have a thermometer, you can test the oil’s readiness by dropping a small piece of batter into it. If the batter sizzles and turns golden brown within a few seconds, the oil is ready. Be careful not to overheat the oil.
- One at a time, lightly dredge each onion ring in the flour, shaking off any excess. Then, dip the floured onion ring into the batter, ensuring it is fully coated.
- Carefully lift the battered onion ring from the batter, allowing any excess batter to drip back into the bowl. This helps prevent the rings from becoming overly greasy.
- Gently lower the battered onion rings into the hot oil, being careful not to overcrowd the fryer or pot. Fry in batches to maintain the oil temperature and ensure even cooking.
- Fry the onion rings for approximately 2-3 minutes, or until they are golden brown and crispy. Turn them occasionally with a slotted spoon or spider to ensure even cooking.
- Once the onion rings are golden brown, remove them from the oil with a slotted spoon or spider and place them on a plate or tray lined with paper towels to drain any excess oil.
- Repeat steps 5-9 with the remaining onion rings and batter.
Freezing Instructions:
- Let the onion rings cool completely on the paper towels.
- Arrange the cooled onion rings in a single layer on a baking sheet lined with parchment paper. Place the baking sheet in the freezer for about 1-2 hours, or until the onion rings are frozen solid. This pre-freezing step prevents the onion rings from sticking together in the freezer bag.
- Once the onion rings are frozen, transfer them to freezer bags. Label the bags with the date.
- Store the frozen onion rings in the freezer for up to 2-3 months.
Reheating Instructions (for Frozen Onion Rings):
- Preheat the oven to 375°F (190°C).
- Spread the frozen onion rings in a single layer on a baking sheet.
- Bake for approximately 5-10 minutes, or until they are heated through and crispy.
Expert Tips & Tricks
- Sweet Onions: For the sweetest flavor, use sweet onions like Vidalia or Walla Walla. They caramelize beautifully when fried.
- Batter Consistency: The batter should be thick enough to coat the onion rings without being too heavy. If it’s too thick, add a tablespoon of milk at a time until you reach the desired consistency.
- Oil Temperature: Maintaining the correct oil temperature is crucial for crispy onion rings. If the oil is too cool, the onion rings will absorb too much oil and become greasy. If the oil is too hot, they will brown too quickly on the outside and may not cook through on the inside.
- Don’t Overcrowd: Fry the onion rings in batches to prevent overcrowding the fryer or pot. Overcrowding will lower the oil temperature and result in soggy onion rings.
- Seasoning: For extra flavor, add a pinch of garlic powder, onion powder, or paprika to the batter.
Serving & Storage Suggestions
Serve the onion rings immediately while they are hot and crispy. They make a great appetizer, side dish, or snack. Serve with your favorite dipping sauce, such as ketchup, ranch dressing, barbecue sauce, or a homemade aioli.
Store leftover onion rings in an airtight container in the refrigerator for up to 2-3 days. Reheat them in the oven or air fryer to restore their crispness. The microwave is not recommended as it will make them soggy.
Frozen onion rings, if properly stored, can last in the freezer for 2-3 months. Make sure the freezer bag is tightly sealed to prevent freezer burn.
Nutritional Information
| Nutrient | Amount per Serving | % Daily Value |
|---|---|---|
| Calories | 250 kcal | 13% |
| Total Fat | 12g | 18% |
| Saturated Fat | 2g | 10% |
| Cholesterol | 40mg | 13% |
| Sodium | 250mg | 11% |
| Total Carbohydrate | 32g | 12% |
| Dietary Fiber | 3g | 12% |
| Sugars | 6g | – |
| Protein | 6g | 12% |
Note: Nutritional information is an estimate and may vary depending on specific ingredients and portion sizes.
Variations & Substitutions
- Gluten-Free: Substitute the all-purpose flour with a gluten-free all-purpose flour blend.
- Dairy-Free: Use a non-dairy milk alternative, such as almond milk, soy milk, or oat milk.
- Spicy: Add a pinch of cayenne pepper or a dash of hot sauce to the batter for a spicy kick.
- Beer Batter: Substitute half of the milk with beer for a richer, more flavorful batter.
- Sweet & Savory: Sprinkle a little powdered sugar over the onion rings immediately after frying for a sweet and savory combination.
FAQs (Frequently Asked Questions)
Q: Can I use yellow onions instead of sweet onions?
A: Yes, you can use yellow onions, but the onion rings will have a stronger, more pungent flavor. Sweet onions are recommended for a milder, sweeter taste.
Q: How do I prevent the batter from falling off the onion rings?
A: Dredging the onion rings in flour before dipping them in the batter helps the batter adhere better. Also, make sure to let any excess batter drip off before frying.
Q: Can I bake the onion rings instead of frying them?
A: While baking is a healthier option, it will be difficult to achieve the same crispy texture as fried onion rings. If you choose to bake them, preheat your oven to 400°F (200°C), spray the onion rings with cooking spray, and bake for 15-20 minutes, flipping halfway through.
Q: How can I make the onion rings crispier?
A: Make sure the oil is hot enough (350°F/175°C) and don’t overcrowd the fryer or pot. Frying in batches will help maintain the oil temperature and ensure crispy onion rings. Reheating in a dry oven or air fryer is also an option.
Q: Can I prepare the batter ahead of time?
A: Yes, you can prepare the batter up to a few hours in advance. Cover it and refrigerate it until you are ready to use it. You may need to add a splash of milk to thin it out if it has thickened while sitting.
Final Thoughts
These onion rings are more than just a recipe; they’re a taste of home, a memory of Mom’s love, and a reminder of the simple joys in life. Don’t be afraid to experiment with the recipe, adding your own personal touch. Whether you’re serving them as a side dish at a barbecue or enjoying them as a late-night snack, I hope these onion rings bring you as much joy as they have brought me. So, gather your ingredients, heat up the oil, and get ready to make some delicious memories. And please, feel free to share your feedback! Happy cooking!