
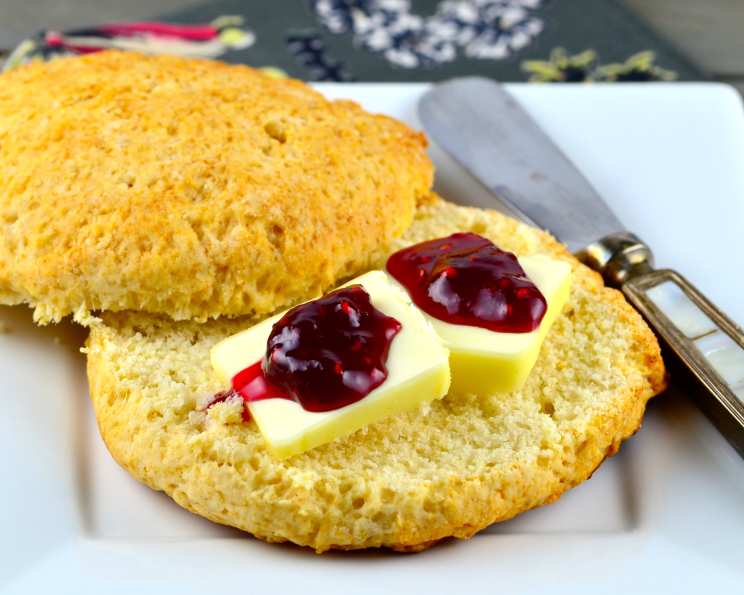
Mom’s Homemade Biscuits: A Taste of Home
The memory is etched in my mind: the warmth radiating from the oven, the comforting scent of flour and butter mingling in the air, and the sight of my mom, her hands dusted white, pulling a tray of golden-brown biscuits from the oven. These weren’t just biscuits; they were a symbol of home, of love baked into every fluffy, tender bite. We’d slather them with butter and homemade jam, and for a brief moment, the world felt perfect. These biscuits are a taste of that perfection, a memory I’m thrilled to share.
Recipe Overview
- Prep Time: 15 minutes
- Cook Time: 12-15 minutes
- Total Time: 27-30 minutes
- Yields: 8-10 biscuits
- Serves: 4-5
- Dietary Type: Vegetarian
Ingredients
- 2 cups flour
- 4 tablespoons sugar
- 1 teaspoon salt
- 3 teaspoons baking powder
- 1/3 cup shortening (Crisco works best)
- 3/4 cup milk
Equipment Needed
- Large Mixing Bowl
- Pastry Blender (or two forks)
- Measuring Cups and Spoons
- Baking Sheet
- Biscuit Cutter (or large glass)
Instructions
-
Preheat your oven to 425 degrees F (220 degrees C). Ensure your baking sheet is ready; no greasing is required.
-
In a large mixing bowl, combine the flour, sugar, and salt. Whisking these dry ingredients together evenly distributes the leavening agent, ensuring a uniform rise.
-
Add the baking powder to the dry ingredients. Incorporate it evenly.
-
Now, it’s time to cut in the shortening. This is a crucial step for achieving those flaky layers we all crave. Using a pastry blender, cut the shortening into the flour mixture until the mixture resembles coarse crumbs. If you don’t have a pastry blender, you can use two forks to achieve the same effect. The key is to work quickly and avoid overmixing, which can develop the gluten in the flour and result in tougher biscuits.
-
Pour in the milk. Gently mix with a fork or spatula just until a soft dough forms. Be careful not to overmix! The dough will likely be slightly sticky, and that’s perfectly fine. A sticky dough indicates proper hydration, which is essential for a tender biscuit.
-
Generously flour a clean counter or board. Transfer the dough onto the floured surface. Dust the top of the dough with a small amount of flour if it is still sticky.
-
Using your hands, pat the dough out to a thickness of about 1 inch. Resist the urge to use a rolling pin! A rolling pin will compress the dough and eliminate the light, airy texture. Instead, gently pat it down to maintain those flaky layers.
-
Cut out the biscuits using a biscuit cutter or a large glass dipped in flour. Dipping the cutter in flour before each cut prevents the dough from sticking and ensures clean edges.
-
Place the cut biscuits on the baking sheet, about 1 1/2 inches apart. This spacing allows for even heat circulation and prevents the biscuits from sticking together during baking.
-
Bake in the preheated oven for 12 to 15 minutes, or until the biscuits are golden brown on top. Keep a close eye on them during the last few minutes of baking to prevent burning. The exact baking time may vary depending on your oven. A good test for doneness is to gently tap the top of a biscuit; it should sound hollow.
Expert Tips & Tricks
- Cold Ingredients are Key: For the flakiest biscuits, use cold shortening and cold milk. The cold ingredients help to create steam during baking, which separates the layers and results in a lighter, more tender biscuit.
- Don’t Overmix: Overmixing develops the gluten in the flour, leading to tough biscuits. Mix the dough only until the ingredients are just combined.
- Handle with Care: Be gentle when handling the dough. Avoid overworking it.
- Flour Power: Keep your work surface and biscuit cutter lightly floured to prevent sticking.
- Oven Temperature: Make sure your oven is fully preheated to 425°F (220°C) before baking. An accurate oven temperature is crucial for even baking and proper rising.
- For Extra Flaky Biscuits: After cutting the biscuits, stack them gently on top of each other, then pat down to the desired thickness. This creates even more layers!
- Buttermilk Boost: For a tangy flavor and extra-tender texture, substitute buttermilk for the milk in the recipe.
Serving & Storage Suggestions
Serve these warm, freshly baked biscuits immediately for the best experience. They are delicious with butter, jam, honey, or served alongside your favorite savory dishes like soup or chili.
To store leftover biscuits, place them in an airtight container at room temperature for up to 2 days. For longer storage, refrigerate them for up to a week, or freeze them for up to 2 months. To reheat, wrap the biscuits in foil and warm them in a preheated oven at 350°F (175°C) for about 10-15 minutes, or until heated through. You can also microwave them for a quick reheat, but they may lose some of their crispness.
Nutritional Information
| Nutrient | Amount per Serving | % Daily Value |
|---|---|---|
| Calories | 458 kcal | N/A |
| Total Fat | 19g | 29% |
| Saturated Fat | 5g | 27% |
| Cholesterol | 6mg | 2% |
| Sodium | 878mg | 36% |
| Total Carbohydrate | 63g | 21% |
| Dietary Fiber | 2g | 6% |
| Sugars | 13g | N/A |
| Protein | 8g | 15% |
Note: Nutritional information is an estimate and may vary based on specific ingredients and serving sizes.
Variations & Substitutions
- Buttermilk Biscuits: Substitute buttermilk for the milk for a tangier flavor and a slightly more tender crumb.
- Cheese Biscuits: Add 1/2 cup of shredded cheddar cheese to the dry ingredients for a cheesy twist.
- Herb Biscuits: Incorporate 1-2 tablespoons of chopped fresh herbs, such as rosemary, thyme, or chives, into the dry ingredients.
- Sweet Biscuits: Add a sprinkle of cinnamon and a drizzle of honey to the dough for a sweeter biscuit.
- Gluten-Free Option: Use a gluten-free all-purpose flour blend. You may need to experiment with the amount of liquid to achieve the right consistency.
- Vegan Option: Substitute the milk with your favorite plant-based milk and use a vegan shortening.
FAQs (Frequently Asked Questions)
Q: Why are my biscuits tough?
A: The most common cause of tough biscuits is overmixing the dough. Be gentle and mix only until the ingredients are just combined.
Q: Can I use butter instead of shortening?
A: Yes, you can use butter, but shortening tends to create a flakier biscuit. If using butter, make sure it’s very cold and cut it into small pieces before cutting it into the flour.
Q: How do I get my biscuits to rise higher?
A: Make sure your baking powder is fresh and that you’re not overmixing the dough. Cold ingredients also help with rising.
Q: Can I make the dough ahead of time?
A: Yes, you can prepare the dough ahead of time, wrap it tightly in plastic wrap, and refrigerate it for up to 24 hours. Let it come to room temperature slightly before patting and cutting.
Q: What can I serve with these biscuits?
A: These biscuits are delicious with butter, jam, honey, gravy, or served alongside soups, stews, and chili. They’re also great for breakfast sandwiches.
Final Thoughts
More than just a recipe, these biscuits are a connection to my past, a comforting reminder of home. I encourage you to try this recipe and create your own memories. Don’t be afraid to experiment with variations and make them your own. Share them with your loved ones, and let the warmth of these homemade biscuits fill your kitchen with love and laughter. I’d love to hear about your baking experience and any variations you try – happy baking!