
Mom’s Homemade White Bread Rolls (Or Loaves)
The scent of yeast and warm dough rising in a cozy kitchen – that’s a sensory snapshot of my childhood holidays. Mom’s homemade white bread was the centerpiece, the carb-loaded foundation upon which countless memories were built. The pull-apart softness of the rolls, the subtly sweet crust… they were the perfect accompaniment to every festive meal, and the leftovers transformed into epic turkey sandwiches the next day. This isn’t just a recipe; it’s a warm hug from home, and I am so excited to share it with you!
Recipe Overview
- Prep Time: 1 hour
- Cook Time: 20 minutes
- Total Time: 4 hours 20 minutes (includes rising time)
- Servings: Varies depending on roll or loaf size
- Yields: 1 ten x thirteen inch pan of rolls or two loaves
- Dietary Type: Vegetarian (can be made vegan with shortening substitution)
Ingredients
- 2 cups water
- 1 (1/4 ounce) package yeast
- 1/4 cup lukewarm water
- 2 tablespoons sugar
- 1 tablespoon shortening (vegetable shortening or butter)
- 2 teaspoons salt
- 6 cups flour (all-purpose)
Equipment Needed
- Large mixing bowl
- Measuring cups and spoons
- Microwave-safe bowl or measuring cup
- 10×13 inch baking pan or two loaf pans
- Clean kitchen towel
- Greased bowl for rising
Instructions
-
Begin by activating the yeast. In a small bowl, dissolve the yeast and 2 tablespoons sugar in 1/4 cup lukewarm water. Set aside for about 5-10 minutes, until foamy. This step ensures the yeast is alive and ready to leaven the dough.
-
In a microwave-safe bowl or measuring cup, combine the 2 cups water, shortening, and salt. Microwave until the shortening melts completely. Stir the mixture thoroughly to ensure the salt is fully dissolved. This is crucial for even flavor distribution in the bread.
-
Let the water/shortening mixture cool slightly until it is warm, not hot. You should be able to comfortably keep your finger in the water for a few seconds. Excessively hot water will kill the yeast.
-
Now, in a large mixing bowl, gradually add the flour to the water mixture, starting with about 2 cups. Incorporate the flour a little at a time, mixing well after each addition, to prevent lumps from forming. The goal is to create a smooth, consistent batter.
-
Add the proofed yeast mixture to the bowl and mix well.
-
Continue adding the remaining flour gradually, mixing until a shaggy dough forms.
-
Turn the dough out onto a lightly floured surface and begin to knead. Knead the dough for 8-10 minutes, adding flour as needed to prevent it from sticking, until it becomes smooth and elastic. The dough should be soft and pliable but not sticky.
-
Grease a large bowl with vegetable oil. Place the kneaded dough in the greased bowl, turning to coat all sides. This prevents the dough from drying out during rising.
-
Cover the bowl with a clean kitchen towel and let it rise in a warm place. If using fast-acting yeast, this first rise should take about 45 minutes, or until the dough has doubled in size. Factors like room temperature can affect rising time, so keep an eye on it.
-
Once doubled, gently turn the dough out onto the counter and fold the sides in toward the center. Return the dough to the bowl, cover, and let it rise again for another 45 minutes, or until doubled. This second rise helps develop the flavor and texture of the bread.
-
After the second rising, turn the dough out onto a lightly oiled surface. Gently deflate the dough by pressing down on it. This helps to release any large air bubbles.
-
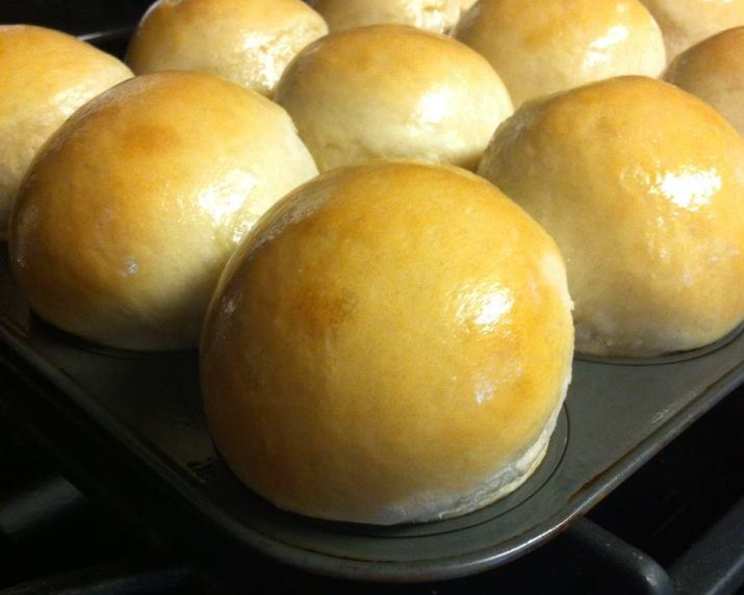
Shape the dough into rolls or loaves. For rolls, divide the dough into equal-sized portions (about 12-15 rolls for a 10×13 pan). For loaves, divide the dough into two equal parts and shape each into a loaf.
-
Grease your baking pan(s) generously with vegetable oil. This prevents the bread from sticking and helps create a golden-brown crust.
-
Arrange the rolls or loaves in the prepared pan(s), leaving some space between them to allow for expansion during the final rise.
-
Cover the pan(s) with a clean kitchen towel and let the rolls or loaves rise one last time for about 30-45 minutes, or until they have nearly doubled in size.
-
Preheat your oven to 375°F (190°C).
-
Bake the rolls or loaves in the preheated oven until golden brown and cooked through. This typically takes about 20 minutes, but baking times can vary depending on your oven. To check for doneness, insert a toothpick into the center of a roll or loaf; if it comes out clean, the bread is ready.
-
Remove the rolls or loaves from the oven and let them cool slightly in the pan before transferring them to a wire rack to cool completely.
Expert Tips & Tricks
- Warmth is Key: Yeast thrives in warm environments. Ensure your water is lukewarm and your rising spot is warm to encourage optimal rising. If your kitchen is cold, try placing the dough in a slightly warmed oven (turned off!) or near a warm appliance.
- Don’t Overmix: Overmixing can lead to tough bread. Mix the dough until just combined, and rely on kneading to develop the gluten.
- Shaping Matters: Consistent shaping ensures even baking. For rolls, aim for uniform size to ensure they bake at the same rate.
- Egg Wash (Optional): For an extra golden and glossy crust, brush the tops of the rolls or loaves with an egg wash (1 egg whisked with 1 tablespoon of water) before baking.
- Resting Time: Allowing the bread to cool slightly before slicing helps prevent it from becoming gummy.
Serving & Storage Suggestions
Serve these warm, homemade rolls or loaves alongside your favorite soups, stews, or as a side to any meal. They are also delicious on their own with a pat of butter or a drizzle of honey.
Store leftover rolls or loaves in an airtight container at room temperature for up to 3 days. For longer storage, wrap tightly and freeze for up to 2 months. To reheat, thaw completely and warm in a 350°F (175°C) oven for 5-10 minutes, or until heated through. You can also microwave them in 15-second intervals.
Nutritional Information
(Estimated, per roll or slice, varies based on size)
| Nutrient | Amount per Serving | % Daily Value |
|---|---|---|
| Calories | 230 kcal | 12% |
| Total Fat | 2g | 3% |
| Saturated Fat | 0.5g | 3% |
| Cholesterol | 0mg | 0% |
| Sodium | 200mg | 9% |
| Total Carbohydrate | 45g | 15% |
| Dietary Fiber | 2g | 8% |
| Sugars | 2g | 4% |
| Protein | 6g | 12% |
Variations & Substitutions
- Vegan Bread: Substitute the shortening with a vegan shortening alternative or a neutral-flavored oil like canola or sunflower oil.
- Whole Wheat Bread: Replace up to half of the all-purpose flour with whole wheat flour for a nuttier flavor and increased fiber. You may need to add a little extra water to compensate for the added fiber in whole wheat flour.
- Herb-Infused Bread: Add dried herbs like rosemary, thyme, or oregano to the dough for a savory twist.
- Sweet Rolls: Add a bit more sugar (up to 1/4 cup total) and a touch of vanilla extract to the dough for sweeter rolls.
- Garlic Bread: Brush the baked rolls or loaves with garlic butter while still warm for a delicious garlic bread variation.
FAQs (Frequently Asked Questions)
Q: My dough isn’t rising. What am I doing wrong?
A: Ensure your yeast is fresh and your water is lukewarm, not hot. A cold environment can also hinder rising. Try placing the dough in a warmer spot.
Q: Can I use bread flour instead of all-purpose flour?
A: Yes, bread flour will result in a chewier texture. You might need to adjust the amount of water slightly.
Q: How do I know when the bread is done baking?
A: The bread should be golden brown and sound hollow when tapped on the bottom. A toothpick inserted into the center should come out clean.
Q: Can I make the dough ahead of time and bake it later?
A: Yes! You can prepare the dough through the first rise, then punch it down and refrigerate it for up to 24 hours. Let it come to room temperature before shaping and baking.
Q: My rolls are browning too quickly on top. What should I do?
A: Tent the pan loosely with aluminum foil to prevent over-browning.
Final Thoughts
Making Mom’s homemade white bread rolls (or loaves) is an act of love, a connection to tradition, and a guaranteed crowd-pleaser. Don’t be intimidated by the process; each step is simple, and the reward is immeasurable. The warm, yeasty aroma filling your kitchen is just the beginning. So, gather your ingredients, embrace the process, and prepare to create memories that will last a lifetime, one delicious roll at a time. This bread is fantastic alongside a hearty soup or a comforting stew, like my famous tomato basil soup. Happy baking!