
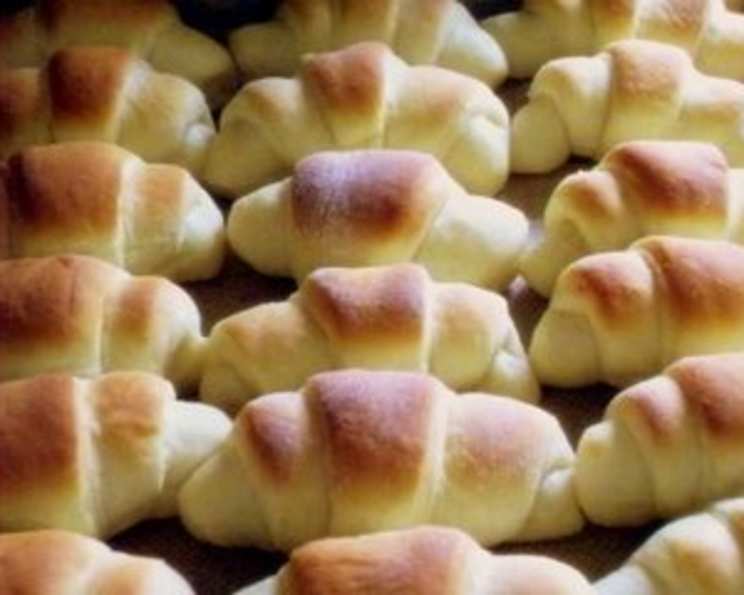
Mom’s Melt-In-Your-Mouth Dinner Rolls
I can still picture it: the Sunday dinner table, laden with roasted chicken, mashed potatoes swimming in gravy, and a basket overflowing with these golden, pillowy rolls. The aroma alone was enough to make my mouth water, but the moment I sunk my teeth into one of Mom’s rolls, still warm from the oven and slathered in butter, pure bliss washed over me. These aren’t just rolls; they’re a taste of home, a reminder of family, and a testament to Mom’s unwavering love, all baked into a single, perfect bite.
Recipe Overview
- Prep Time: 25 minutes (plus overnight refrigeration)
- Cook Time: 8-10 minutes
- Total Time: 2 hours 35 minutes (plus overnight refrigeration)
- Servings: 24 rolls
- Yield: 2 dozen rolls
- Dietary Type: Not specified (contains dairy and eggs)
Ingredients
- 1 (1/4 ounce) package yeast
- 1/2 cup warm water
- 1 tablespoon sugar
- 1 teaspoon baking powder
- 1 cup milk
- 1/3 cup margarine (or butter)
- 1/3 cup sugar
- 1 dash salt
- 2 eggs, beaten
- 4 1/2 cups flour
Equipment Needed
- Large mixing bowl
- 4-cup glass measuring cup (microwave safe optional)
- Measuring cups and spoons
- Clean kitchen towel
- Greased baking sheets
Instructions
-
Begin by activating the yeast. In a small bowl, dissolve one (1/4 ounce) package of yeast in 1/2 cup of warm water. Add 1 tablespoon of sugar and 1 teaspoon of baking powder. Let this mixture stand for 20 minutes, allowing the yeast to bloom and become frothy. This is a crucial step to ensure your rolls rise properly.
-
While the yeast is activating, prepare the milk mixture. In a saucepan or a microwave-safe container, scald 1 cup of milk. This means heating it until it’s just below boiling point – you’ll see small bubbles forming around the edges.
-
Remove the scalded milk from the heat and add 1/3 cup of margarine (or butter), 1/3 cup of sugar, and a dash of salt. Stir until the margarine is completely melted and the sugar is dissolved. If using a microwave, I prefer to do this step in a 4-cup glass measuring cup for easier pouring later.
-
Allow the milk mixture to cool slightly, then add 2 eggs, beaten. Be sure the milk mixture isn’t too hot, or you risk scrambling the eggs.
-
In a large mixing bowl, combine the activated yeast mixture with the cooled milk and egg mixture. Gradually add 4 1/2 cups of flour, mixing until a dough forms.
-
Cover the bowl with a lid or plastic wrap and refrigerate overnight. This long, slow rise in the refrigerator is what gives these rolls their incredible flavor and texture. The dough will more than double in bulk, so make sure your container is large enough to accommodate the expansion. If you’re concerned about the dough overflowing, you can gently punch it down once or twice during the refrigeration period without compromising the final result.
-
Two hours before you plan to serve the rolls, remove the dough from the refrigerator. On a lightly floured surface, divide the dough into thirds. Roll each third into a large circle, approximately 9 inches in diameter. Don’t worry if the dough seems a bit sticky at first; a light dusting of flour will make it easier to handle.
-
Using a sharp knife or pizza cutter, cut each circle into 8 wedges. Starting at the wide end of each wedge, roll it up tightly to form a crescent roll shape.
-
Place the formed rolls on greased baking sheets, leaving some space between each roll to allow for further rising. Cover the baking sheets with clean kitchen towels and let the rolls rise in a warm place for 2 hours. This second rise is essential for achieving that light and airy texture.
-
Preheat your oven to 425 degrees Fahrenheit (220 degrees Celsius).
-
Once the rolls have risen for 2 hours, bake them in the preheated oven for 8-10 minutes, or until they are golden brown on top. Keep a close eye on them to prevent burning.
-
As soon as the rolls come out of the oven, rub the tops with a stick of butter. This not only adds a beautiful sheen but also enhances the flavor and keeps the crust soft.
Expert Tips & Tricks
- Don’t skip the overnight refrigeration: This step is crucial for developing the complex flavor and tender texture of the rolls.
- Handle the dough gently: Overworking the dough can result in tough rolls.
- Use a light hand with the flour: Adding too much flour will make the rolls dense.
- For extra flavor: Brush the rolls with garlic butter or sprinkle them with herbs before baking.
- If your kitchen is cold: Place the covered dough in a slightly warmed oven (turned off!) to help it rise faster.
Serving & Storage Suggestions
Serve these rolls warm from the oven with a generous pat of butter. They’re the perfect accompaniment to any meal, from a simple weeknight dinner to a festive holiday feast. Leftover rolls can be stored in an airtight container at room temperature for up to 2 days, or in the refrigerator for up to a week. For longer storage, freeze the baked rolls in a freezer-safe bag or container. To reheat, wrap the rolls in foil and warm them in a 350°F (175°C) oven for about 10-15 minutes, or until heated through. You can also microwave them for a short burst, but be careful not to overheat them, or they will become tough.
Nutritional Information
Note: Nutritional information is an estimate and can vary based on specific ingredients and portion sizes.
| Nutrient | Amount per Serving | % Daily Value |
|---|---|---|
| Calories | 134 kcal | 7% |
| Total Fat | 3.5g | 5% |
| Saturated Fat | 0.8g | 4% |
| Cholesterol | 19.1mg | 6% |
| Sodium | 62.6mg | 2% |
| Total Carbohydrate | 21.9g | 7% |
| Dietary Fiber | 0.7g | 2% |
| Sugars | 3.4g | N/A |
| Protein | 3.4g | 6% |
Variations & Substitutions
- Dairy-Free: Substitute the milk with your favorite plant-based milk, such as almond, soy, or oat milk. Use a dairy-free margarine or oil.
- Gluten-Free: While it significantly alters the recipe, you can attempt a gluten-free version using a 1:1 gluten-free flour blend. Note that the texture will be different, and the dough may require adjustments to the liquid content.
- Sweet Rolls: Add a cinnamon-sugar filling before rolling up the wedges for a delicious sweet treat.
- Herb Rolls: Incorporate fresh herbs like rosemary, thyme, or oregano into the dough for a savory twist.
FAQs (Frequently Asked Questions)
Q: Can I make the dough ahead of time and freeze it?
A: Yes, you can freeze the dough after the first rise. Thaw it in the refrigerator overnight before shaping and baking.
Q: Why is my dough not rising?
A: Possible causes include using expired yeast, the water being too hot or cold, or the room being too cold for the second rise.
Q: Can I use bread flour instead of all-purpose flour?
A: Bread flour will result in a slightly chewier roll. All-purpose flour is recommended for the most tender texture.
Q: How do I prevent the rolls from drying out?
A: Brushing the hot rolls with butter immediately after baking helps to keep them moist. Also, avoid overbaking.
Q: What is the best way to reheat the rolls?
A: Wrapping the rolls in foil and warming them in a 350°F (175°C) oven for about 10-15 minutes is the best way to retain their moisture.
Final Thoughts
These melt-in-your-mouth dinner rolls are more than just a recipe; they’re a piece of my family history, a tradition passed down through generations. I encourage you to try this recipe and experience the joy of baking these incredibly soft and flavorful rolls. Don’t be afraid to experiment with variations and make them your own. And most importantly, share them with the people you love. Serve them alongside a hearty stew or a simple salad, and watch as they disappear from the table. I’d love to hear about your experience and any variations you try – happy baking!