
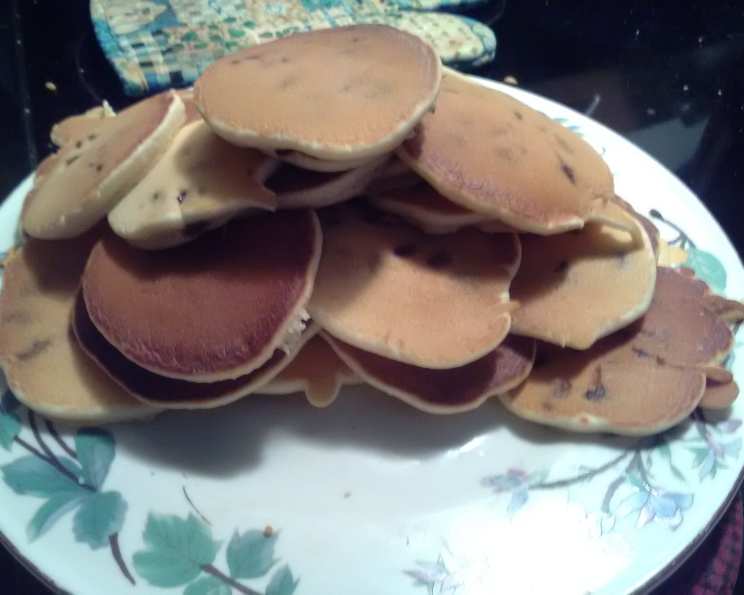
Mom’s Mini Chocolate Chip Pancakes
The scent of these mini chocolate chip pancakes instantly transports me back to weekend mornings in my childhood home. My mom would stand at the stove, a spatula in hand, expertly flipping these little golden discs as fast as we could devour them. They weren’t just breakfast; they were edible sunshine, a symbol of cozy family time, and a guaranteed way to start the day with a smile—especially when the chocolate chips melted just right.
Recipe Overview
- Prep Time: 5 minutes
- Cook Time: 15 minutes
- Total Time: 20 minutes
- Servings: 12
- Yield: 48 mini pancakes
- Dietary Type: Vegetarian
Ingredients
- 1 1/4 cups self-rising flour
- 2 tablespoons white sugar
- 1 cup milk
- 2 tablespoons vegetable oil
- 1 egg
- 1 cup chocolate chips
Equipment Needed
- Large bowl
- Wire whisk
- Lightly greased skillet or griddle
Instructions
- Preheat a lightly greased skillet or griddle to medium heat. The key here is “lightly greased”—you don’t want the pancakes swimming in oil, just a thin coating to prevent sticking.
NOTE: My mother always uses regular canola non-stick spray, but I use olive oil non-stick spray, and the pancakes come out lighter and fluffier. Using olive oil non-stick spray can give a slightly different flavor profile and may contribute to a more tender pancake. Experiment and see which you prefer. - In a large bowl, combine the self-rising flour and white sugar. This is your dry ingredient base. Make sure there are no lumps in the flour for a smooth batter.
- Add the milk, vegetable oil, and egg to the bowl. Using a wire whisk, mix until well combined. Don’t overmix! A few lumps are okay; overmixing can lead to tough pancakes. The goal is to incorporate all the ingredients until just moistened.
- Gently stir in the chocolate chips. Distribute them evenly throughout the batter. Be careful not to crush the chocolate chips, as this can discolor the batter.
- Pour the batter onto the hot surface by tablespoonfuls. Using a tablespoon ensures uniform size for these mini treats.
- Cook until golden brown on both sides. This usually takes about 2-3 minutes per side. Watch for the top surface to get very bubbly before flipping the first time. The bubbles indicate that the pancakes are cooking through and ready to be flipped.
- Enjoy immediately! These are best served warm, right off the griddle.
Expert Tips & Tricks
- Temperature is key. If your skillet is too hot, the pancakes will burn on the outside before they’re cooked through on the inside. If it’s too cold, they’ll be pale and flat. Medium heat is generally the sweet spot.
- Don’t overcrowd the griddle. Cook in batches to ensure even cooking and easy flipping.
- For extra fluffy pancakes, let the batter rest for 5-10 minutes before cooking. This allows the gluten to relax and the self-rising flour to activate fully.
- Spice things up! Add a pinch of cinnamon or nutmeg to the dry ingredients for a warm, comforting flavor.
- Chocolate chip variations: Experiment with different types of chocolate chips, such as dark chocolate, white chocolate, or even mini M&Ms for a colorful twist.
Serving & Storage Suggestions
Serve these mini pancakes warm with your favorite toppings. Maple syrup is a classic, but fresh berries, whipped cream, or a dusting of powdered sugar are also delicious options. For a more decadent treat, drizzle with chocolate sauce or Nutella.
Leftover pancakes can be stored in an airtight container in the refrigerator for up to 3 days. To reheat, simply microwave for a few seconds or toast them in a toaster oven until warmed through. You can also freeze them for longer storage. Place the pancakes in a single layer on a baking sheet and freeze for about an hour. Once frozen, transfer them to a freezer bag or container. They can be stored in the freezer for up to 2 months. Reheat from frozen in a toaster or microwave.
Nutritional Information
| Nutrient | Amount per Serving | % Daily Value |
|---|---|---|
| Calories | 160.5 kcal | N/A |
| Calories from Fat | 69 kcal | N/A |
| Total Fat | 7.8 g | 11% |
| Saturated Fat | 3.4 g | 16% |
| Cholesterol | 20.5 mg | 6% |
| Sodium | 182.7 mg | 7% |
| Total Carbohydrate | 21.6 g | 7% |
| Dietary Fiber | 1.2 g | 4% |
| Sugars | 9.8 g | N/A |
| Protein | 3.1 g | 6% |
Note: Nutritional information is an estimate and may vary based on specific ingredients and preparation methods.
Variations & Substitutions
- Gluten-Free: Substitute the self-rising flour with a gluten-free self-rising flour blend. You may need to adjust the amount of liquid slightly to achieve the desired consistency.
- Dairy-Free: Use almond milk, soy milk, or oat milk instead of regular milk.
- Vegan: Replace the egg with a flax egg (1 tablespoon of ground flaxseed mixed with 3 tablespoons of water). Let it sit for 5 minutes to thicken before adding to the batter.
- Different Flavors: Add a teaspoon of vanilla extract or almond extract to the batter for a different flavor profile. You can also add a pinch of cinnamon, nutmeg, or cardamom for a warm, spicy twist.
- Fruity Pancakes: Incorporate fresh or frozen blueberries, raspberries, or sliced bananas into the batter for a fruity variation.
FAQs (Frequently Asked Questions)
Q: Why are my pancakes flat?
A: Flat pancakes can be caused by overmixing the batter, using old self-rising flour, or having the skillet temperature too low. Make sure to gently mix the batter until just combined and use fresh ingredients.
Q: How do I keep the pancakes warm while I’m cooking the rest of the batch?
A: Preheat your oven to 200°F (93°C). Place the cooked pancakes on a baking sheet in a single layer and keep them warm in the oven until ready to serve.
Q: Can I make the batter ahead of time?
A: Yes, you can prepare the batter up to 24 hours in advance. Store it in an airtight container in the refrigerator. You may need to add a splash of milk to thin the batter before cooking, as it may thicken upon standing.
Q: What if I don’t have self-rising flour?
A: You can make your own self-rising flour by combining 1 cup of all-purpose flour with 1 1/2 teaspoons of baking powder and 1/4 teaspoon of salt.
Q: How do I prevent the chocolate chips from sinking to the bottom of the pancakes?
A: Make sure your batter is not too thin. Also, gently toss the chocolate chips in a tablespoon of flour before adding them to the batter. This will help them stay suspended.
Final Thoughts
I truly hope you’ll give these mini chocolate chip pancakes a try. They’re a simple, comforting classic that’s sure to bring a smile to your face. Whether you’re making them for a weekend brunch or a quick weekday snack, these little treats are always a hit. Don’t be afraid to experiment with variations and make them your own. And most importantly, enjoy the process! Let me know how they turn out, and feel free to share your own tips and tricks. Perhaps a side of crispy bacon or a steaming mug of hot chocolate would complete the experience? Happy cooking!