
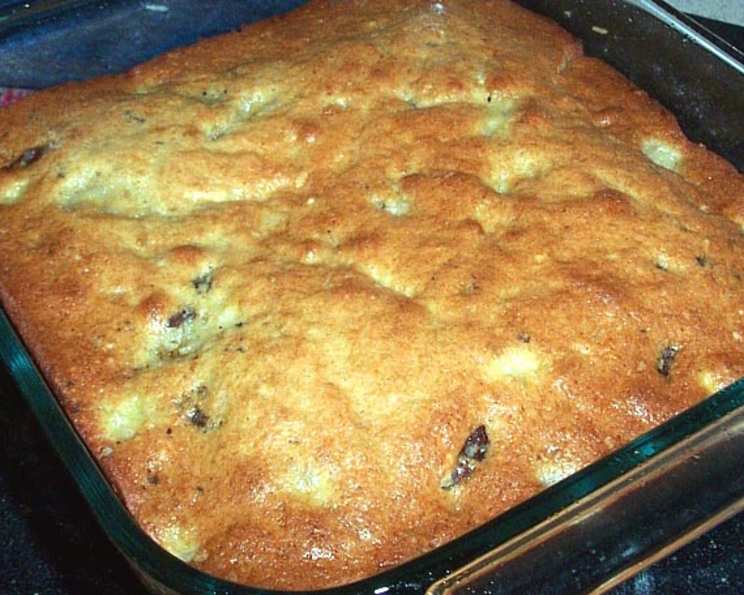
Monkey Bars: A Slice of Childhood Nostalgia
The scent of bananas baking always transports me back to my grandmother’s kitchen. Not just banana bread, but these delightful “Monkey Bars,” as she playfully called them. I remember standing on a stool, “helping” her mash the bananas (mostly making a mess), the sweet aroma mingling with the warmth of the oven. These bars, studded with chocolate chips, were the ultimate afternoon treat, a simple yet satisfying indulgence that tasted like pure love. They were the perfect portable snack, great for lunchboxes or picnics, and far superior to any store-bought granola bar!
Recipe Overview
- Prep Time: 10 minutes
- Cook Time: 20-25 minutes
- Total Time: 30 minutes
- Servings: 16
- Yield: 1 9-inch square pan
- Dietary Type: Vegetarian
Ingredients
- 1 1⁄4 cups all-purpose flour
- 1⁄2 teaspoon baking soda
- 1⁄4 teaspoon salt
- 1⁄4 teaspoon nutmeg
- 2 medium bananas (3/4 – 1 cup mashed banana)
- 2 tablespoons butter, melted
- 2 eggs
- 3⁄4 cup sugar
- 1 teaspoon vanilla extract
- 1⁄2 cup chocolate chips
Equipment Needed
- 9-inch square baking pan
- Medium bowl
- Whisk
- Food processor
- Measuring cups and spoons
Instructions
-
Preheat your oven to 350°F (175°C). Lightly grease a 9-inch square pan. This prevents the bars from sticking and makes them easier to remove after baking. You can use butter, cooking spray, or line the pan with parchment paper.
-
In a medium bowl, whisk together flour, baking soda, salt, and nutmeg. Whisking ensures that the dry ingredients are evenly distributed, which is crucial for consistent baking. The nutmeg adds a warm, subtle spice that complements the banana flavor beautifully.
-
In the bowl of a food processor, blend the bananas until smooth. Alternatively, you can mash them very well with a fork if you don’t have a food processor. Add in the melted butter, eggs, sugar, and vanilla extract and whizz until smooth and well-combined. This wet mixture provides the moisture and sweetness for the bars. Make sure the butter isn’t too hot, as it could cook the eggs slightly.
-
Pour the banana mixture into the flour mixture and stir until just combined. Be careful not to overmix the batter, as this can develop the gluten in the flour and result in tough bars. A few streaks of flour are perfectly fine.
-
Fold in the chocolate chips. Even distribution of the chocolate chips throughout the batter ensures that every bite is a delight.
-
Pour the batter into the prepared pan. It will be a relatively thin layer, so don’t be concerned if it doesn’t fill the entire pan.
-
Bake at 350°F (175°C) for 20-25 minutes, or until a tester inserted into the center comes out dry. Baking times may vary slightly depending on your oven, so start checking for doneness around the 20-minute mark. The bars should be golden brown on top and slightly firm to the touch.
-
Cool completely before slicing. This is important because the bars need time to set and firm up. Cutting them while they’re still warm can result in a crumbly mess. Place the pan on a wire rack to allow air to circulate and speed up the cooling process.
Expert Tips & Tricks
- Ripeness Matters: Use very ripe bananas for the best flavor and moisture. The browner the better! Those overripe bananas sitting on your counter are perfect for this recipe.
- Melted Butter Alternative: If you don’t have butter on hand, you can substitute it with melted coconut oil or vegetable oil. The flavor will be slightly different, but the texture will be similar.
- Don’t Overmix: Overmixing develops gluten, leading to tough bars. Mix until just combined.
- Even Baking: To ensure even baking, rotate the pan halfway through the baking time. This helps to prevent hot spots in your oven from overcooking certain areas of the bars.
- Customize with Toppings: Before baking, sprinkle the top of the bars with chopped nuts, shredded coconut, or a dusting of cinnamon for added flavor and texture.
- Make Ahead: The batter can be made ahead of time and stored in the refrigerator for up to 24 hours. Bring to room temperature before baking.
- Troubleshooting: If your bars are browning too quickly, tent the pan with foil to prevent them from burning. If they’re not browning enough, increase the baking time by a few minutes.
Serving & Storage Suggestions
Once cooled, cut the Monkey Bars into squares or rectangles. They are delicious served as a snack, dessert, or even for breakfast. They pair well with a glass of cold milk, a cup of coffee, or a scoop of vanilla ice cream.
Store the bars in an airtight container at room temperature for up to 3 days, in the refrigerator for up to a week, or in the freezer for up to 2 months. To freeze, wrap the bars individually in plastic wrap and then place them in a freezer-safe bag or container.
To reheat frozen bars, thaw them in the refrigerator overnight or at room temperature for a few hours. You can also microwave them for a few seconds to warm them up.
Nutritional Information
| Nutrient | Amount per Serving | % Daily Value |
|---|---|---|
| Calories | 133 kcal | N/A |
| Calories from Fat | 34 g | 26% |
| Total Fat | 3.8 g | 5% |
| Saturated Fat | 2.1 g | 10% |
| Cholesterol | 30.2 mg | 10% |
| Sodium | 95.6 mg | 3% |
| Total Carbohydrate | 23.6 g | 7% |
| Dietary Fiber | 1 g | 3% |
| Sugars | 14.2 g | 56% |
| Protein | 2.2 g | 4% |
Note: Nutritional information is an estimate and may vary based on specific ingredients and portion sizes.
Variations & Substitutions
- Gluten-Free: Substitute the all-purpose flour with a gluten-free all-purpose blend. Be sure to use a blend that contains xanthan gum or add 1/2 teaspoon of xanthan gum to the mixture for the best texture.
- Vegan: Replace the butter with vegan butter or coconut oil, and use a flax egg (1 tablespoon of flaxseed meal mixed with 3 tablespoons of water, let sit for 5 minutes to thicken) for the eggs.
- Nutty: Add 1/2 cup of chopped walnuts, pecans, or almonds to the batter for a nutty twist.
- Spiced: Increase the amount of nutmeg or add other spices like cinnamon, cloves, or allspice for a warmer, more complex flavor.
- Chocolate Chunk: Substitute the chocolate chips with chopped chocolate chunks for a richer, more decadent treat.
- Peanut Butter: Swirl peanut butter into the batter before baking for a peanut butter banana flavor combination.
- Maple Syrup: Substitute the sugar with maple syrup for a healthier sweetener option.
FAQs (Frequently Asked Questions)
Q: Can I use frozen bananas for this recipe?
A: Yes, frozen bananas work perfectly! Just be sure to thaw them completely and drain any excess liquid before using.
Q: How do I know when the bars are done?
A: Insert a toothpick or cake tester into the center of the bars. If it comes out clean or with a few moist crumbs attached, they’re done.
Q: Can I add nuts to these bars?
A: Absolutely! Chopped walnuts, pecans, or almonds would be a delicious addition. Simply fold them into the batter along with the chocolate chips.
Q: Why did my bars turn out dry?
A: Overbaking is the most common cause of dry bars. Be sure to check them for doneness around the 20-minute mark and remove them from the oven as soon as they’re ready. Also, ensure you are using the correct amount of butter and that your bananas are ripe enough.
Q: Can I freeze these bars?
A: Yes, these bars freeze very well. Wrap them individually in plastic wrap and then place them in a freezer-safe bag or container. They can be stored in the freezer for up to 2 months.
Final Thoughts
These Monkey Bars are more than just a recipe; they’re a little piece of happiness baked into a square. I encourage you to try this recipe and experience the joy of sharing these treats with your loved ones. Don’t be afraid to experiment with variations and make them your own. And please, let me know what you think! Do you have any childhood memories associated with banana bread or similar treats? I’d love to hear your stories! These bars pair perfectly with a scoop of vanilla ice cream and a drizzle of caramel sauce. Happy baking!