
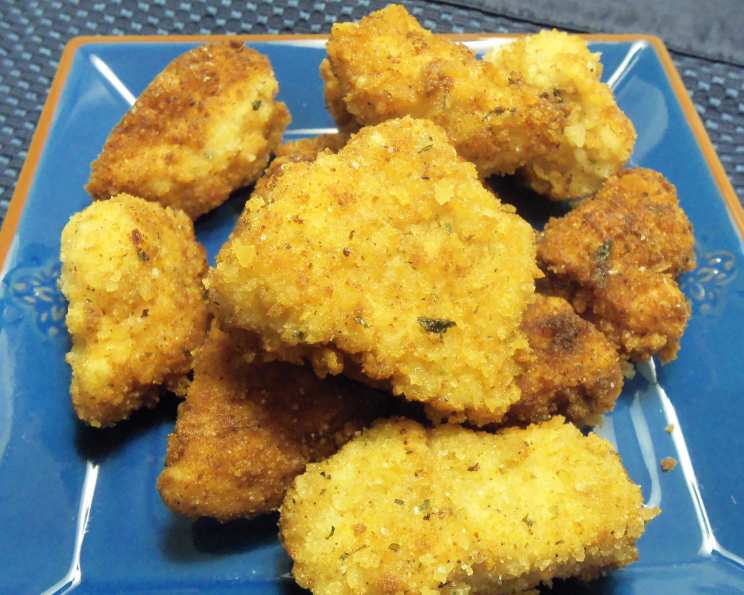
Monkey’s Chicken Fingers: A Crispy, Juicy Delight
I’ll never forget the first time I made these chicken fingers. My nephew, whom we affectionately call “Monkey,” is notoriously picky, a culinary critic in miniature form. Chicken nuggets were his go-to, but I was determined to elevate his experience. After some experimentation and a bit of coaxing, I presented him with these homemade chicken fingers. The look on his face – a mixture of surprise and pure joy – was priceless. He devoured them, proclaiming them the “bestest” he’d ever had. That’s when I knew this recipe was a keeper, a testament to the power of simple ingredients combined with a little love.
Recipe Overview
- Prep Time: 20 minutes
- Cook Time: 15-20 minutes
- Total Time: 35-40 minutes
- Servings: 8
- Yield: About 24 chicken fingers (depending on size)
- Dietary Type: Not specified (can be modified to be gluten-free or dairy-free with substitutions)
Ingredients
- 3 lbs chicken tenders
- 1 cup panko breadcrumbs
- 1 cup seasoned bread crumbs
- 1 cup flour, divided
- 1 tablespoon onion powder
- 1 tablespoon garlic powder
- 1 teaspoon fresh coarse ground black pepper
- 1 teaspoon sea salt (or creole seasoning)
- ½ packet Good Seasons Italian Seasoning Mix
- 1 egg
- ½ cup milk
- Oil, for frying (vegetable, canola, or peanut oil recommended)
Equipment Needed
- Shallow bowls or dishes (3)
- Large skillet or frying pan
- Paper towels
- Tongs
- Thermometer (optional, for oil temperature)
Instructions
- Begin by preparing the egg wash. In a shallow bowl, whisk together the egg, milk, and Good Seasons Italian Seasoning Mix. Set this aside. This mixture will help the breading adhere to the chicken.
- Next, create the flavorful breading mixture. In another shallow bowl, combine the panko breadcrumbs, seasoned bread crumbs, ½ cup of the flour, onion powder, garlic powder, salt, and pepper. Mix thoroughly to ensure the spices are evenly distributed.
- Dust the chicken tenders with the remaining ½ cup of flour. This initial coating of flour provides a better surface for the egg wash to cling to. Shake off any excess flour to prevent a gummy texture.
- Now, it’s time to bread the chicken. Take each floured chicken tender and dip it into the egg wash, ensuring it’s fully coated. Let any excess drip off before transferring it to the breadcrumb mixture.
- Completely coat the chicken tender in the breadcrumb mixture, pressing gently to ensure the breading adheres well. Set the breaded chicken aside on a clean plate or baking sheet. Repeat this process until all the chicken tenders are breaded.
- Heat about ½ inch of oil in a large skillet or frying pan over medium-high heat. The ideal oil temperature is around 350-375°F (175-190°C). If you don’t have a thermometer, test the oil by dropping a small piece of breading into it. If it sizzles and turns golden brown in about 30 seconds, the oil is ready.
- Carefully place about 6 breaded chicken tenders into the hot oil, being careful not to overcrowd the pan. Overcrowding will lower the oil temperature and result in soggy chicken fingers.
- Fry the chicken fingers for approximately 3 minutes on each side, or until they are golden brown and cooked through. The internal temperature of the chicken should reach 165°F (74°C).
- Remove the chicken fingers from the pan using tongs and place them on a plate lined with paper towels to drain any excess oil.
- Repeat the frying process with the remaining chicken tenders, ensuring the oil temperature remains consistent.
- Serve immediately with your favorite dipping sauces.
Expert Tips & Tricks
- For extra crispy chicken fingers, consider double breading. Dip the floured chicken in the egg wash, then the breadcrumb mixture, then back into the egg wash, and finally back into the breadcrumb mixture.
- If you prefer baking over frying, you can bake these chicken fingers in a preheated oven at 400°F (200°C) for about 20-25 minutes, or until golden brown and cooked through. Place them on a baking sheet lined with parchment paper and consider spraying them with cooking oil for added crispiness.
- To prevent the breading from falling off during frying, chill the breaded chicken fingers in the refrigerator for about 30 minutes before cooking. This helps the breading adhere better.
- For a spicier kick, add a pinch of cayenne pepper or some hot sauce to the egg wash.
Serving & Storage Suggestions
Serve these chicken fingers hot and fresh with a variety of dipping sauces such as ketchup, honey mustard, barbecue sauce, ranch dressing, or even a homemade aioli. They also make a great addition to salads or wraps.
Leftover chicken fingers can be stored in an airtight container in the refrigerator for up to 3-4 days. For longer storage, you can freeze them for up to 2-3 months. To reheat, bake them in a preheated oven at 350°F (175°C) for about 10-15 minutes, or until heated through and crispy. You can also reheat them in an air fryer for a similar result. Microwaving is not recommended as it can make them soggy.
Nutritional Information
| Nutrient | Amount per Serving | % Daily Value |
|---|---|---|
| Calories | 388 kcal | N/A |
| Calories from Fat | 65 g | 17% |
| Total Fat | 7.3 g | 11% |
| Saturated Fat | 1.9 g | 9% |
| Cholesterol | 134.5 mg | 44% |
| Sodium | 868.9 mg | 36% |
| Total Carbohydrate | 34.4 g | 11% |
| Dietary Fiber | 2.1 g | 8% |
| Sugars | 1.9 g | 7% |
| Protein | 43.3 g | 86% |
Note: Nutritional information is an estimate and may vary based on specific ingredients and portion sizes.
Variations & Substitutions
- Gluten-Free: Use gluten-free bread crumbs and gluten-free flour.
- Dairy-Free: Substitute almond milk or another plant-based milk for the cow’s milk. Ensure the seasoned bread crumbs are also dairy-free.
- Spice it Up: Add a dash of cayenne pepper to the breadcrumb mixture or use a spicy seasoning blend.
- Herb Infusion: Incorporate finely chopped fresh herbs like parsley, thyme, or rosemary into the breadcrumb mixture for a more sophisticated flavor.
- Asian-Inspired: Use panko breadcrumbs mixed with sesame seeds and ginger powder. Serve with a soy sauce-based dipping sauce.
FAQs (Frequently Asked Questions)
Q: Can I use chicken breasts instead of chicken tenders?
A: Yes, you can. Simply cut the chicken breasts into strips similar in size to chicken tenders.
Q: Can I prepare these chicken fingers ahead of time?
A: Yes, you can bread the chicken fingers and store them in the refrigerator for up to 24 hours before frying.
Q: What’s the best way to keep the chicken fingers warm while serving?
A: Place the cooked chicken fingers on a wire rack in a warm oven (around 200°F or 95°C) to keep them crispy and warm until serving.
Q: My breading keeps falling off. What am I doing wrong?
A: Make sure you are dusting the chicken with flour before dipping it in the egg wash. Also, ensure the breading is pressed firmly onto the chicken. Chilling the breaded chicken for 30 minutes before frying can also help.
Q: Can I use an air fryer instead of frying in oil?
A: Absolutely! Air frying is a healthier alternative. Preheat your air fryer to 400°F (200°C) and cook the chicken fingers for about 12-15 minutes, flipping halfway through, until golden brown and cooked through.
Final Thoughts
These Monkey’s Chicken Fingers are more than just a recipe; they’re a memory, a taste of pure joy, and a testament to the power of homemade food. I encourage you to try this recipe and share it with your loved ones. Whether you’re feeding picky eaters or simply craving a delicious and satisfying meal, these chicken fingers are sure to be a hit. Experiment with different dipping sauces, share your creations, and let me know what you think! Bon appétit!