
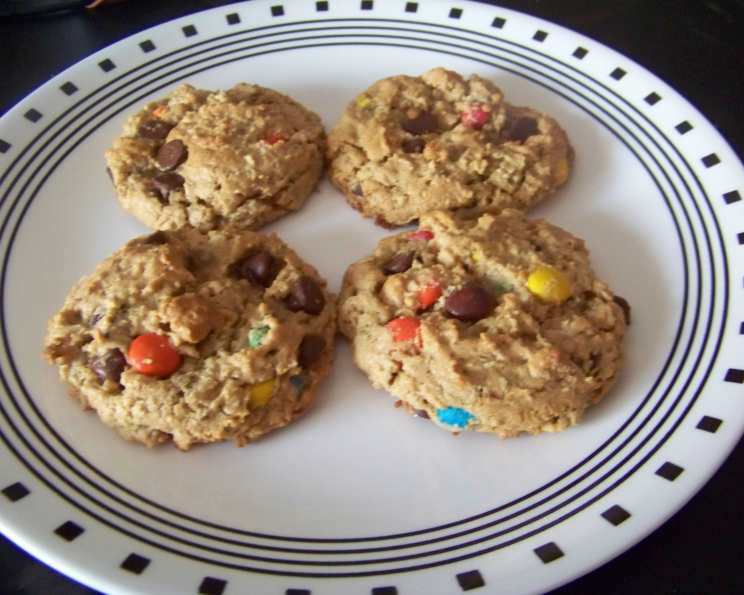
The Surprisingly Simple Monster Cookie
I remember the first time I saw a Monster Cookie. It was at a school bake sale, a chaotic swirl of colors and textures that looked like it had been dreamt up by a kid with an overactive imagination. Towering above the neatly arranged chocolate chip cookies and brownies, it was a magnificent beast of oats, peanut butter, chocolate, and candy, daring me to take a bite. That single cookie, purchased with hard-earned allowance money, sparked a lifelong love for these delightful confections. The sheer joy of that first bite, the explosion of flavors and textures, is a memory I cherish to this day. What I didn’t know then was how surprisingly easy they were to make!
Recipe Overview
- Prep Time: 10 minutes
- Cook Time: 12 minutes
- Total Time: 22 minutes
- Yields: 48 cookies
- Serves: 48
- Dietary Type: Gluten-Free (if using certified gluten-free oats)
Ingredients
- 3 eggs
- 1 cup brown sugar, packed
- 1 cup white sugar
- 1 teaspoon vanilla extract
- 1 teaspoon corn syrup
- ½ cup (1 stick) butter, softened
- 1 ½ cups peanut butter (creamy or chunky)
- 2 teaspoons baking soda
- 4 cups quick-cooking oats (not instant)
- ½ cup M&M’s plain chocolate candies
- ½ cup chocolate chips (semi-sweet or milk chocolate)
Equipment Needed
- Large mixing bowl
- Electric mixer (handheld or stand mixer)
- Measuring cups and spoons
- Baking sheets
- Parchment paper or silicone baking mats
- Cookie scoop (optional, for uniform cookies)
Instructions
- Preheat your oven to 350°F (175°C). Line your baking sheets with parchment paper or silicone baking mats. This prevents sticking and makes cleanup a breeze.
- In a large mixing bowl, cream together the brown sugar, white sugar, softened butter, and peanut butter until the mixture is light and fluffy. This step is crucial for achieving the right texture. Use an electric mixer for best results.
- Beat in the eggs one at a time, then stir in the vanilla extract and corn syrup. The corn syrup helps to keep the cookies soft and chewy.
- In a separate small bowl, whisk together the baking soda and oats.
- Gradually add the oat mixture to the wet ingredients, mixing until just combined. Be careful not to overmix, as this can make the cookies tough.
- Gently fold in the M&M’s and chocolate chips. Distribute them evenly throughout the batter.
- Drop by rounded tablespoons (or use a cookie scoop for uniform size) onto the prepared baking sheets, leaving about 2 inches between each cookie. These cookies will spread slightly as they bake.
- Bake for 12 minutes, or until the edges are golden brown and the centers are set. Don’t overbake, or the cookies will be dry.
- Remove the baking sheets from the oven and let the cookies cool on the sheets for a few minutes before transferring them to a wire rack to cool completely.
Expert Tips & Tricks
- Use Quick Oats: This recipe specifically calls for quick-cooking oats, not instant or old-fashioned oats. Quick oats provide the right texture and prevent the cookies from becoming too dry.
- Don’t Overmix: Overmixing the batter can develop the gluten in the oats, resulting in tough cookies. Mix until just combined.
- Soften the Butter: Make sure your butter is softened to room temperature for easy creaming. If you forget, you can microwave it in short intervals (5-10 seconds), but be careful not to melt it.
- Room Temperature Eggs: Using room temperature eggs will help the ingredients blend together more evenly.
- Vary the Mix-Ins: Feel free to experiment with different types of chocolate chips (dark, white, peanut butter), nuts, dried fruit, or even chopped pretzels for a salty-sweet twist.
- Scoop for Uniformity: Using a cookie scoop ensures that all your cookies are the same size, which means they’ll bake evenly.
- Flatten Slightly: If you prefer a flatter cookie, you can gently flatten the dough balls with the palm of your hand before baking.
- For Extra Chewy Cookies: Underbake the cookies slightly (by a minute or two). They will continue to set as they cool.
- Make-Ahead Dough: The cookie dough can be made ahead of time and stored in the refrigerator for up to 3 days. Bring it to room temperature before baking. You can also freeze the dough for up to 2 months. Scoop into balls and freeze on a baking sheet, then transfer to a freezer bag. Bake from frozen, adding a few extra minutes to the baking time.
Serving & Storage Suggestions
Monster Cookies are best enjoyed fresh, while they are still slightly warm and gooey. They are perfect with a glass of cold milk, a cup of coffee, or even a scoop of vanilla ice cream.
Store leftover cookies in an airtight container at room temperature for up to 3 days. For longer storage, you can freeze the cookies for up to 2 months. Thaw them at room temperature before serving. To refresh slightly stale cookies, you can microwave them for a few seconds.
Nutritional Information
Please note that this is an estimate and can vary based on specific ingredients used.
| Nutrient | Amount per Serving | % Daily Value |
|---|---|---|
| Calories | 148 kcal | N/A |
| Total Fat | 7.7g | 11% |
| Saturated Fat | 2.8g | 14% |
| Cholesterol | 18.6mg | 6% |
| Sodium | 111mg | 4% |
| Total Carbohydrate | 17.5g | 5% |
| Dietary Fiber | 1.3g | 5% |
| Sugars | 11.8g | N/A |
| Protein | 3.7g | 7% |
Variations & Substitutions
- Gluten-Free: Ensure you use certified gluten-free oats to make these cookies gluten-free.
- Dairy-Free: Substitute the butter with a dairy-free butter alternative. Be sure to select dairy-free chocolate chips and M&M’s as well.
- Nut-Free: Replace the peanut butter with sunflower seed butter (sunbutter) or tahini (sesame seed paste). Always double-check all other ingredients to ensure they are processed in a nut-free facility if you have severe allergies.
- Less Sugar: Reduce the amount of brown and white sugar by ¼ cup each. You can also use a sugar substitute, but be aware that it may affect the texture of the cookies.
- Spice it Up: Add a teaspoon of cinnamon or pumpkin pie spice to the batter for a warm, comforting flavor.
- Festive Flavors: In the fall, use peanut butter M&M’s, or add chopped pecans and dried cranberries for a seasonal twist. For Christmas, use red and green M&M’s.
FAQs (Frequently Asked Questions)
Q: Can I use old-fashioned oats instead of quick oats?
A: While you can, the texture will be different. Old-fashioned oats will result in a chewier, denser cookie. If you do use them, you may want to pulse them in a food processor a few times to break them down slightly.
Q: My cookies are spreading too thin. What am I doing wrong?
A: This could be due to a few factors. Make sure your butter isn’t too soft or melted. Also, avoid overmixing the batter. Chilling the dough for 30 minutes before baking can also help prevent spreading.
Q: Can I freeze the baked cookies?
A: Yes, absolutely! Baked Monster Cookies freeze well. Let them cool completely, then wrap them individually in plastic wrap or place them in a freezer bag. They can be stored in the freezer for up to 2 months.
Q: My cookies are dry and crumbly. What happened?
A: You likely overbaked them. Be sure to check them at the 12-minute mark and remove them from the oven as soon as the edges are golden brown and the centers are set.
Q: Can I add other ingredients besides M&M’s and chocolate chips?
A: Absolutely! Feel free to get creative and add other candies, nuts, dried fruits, or even sprinkles. Just be sure not to add too much, or the cookies may not bake properly.
Final Thoughts
Now that you’re armed with this surprisingly simple recipe, it’s time to unleash your inner baker and create your own batch of Monster Cookies! Don’t be afraid to experiment with different mix-ins and flavors to create your signature version. Whether you’re baking for a crowd or simply treating yourself, these cookies are guaranteed to bring a smile to your face. So go ahead, gather your ingredients, and get ready to experience the joy of Monster Cookies. And please, share your creations and variations – I’d love to see what you come up with! They pair wonderfully with a cold glass of milk or a warm cup of coffee. Happy baking!