
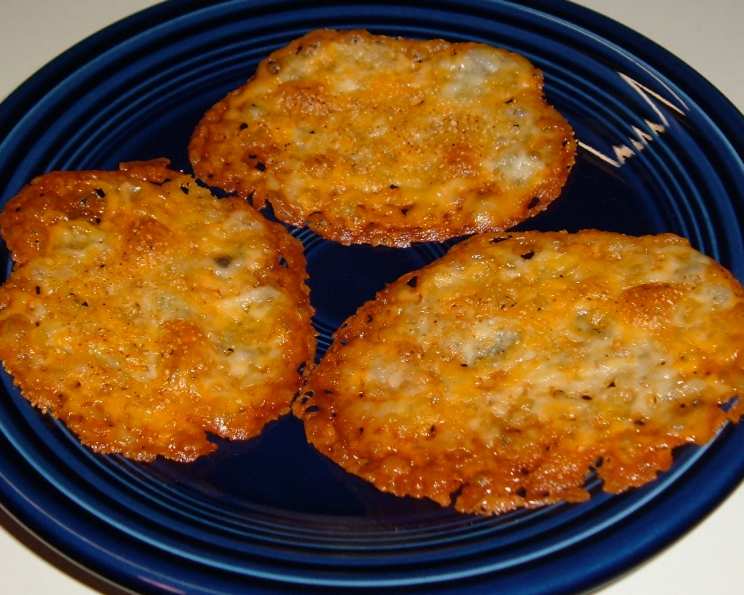
Monterey Cheese Crisps: A Savory Bite of Sunshine
I still remember the first time I made these. It was a frantic weeknight, and I needed a quick, satisfying snack to keep me from ordering takeout. Rummaging through the fridge, my eyes landed on a forgotten block of Monterey Jack. Inspiration struck! What started as a desperate attempt to curb my hunger quickly evolved into a family favorite. The crispy, cheesy edges, the hint of spice – it’s pure comfort food, elevated. Now, my kids request these crunchy delights almost weekly.
Recipe Overview
- Prep Time: 5 minutes
- Cook Time: 10 minutes
- Total Time: 15 minutes
- Servings: 6
- Dietary Type: Low-Carb, Keto-Friendly
Ingredients
- 1 lb Monterey Jack cheese
- ¼ teaspoon garlic powder
- ⅛ teaspoon cayenne pepper
Equipment Needed
- Nonstick baking sheet
- Knife or cheese slicer
- Paper towels
Instructions
-
Begin by preheating your oven to 400°F (200°C). Ensuring the oven is fully preheated is crucial for even cooking and that perfect crispy texture.
-
Next, prepare the Monterey Jack cheese. Slice the cheese into ¼-inch-thick slices. Aim for consistent thickness to ensure even cooking. If the slices are too thin, they may burn; if they’re too thick, they might not crisp up properly.
-
Carefully arrange the cheese slices on a nonstick baking sheet. Space the slices about 3 inches apart. This prevents them from melting together during baking and allows for optimal air circulation, promoting crispiness. If you don’t have a nonstick baking sheet, consider lining a regular baking sheet with parchment paper for easy cleanup.
-
Now, it’s time to add the flavor! Sprinkle the cheese slices evenly with garlic powder and cayenne pepper. Distribute the spices lightly and uniformly across each slice. Feel free to adjust the amount of cayenne pepper to your preferred level of spice. A pinch more can add a delightful kick, while omitting it entirely will still result in a delicious, savory snack.
-
Carefully place the baking sheet in the preheated oven and bake for 10 minutes, or until the cheese slices are golden brown. Keep a close watch on the cheese, as oven temperatures can vary. The key to success is achieving that beautiful golden-brown color. This ensures the cheese will crisp up as it cools. If the edges start to brown too quickly, you can reduce the oven temperature slightly.
-
Once the cheese crisps are golden brown, remove the baking sheet from the oven. Let the crisps cool on the baking sheet for 2-3 minutes. This brief cooling period allows them to firm up slightly before transferring.
-
Using a spatula, carefully transfer the cheese crisps to a plate lined with paper towels. This helps absorb any excess oil and allows them to crisp up fully. Allow the crisps to cool completely on the paper towels. As they cool, they will become even crispier.
-
Serve immediately, or store them in an airtight container for later enjoyment.
Expert Tips & Tricks
- Cheese Matters: While Monterey Jack is the star of this recipe, feel free to experiment with other semi-hard cheeses like cheddar or Colby-Jack for a different flavor profile.
- Spice it Up: Don’t be afraid to get creative with your spices. A dash of smoked paprika, onion powder, or Italian seasoning can add a unique twist.
- Prevent Sticking: If you don’t have a nonstick baking sheet, lightly grease a regular baking sheet or line it with parchment paper to prevent the cheese from sticking.
- Achieve Maximum Crispiness: For extra crispy crisps, try pressing the cheese slices between two paper towels before baking to remove excess moisture.
- Watch the Oven: Keep a close eye on the cheese while it’s baking, as it can go from golden brown to burnt very quickly.
Serving & Storage Suggestions
These Monterey Cheese Crisps are best served immediately while they’re still warm and crispy. They make a fantastic appetizer, snack, or even a crunchy topping for salads or soups.
To store leftover cheese crisps, place them in an airtight container at room temperature. They will stay crispy for about 2-3 days, although they are best consumed within the first day. They tend to soften slightly over time, but they are still delicious.
Reheating is not recommended, as it can make the crisps oily. However, if you must reheat them, a brief stint in a preheated oven at 350°F (175°C) for a few minutes can help restore some of their crispness.
Nutritional Information
| Nutrient | Amount per Serving | % Daily Value |
|---|---|---|
| Calories | 284 kcal | 14% |
| Total Fat | 23g | 35% |
| Saturated Fat | 15g | 72% |
| Cholesterol | 68mg | 22% |
| Sodium | 407mg | 16% |
| Total Carbohydrate | 1g | 0% |
| Dietary Fiber | 0g | 0% |
| Sugars | 0g | 1% |
| Protein | 19g | 37% |
Variations & Substitutions
- Spicy Cheese Crisps: Add a pinch of red pepper flakes or a dash of your favorite hot sauce to the cheese before baking for an extra kick.
- Herbaceous Cheese Crisps: Sprinkle the cheese with dried herbs like oregano, thyme, or rosemary for a more complex flavor.
- Garlic & Herb Cheese Crisps: Combine garlic powder with your favorite dried herbs for a savory and aromatic twist.
- Everything Bagel Cheese Crisps: Sprinkle the cheese with everything bagel seasoning for a delightful crunch and savory flavor.
- Smoked Paprika Cheese Crisps: Replace the cayenne pepper with smoked paprika for a smoky and slightly sweet flavor.
- Different Cheese: Feel free to substitute the Monterey Jack cheese with other semi-hard cheeses like cheddar, Colby-Jack, or even pepper jack for a spicier version.
FAQs (Frequently Asked Questions)
Q: Can I use pre-shredded cheese for this recipe?
A: While it’s possible, using sliced cheese is highly recommended. Sliced cheese melts more evenly and crisps up better than shredded cheese, resulting in a superior texture.
Q: How do I prevent the cheese crisps from sticking to the baking sheet?
A: Using a nonstick baking sheet is the best way to prevent sticking. If you don’t have one, line a regular baking sheet with parchment paper or lightly grease it with cooking spray.
Q: Can I make these ahead of time?
A: While they are best enjoyed fresh, you can make these a few hours ahead of time and store them in an airtight container at room temperature. They may lose some of their crispness, but they will still be delicious.
Q: What if my cheese crisps are not getting crispy enough?
A: Ensure your oven is fully preheated to 400°F (200°C). You can also try baking them for a few extra minutes, keeping a close eye on them to prevent burning. Letting them cool completely on paper towels is also crucial for achieving maximum crispiness.
Q: Can I add other toppings to the cheese crisps?
A: Absolutely! Feel free to experiment with adding other toppings like chopped olives, sun-dried tomatoes, or even a sprinkle of Parmesan cheese before baking.
Final Thoughts
So, there you have it – a simple yet satisfying recipe for Monterey Cheese Crisps that is guaranteed to become a new family favorite. This recipe is not only easy to make, but also incredibly versatile, allowing you to customize the flavors to your liking. Gather your ingredients, preheat your oven, and get ready to enjoy a delightful and healthy snack that will leave you craving more. Don’t hesitate to experiment with different cheeses and spices to create your own signature version. And most importantly, share your creations and feedback – I’d love to hear what you think! Perhaps pair these with a simple tomato soup or a crisp green salad for a complete and satisfying meal. Happy cooking!