
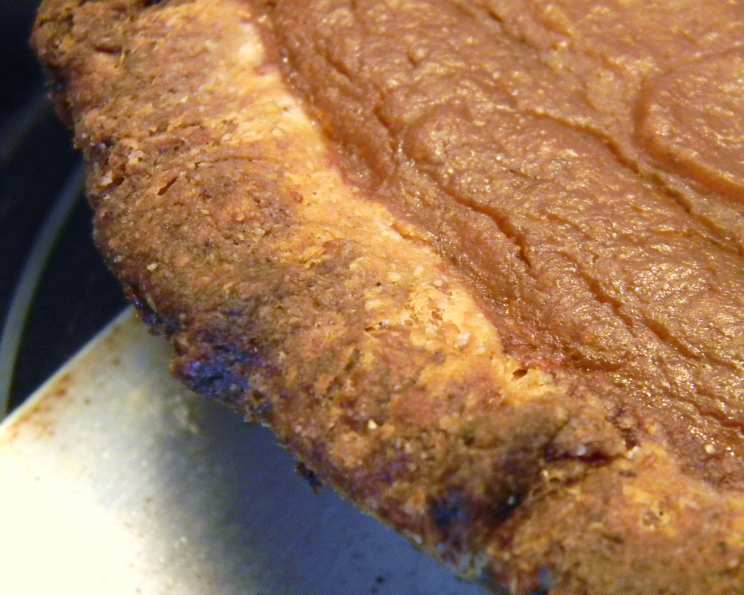
The Most Tender Pie Crust: A Culinary Homage to Simplicity
The scent of baking pie crust always transports me back to my grandmother’s kitchen, a haven of warmth and comforting aromas. I remember standing on a stool, barely tall enough to see over the counter, mesmerized as her weathered hands deftly combined flour and fat. The resulting dough, so unassuming, held the promise of flaky, golden perfection that would cradle the season’s freshest fruits. It wasn’t just a pie; it was love baked into a circle.
Recipe Overview
- Prep Time: 30 minutes
- Cook Time: Variable, based on pie filling
- Total Time: 2 hours 30 minutes (including chilling)
- Yields: 2 9-inch crusts
- Serves: 24
- Dietary Type: Not specified
Ingredients
- 1 1/4 cups all-purpose flour (divided)
- 1 cup whole wheat pastry flour
- 1/2 teaspoon nutmeg
- 1/4 teaspoon baking powder
- 1 teaspoon sea salt
- 5 7/8 ounces (about 3/4 cup) lard
- 1/3 cup ice water
- 1 tablespoon rice vinegar
Equipment Needed
- Large mixing bowl
- Pastry blender or two knives
- Small mixing bowl
- Fork
- Plastic wrap
- Rolling pin
- 9-inch pie dish
Instructions
- In a large bowl, combine 1 cup of all-purpose flour, the whole wheat pastry flour, nutmeg, baking powder, and sea salt.
- Using a pastry blender or two knives, cut the lard into the flour mixture until the particles resemble small peas. This is crucial for creating a flaky crust. The smaller the pieces of fat, the more tender the crust.
- In a small bowl, combine the remaining 1/4 cup of all-purpose flour, the ice water, and the rice vinegar. Whisk until smooth. The rice vinegar helps inhibit gluten development, contributing to a more tender texture.
- Pour the water/vinegar mixture all at once into the lard/flour mixture. Stir with a fork just until the ingredients are combined. Be careful not to overmix, as this will develop the gluten and result in a tough crust.
- Divide the dough in half, wrap each portion tightly in plastic wrap, and chill in the refrigerator for a minimum of 2 hours, preferably overnight. This step is essential for allowing the gluten to relax and the fat to firm up, preventing the crust from shrinking during baking. Trust me, skipping this step is a recipe for disaster!
- When ready to bake, remove one dough portion from the refrigerator and let it sit at room temperature for a few minutes to soften slightly. On a lightly floured surface, roll out the dough to a 12-inch circle.
- Carefully transfer the dough to a 9-inch pie dish. Trim and crimp the edges as desired.
- Bake as your pie recipe directs. For a blind-baked crust (a crust baked without filling), preheat the oven to 375°F (190°C). Line the crust with parchment paper and fill with pie weights or dried beans. Bake for 20-25 minutes, or until the edges are lightly golden. Remove the parchment paper and pie weights, and bake for another 5-10 minutes, or until the bottom is golden brown.
Expert Tips & Tricks
- Keep everything cold: The colder the ingredients, the better. This prevents the lard from melting and blending completely into the flour, which is what creates those desirable layers of fat that produce a flaky crust.
- Don’t overmix: Overmixing develops gluten, resulting in a tough crust. Mix just until the ingredients are combined.
- Use a good quality lard: The quality of the lard significantly impacts the taste of the crust. Look for a brand that is not overly processed or hydrogenated. Tenderflake is a reliable option.
- Blind Baking: For custards or fillings that don’t require baking, blind bake your crust. Dock the bottom of the crust (poke with a fork) to prevent bubbling. Use pie weights or dried beans to prevent shrinking.
- Egg Wash: Before baking, brush the crust with an egg wash (1 egg beaten with 1 tablespoon of water or milk) for a glossy, golden-brown finish.
- Prevent Burning: Use a pie shield or strips of foil to protect the edges of the crust from burning, especially if baking for an extended period.
- Make-Ahead: The dough can be made several days in advance and stored in the refrigerator, or it can be frozen for up to 3 months. Thaw overnight in the refrigerator before using.
Serving & Storage Suggestions
Serve your pie warm or at room temperature, depending on the filling. Fruit pies are delicious served slightly warm with a scoop of vanilla ice cream or a dollop of whipped cream. Custard pies are best served chilled.
Store leftover pie in the refrigerator for up to 3-4 days. Cover loosely with plastic wrap or foil to prevent the crust from drying out. You can also freeze leftover pie for up to 2 months. Thaw overnight in the refrigerator before serving. To reheat, warm slices in a 350°F (175°C) oven for 10-15 minutes, or until heated through.
Nutritional Information
Note: Nutritional information is an estimate and will vary based on specific ingredients and portion sizes.
| Nutrient | Amount per Serving | % Daily Value |
|---|---|---|
| Calories | 250 kcal | 13% |
| Total Fat | 16g | 25% |
| Saturated Fat | 7g | 35% |
| Cholesterol | 0mg | 0% |
| Sodium | 150mg | 7% |
| Total Carbohydrate | 20g | 7% |
| Dietary Fiber | 1g | 4% |
| Sugars | 0g | 0% |
| Protein | 3g | 6% |
Variations & Substitutions
- All-Butter Crust: For a richer flavor, substitute the lard with butter. Use unsalted butter and ensure it is very cold. You may need to use slightly less water.
- Gluten-Free Crust: Use a gluten-free all-purpose flour blend. You may need to add a binder like xanthan gum to help hold the crust together.
- Vegan Crust: Substitute the lard with a vegan butter alternative. Look for one that has a high fat content for the best results.
- Herb Crust: Add 1-2 tablespoons of chopped fresh herbs (such as rosemary, thyme, or sage) to the flour mixture for a savory crust. This works particularly well with quiches or pot pies.
- Sweet Crust: Add 1-2 tablespoons of sugar to the flour mixture for a slightly sweeter crust. This is a great option for fruit pies.
FAQs (Frequently Asked Questions)
Q: Why is my pie crust tough?
A: Overmixing the dough is the most common cause of a tough pie crust. Be careful not to overwork the dough when combining the ingredients.
Q: Can I use shortening instead of lard?
A: Yes, shortening can be used as a substitute for lard. However, lard generally produces a flakier and more flavorful crust.
Q: How do I prevent my pie crust from shrinking?
A: Chilling the dough for a minimum of 2 hours is essential for preventing shrinking. Also, avoid stretching the dough when transferring it to the pie dish.
Q: Can I freeze pie crust dough?
A: Yes, pie crust dough can be frozen for up to 3 months. Wrap it tightly in plastic wrap and thaw overnight in the refrigerator before using.
Q: What if my pie crust is browning too quickly?
A: Cover the edges of the crust with a pie shield or strips of aluminum foil to prevent them from burning.
Final Thoughts
Creating the perfect pie crust might seem daunting, but with a little practice and patience, you’ll be rewarded with a golden, flaky masterpiece. Don’t be afraid to experiment and adjust the recipe to your liking. Whether you fill it with sweet berries, savory vegetables, or a creamy custard, this tender pie crust will be the foundation of many delicious memories. So, gather your ingredients, embrace the process, and share the joy of homemade pie with those you love. I would love to hear how this turns out for you!