
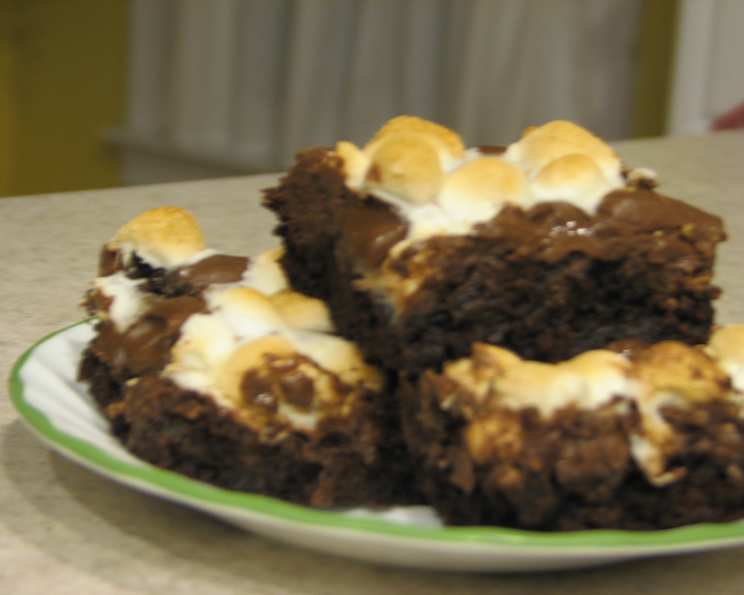
Muddy Road Brownies (Rocky Road Without the Walnuts)
The memory is etched in my mind: a rainy afternoon, the aroma of melting chocolate filling the air, and my grandmother humming softly as she carefully spread a blanket of mini marshmallows over warm, fudgy brownies. These weren’t just any brownies; they were her famous “Muddy Road Brownies,” a delightful twist on rocky road that traded walnuts for an extra layer of gooey goodness. Every bite was a comfort, a warm hug on a cold day, and a reminder of her unwavering love, all baked into a single, irresistible square.
Recipe Overview
- Prep Time: 15 minutes
- Cook Time: 25-28 minutes
- Total Time: 40-43 minutes
- Servings: 12
- Yield: 1 pan of brownies
- Dietary Type: Not Gluten-Free
Ingredients
- 1/2 cup butter, melted
- 3 ounces unsweetened chocolate, coarsely chopped
- 1 cup sugar
- 2 eggs
- 1 teaspoon vanilla extract
- 2/3 cup flour
- 1/4 teaspoon baking soda
- 1 cup Hershey’s chocolate kisses, unwrapped
- 1 cup miniature marshmallows
Equipment Needed
- Medium saucepan
- Small bowl
- 9-inch x 9-inch baking dish
- Measuring cups and spoons
- Whisk or spatula
Instructions
-
Preheat your oven to 350°F (175°C). Make sure the oven rack is positioned in the center. This ensures even baking.
-
In a medium saucepan, combine the melted butter and coarsely chopped unsweetened chocolate. Place the saucepan over low heat and melt the mixture, stirring constantly to prevent burning. It’s crucial to keep the heat low and stir frequently to achieve a smooth, glossy chocolate base.
-
Remove the saucepan from the heat once the chocolate and butter are fully melted and combined. Allow the mixture to cool slightly for a few minutes. This prevents the eggs from cooking when you add them in the next step.
-
Add the sugar, eggs, and vanilla extract to the slightly cooled chocolate mixture. Stir well to combine. The mixture should be smooth and well-emulsified.
-
In a small bowl, whisk together the flour and baking soda. This ensures the baking soda is evenly distributed throughout the flour, which helps the brownies rise properly.
-
Add the flour mixture to the chocolate mixture. Stir until just combined. Be careful not to overmix, as this can result in tough brownies. A few streaks of flour are okay at this point.
-
Pour the brownie batter into a greased 9-inch x 9-inch baking dish. Spread the batter evenly across the bottom of the dish. A greased dish prevents the brownies from sticking and makes them easier to remove once baked.
-
Arrange the unwrapped Hershey’s Kisses evenly over the brownie batter. Gently press each Kiss into the batter to help them adhere. These will melt and create a delicious chocolate layer in the middle of the brownie.
-
Sprinkle the miniature marshmallows evenly over the Hershey’s Kisses. Ensure the marshmallows are distributed uniformly for a perfect browned topping.
-
Bake at 350°F (175°C) for 25-28 minutes, or until a toothpick inserted into the center comes out with moist crumbs attached. Keep a close eye on the brownies during the last few minutes of baking to prevent them from overbaking. The marshmallows should be lightly browned and the brownie edges should be slightly pulled away from the sides of the pan.
-
Remove the brownies from the oven and let them cool slightly before cutting and serving. They are best enjoyed warm, but not hot.
Expert Tips & Tricks
- For an even richer flavor, use high-quality dark chocolate. The higher the cocoa content, the more intense the chocolate taste.
- Don’t overbake the brownies. Overbaked brownies tend to be dry and crumbly. Aim for a moist, fudgy texture.
- To prevent the marshmallows from burning, you can tent the baking dish with aluminum foil during the last few minutes of baking.
- For a more decadent treat, drizzle melted chocolate over the cooled brownies.
- If you want to make these ahead of time, bake the brownie base without the Hershey Kisses and marshmallows. Let it cool completely, then add the Kisses and marshmallows and broil for a minute or two until the marshmallows are golden brown.
- To get clean cuts, chill the brownies completely before cutting. Use a sharp knife and wipe it clean between each cut.
- Try adding a pinch of sea salt to the batter to enhance the chocolate flavor.
Serving & Storage Suggestions
These Muddy Road Brownies are best served warm, either on their own or with a scoop of vanilla ice cream and a drizzle of chocolate sauce. A tall, ice-cold glass of milk is the perfect accompaniment. Leftover brownies can be stored in an airtight container at room temperature for up to 3 days or in the refrigerator for up to a week. To reheat, simply microwave for a few seconds until warmed through. For longer storage, wrap the brownies individually and freeze them for up to 2 months. Thaw in the refrigerator before reheating.
Nutritional Information
Here’s an estimated nutritional breakdown per serving:
| Nutrient | Amount per Serving | % Daily Value |
|---|---|---|
| Calories | 282 kcal | 14% |
| Total Fat | 15.6g | 24% |
| Saturated Fat | 9.8g | 48% |
| Cholesterol | 23.6mg | 7% |
| Sodium | 110.2mg | 4% |
| Total Carbohydrate | 35.8g | 11% |
| Dietary Fiber | 1.8g | 7% |
| Sugars | 26.4g | 105% |
| Protein | 2.9g | 5% |
Variations & Substitutions
- Gluten-Free: Substitute the all-purpose flour with a gluten-free all-purpose flour blend. Be sure to check that the blend contains xanthan gum or add a small amount (about 1/2 teaspoon) for binding.
- Dairy-Free: Use a dairy-free butter substitute and dairy-free chocolate kisses. You can also find vegan marshmallows.
- Extra Chocolatey: Add chocolate chips to the batter for an even more intense chocolate flavor.
- Peanut Butter Swirl: Swirl peanut butter into the batter before baking for a delightful peanut butter and chocolate combination.
- Espresso Boost: Add a teaspoon of instant espresso powder to the batter for a coffee-infused brownie.
- Spiced Brownies: Add a pinch of cinnamon or nutmeg to the batter for a warm, spiced flavor.
FAQs (Frequently Asked Questions)
Q: Can I use a different size baking dish?
A: While a 9×9 inch baking dish is recommended for the specified baking time, you can use an 8×8 inch pan for thicker brownies, but you’ll need to increase the baking time slightly.
Q: My marshmallows burned! What did I do wrong?
A: The oven temperature might have been too high, or the marshmallows were too close to the heating element. Next time, try tenting the baking dish with foil during the last few minutes or lowering the oven temperature slightly.
Q: Can I use chocolate chunks instead of Hershey’s Kisses?
A: Yes, you can substitute the Hershey’s Kisses with an equal amount of chocolate chunks or chopped chocolate. They will melt beautifully into the brownies.
Q: How do I know when the brownies are done?
A: Insert a toothpick into the center of the brownies. If it comes out with moist crumbs attached, they are done. Avoid overbaking, as this will result in dry brownies.
Q: Can I freeze these brownies?
A: Yes, you can freeze these brownies for up to 2 months. Wrap them individually in plastic wrap and then place them in an airtight container. Thaw in the refrigerator before serving.
Final Thoughts
These Muddy Road Brownies are more than just a dessert; they’re a celebration of simple pleasures and the joy of sharing something delicious with loved ones. I encourage you to try this recipe and experience the delightful combination of fudgy brownie, melted chocolate, and toasted marshmallows. Don’t hesitate to add your own personal touch and create a unique version that reflects your taste. And most importantly, don’t forget to share your baking adventures and delicious results with friends and family – and maybe even a scoop of vanilla ice cream on top!