
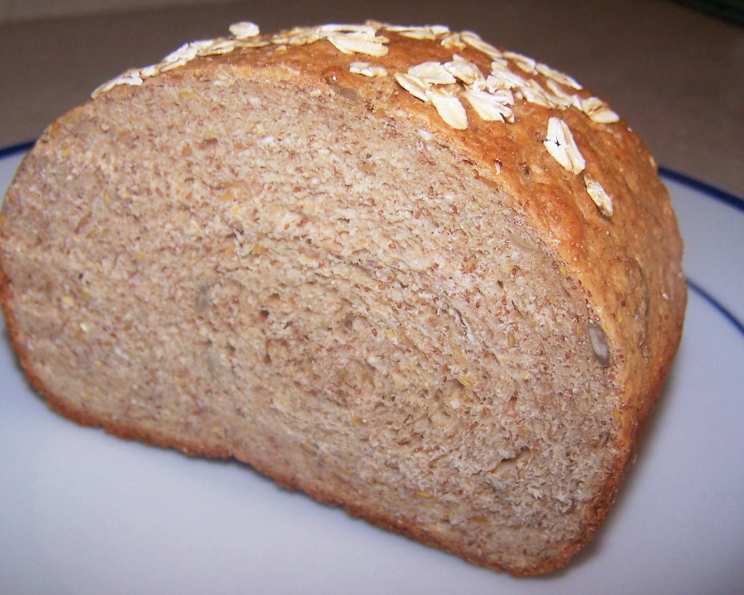
Baking Memories: My Journey with Multi-Grain Bread
I can still smell the comforting aroma wafting from Grandma’s kitchen – a symphony of toasted grains and yeasty warmth. Her multi-grain bread was legendary, a hearty, wholesome creation that nourished not just our bodies, but our souls. Each slice was a taste of home, a reminder of simpler times, and a testament to the love she poured into every loaf. I’ve spent years trying to recreate that magic, and this recipe, while uniquely my own, always brings me back to her cozy kitchen.
Recipe Overview
- Prep Time: 2 hours
- Cook Time: 30-35 minutes
- Total Time: 2 hours 30 minutes
- Yields: 2 loaves
- Serves: 32
- Dietary Type: Vegetarian
Ingredients
- 2 cups unbleached bread flour or all-purpose flour
- 5 teaspoons active dry yeast (2 packages)
- 1/4 cup raw sunflower seeds
- 1/4 cup flax seed
- 1 1/2 cups milk
- 3/4 cup water
- 1/4 cup whole grain red teff
- 1/4 cup cracked wheat
- 1/4 cup whole grain cornmeal
- 1/4 cup packed brown sugar
- 3 tablespoons canola oil (or other neutral oil, like walnut)
- 1 1/2 teaspoons salt
- 1/2 cup soy flour
- 2 1/2 – 3 cups whole wheat flour
- 1/2 cup rolled oats
- Rolled oats, for garnish
Equipment Needed
- Large mixing bowl
- Medium saucepan
- Electric mixer
- Wooden spoon
- Lightly greased bowl
- Lightly greased surface
- 2 loaf pans
- Wire racks
- Instant-read thermometer
Instructions
-
In a large mixing bowl, combine bread flour (or all-purpose flour), yeast, sunflower seeds, and flax seeds. Set this mixture aside.
-
In a medium saucepan, combine milk, water, red teff, cracked wheat, cornmeal, brown sugar, canola oil, and salt. Heat and stir over medium-low heat until the mixture is warm, reaching a temperature between 120-130°F (49-54°C). Use a thermometer for accuracy. Warming the milk mixture activates the yeast more efficiently.
-
Add the warm milk mixture to the dry ingredients in the large mixing bowl. Beat with an electric mixer on low to medium speed for 30 seconds, frequently scraping the sides of the bowl to ensure everything is well combined.
-
Increase the mixer speed to high and beat for 3 minutes. This step develops the gluten, creating a strong and elastic dough.
-
Using a wooden spoon, stir in the soy flour, rolled oats, and as much of the whole wheat flour as you can manage. The dough will become quite thick at this stage.
-
Turn the dough out onto a lightly floured surface. Knead in enough of the remaining whole wheat flour to create a moderately stiff dough that is smooth and elastic. This process should take approximately 6-8 minutes. Proper kneading is crucial for the bread’s texture.
-
Shape the kneaded dough into a ball. Place the ball in a lightly greased bowl, turning it to grease the top surface. This prevents the dough from drying out during the rising process.
-
Cover the bowl with a clean kitchen towel or plastic wrap and let it rise in a warm place until it has nearly doubled in size. This typically takes about 1 hour, but the exact time will depend on the temperature of your kitchen.
-
Once the dough has risen sufficiently, punch it down to release the accumulated gases. This will ensure a more even texture in the final bread.
-
Turn the dough out onto a lightly greased surface. Divide the dough in half. Cover the two portions and let them rest for 10 minutes. This resting period, known as bench rest, allows the gluten to relax, making it easier to shape the loaves.
-
Lightly grease two loaf pans.
-
Shape each portion of dough into a loaf. Place the loaves into the prepared loaf pans.
-
Cover the pans and let the loaves rise until they have doubled in size. This second rise typically takes about 30 minutes.
-
Preheat your oven to 375°F (190°C).
-
Brush the tops of the risen loaves with water and sprinkle them generously with additional rolled oats for garnish. This adds both flavor and visual appeal.
-
Bake in the preheated 375°F (190°C) oven for 30-35 minutes, or until the center of each loaf registers 190°F (88°C) on an instant-read thermometer. If the tops of the loaves begin to brown too quickly, cover them loosely with foil during the last 10 minutes of baking.
-
Immediately remove the bread from the pans and transfer them to wire racks to cool completely. Cooling on wire racks prevents the bottom of the bread from becoming soggy.
Expert Tips & Tricks
- Temperature is Key: Ensure your milk mixture is between 120-130°F (49-54°C) for optimal yeast activation. Too hot, and you’ll kill the yeast; too cold, and it won’t activate.
- Kneading Know-How: Don’t be afraid to add more flour during kneading if the dough is too sticky, but be careful not to add too much, as this can result in a dry, dense loaf.
- Proofing Power: A warm, humid environment is ideal for proofing bread. If your kitchen is cold, try placing the dough in a slightly warmed (but turned-off) oven, or near a warm stovetop.
- Oven Awareness: Every oven is different. Keep a close eye on your bread during baking and adjust the baking time or temperature as needed to prevent burning.
- Make-Ahead Magic: You can prepare the dough through step 8, then refrigerate it overnight. Let it come to room temperature for about 30 minutes before proceeding with the remaining steps.
Serving & Storage Suggestions
Serve this multi-grain bread sliced, toasted, or as a sandwich base. It pairs wonderfully with soups, salads, or simply spread with butter or your favorite jam. For optimal freshness, store the bread in an airtight container at room temperature for up to 3 days. For longer storage, slice the bread and freeze it in a freezer-safe bag or container for up to 2 months. To reheat, toast frozen slices directly or thaw the entire loaf at room temperature before slicing and serving.
Nutritional Information
| Nutrient | Amount per Serving | % Daily Value |
|---|---|---|
| Calories | 118.4 kcal | N/A |
| Calories from Fat | N/A | N/A |
| Total Fat | 3.6 g | 5% |
| Saturated Fat | 0.6 g | 2% |
| Cholesterol | 1.6 mg | 0% |
| Sodium | 117.4 mg | 4% |
| Total Carbohydrate | 18.2 g | 6% |
| Dietary Fiber | 2.1 g | 8% |
| Sugars | 1.8 g | N/A |
| Protein | 4.2 g | 8% |
Note: Nutritional information is an estimate and may vary based on specific ingredients and portion sizes.
Variations & Substitutions
- Gluten-Free Option: Substitute the bread flour and whole wheat flour with a gluten-free all-purpose flour blend. You may need to add a binder like xanthan gum to improve the texture.
- Dairy-Free Delight: Replace the milk with your favorite non-dairy milk, such as almond, soy, or oat milk.
- Sweet Treat: Add 1/4 cup of honey or maple syrup for a sweeter flavor.
- Nutty Goodness: Incorporate other seeds and nuts like pumpkin seeds, walnuts, or pecans for added flavor and texture.
- Teff Type: If you can’t find red teff, use white teff.
FAQs (Frequently Asked Questions)
Q: Can I use all whole wheat flour instead of bread flour?
A: Yes, but the bread may be denser. If you substitute, add 1 tablespoon of wheat gluten per cup of whole wheat flour to improve the rise.
Q: Why is my bread so dense?
A: This could be due to several factors, including not kneading enough, not using fresh yeast, or adding too much flour. Make sure your yeast is active and knead the dough until it’s smooth and elastic.
Q: How do I know when the bread is done baking?
A: The best way to check for doneness is to insert an instant-read thermometer into the center of the loaf. It should register 190°F (88°C). The loaf should also sound hollow when tapped.
Q: Can I freeze this bread?
A: Absolutely! Let the bread cool completely before slicing it and wrapping it tightly in freezer-safe wrap. It can be stored in the freezer for up to 2 months.
Q: What can I use instead of canola oil?
A: You can use any neutral-flavored oil, such as vegetable oil, sunflower oil, or even melted coconut oil.
Final Thoughts
This multi-grain bread is more than just a recipe; it’s a journey back to my roots, a connection to a cherished memory. I encourage you to try this recipe, experiment with different grains and seeds, and make it your own. Share your creations with loved ones and spread the joy of homemade bread. And don’t forget to let me know how it turns out – I’d love to hear your baking adventures!