
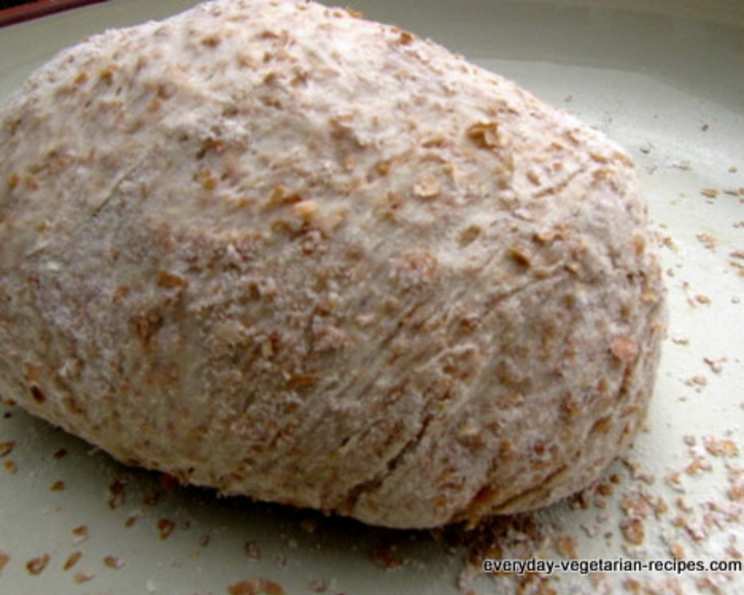
The Quintessential Multigrain Pizza Crust: A Culinary Journey
The scent of freshly baked pizza dough, mingled with the sweetness of simmering tomato sauce, always transports me back to my grandmother’s kitchen. Every Sunday, her tiny apartment would transform into a pizzeria, the air thick with anticipation. While she was famous for her classic Neapolitan, it was her multigrain crust that truly stole my heart. Its subtly nutty flavor and satisfying chew made every slice an unforgettable experience – a reminder of family, warmth, and the simple joys of sharing a delicious meal.
Recipe Overview
- Prep Time: 20 minutes
- Cook Time: 20-25 minutes
- Total Time: 45 minutes
- Servings: 8
- Yield: 1 pizza crust
- Dietary Type: Vegetarian (can be made vegan by using water instead of milk and honey alternatives)
Ingredients
- 1 1/4 cups bread flour or unbleached flour, plus
- 2 tablespoons bread flour or unbleached flour, divided
- 2 tablespoons whole grain cornmeal
- 2 tablespoons wheat bran
- 2 tablespoons quick-cooking oats
- 1 1/2 teaspoons fast rising yeast
- 1/4 teaspoon salt
- 1/2 cup water or 1/2 cup skim milk, plus
- 2 tablespoons water or 2 tablespoons skim milk, divided
- 1 teaspoon honey (can substitute agave or maple syrup for a vegan option)
Equipment Needed
- Large bowl
- Small saucepan
- Measuring cups and spoons
- Clean kitchen towel
- Nonstick cooking spray
- Flat surface for kneading
- Rolling pin (optional)
- Pizza stone or baking sheet
Instructions
-
In a large bowl, combine 3/4 cup of the bread flour or unbleached flour, all of the cornmeal, wheat bran, oats, yeast, and salt. Stir well to ensure all dry ingredients are evenly distributed. This even distribution is key to ensuring a consistent rise and flavor throughout the crust.
-
In a small saucepan, combine the water or skim milk and the honey. Gently heat over low heat until the liquid is very warm to the touch, approximately 125°F to 130°F. Use a thermometer to ensure accuracy; if the liquid is too hot, it can kill the yeast. If it is too cold, the yeast won’t activate properly.
-
Pour the warm water or milk mixture into the bowl with the flour mixture. Stir for about 1 minute to begin forming the dough. This initial mixing ensures the yeast is activated and starts the gluten development process.
-
Gradually incorporate the remaining flour, adding 2 tablespoons at a time, until a soft dough begins to form. The dough should be slightly sticky but still manageable. Avoid adding too much flour at this stage, as it can result in a dry and tough crust.
-
Sprinkle 2 tablespoons of the remaining flour over a clean, flat surface. Turn the dough out onto the floured surface.
-
Knead the dough for approximately 5 minutes, gradually incorporating just enough of the remaining flour to create a smooth, satiny ball. Be careful not to add too much flour; the dough should remain slightly tacky but not overly sticky. The kneading process develops the gluten, which gives the crust its structure and chewy texture.
-
Lightly coat a large bowl with nonstick cooking spray. Place the ball of dough into the bowl, turning it to ensure it is evenly coated with the spray. This prevents the dough from sticking to the bowl as it rises.
-
Cover the bowl with a clean kitchen towel. Place the bowl in a warm, draft-free location to rise for about 35 minutes, or until the dough has doubled in size. The warmth encourages the yeast to ferment, creating air pockets that give the crust its light and airy texture. A slightly warm oven (turned off!) or a sunny spot works perfectly.
-
Once the dough has doubled, gently punch it down to release the air. Shape it into a ball and turn it out onto a lightly floured surface. The dough is now ready to be shaped, topped, and baked.
-
Preheat your oven to 450°F (232°C). If you have a pizza stone, place it in the oven while it preheats. This helps to create a crispy bottom crust.
-
Roll out the dough to your desired thickness and shape. You can use a rolling pin or gently stretch it with your hands.
-
Transfer the dough to your prepared pizza stone or baking sheet.
-
Add your favorite toppings. Don’t overload the crust, as this can make it soggy.
-
Bake for 20-25 minutes, or until the crust is golden brown and the toppings are cooked to your liking. Keep a close eye on it during the last few minutes to prevent burning.
-
Remove from the oven and let cool slightly before slicing and serving.
Bread Machine Instructions:
-
Place all of the dough ingredients, except for 2 tablespoons of the bread flour, into the bread machine’s bread pan. Do not heat the water or milk.
-
Set the bread machine to the “rise,” “dough,” or “manual” setting. This setting will mix, knead, and allow the dough to rise once.
-
Check the dough about 5 minutes after the machine has started. If the dough appears too sticky, gradually add more of the remaining flour, 1 tablespoon at a time, until the dough is smooth and elastic.
-
When the dough is ready, remove it from the machine and proceed to shape, top, and bake as directed in the recipe.
Expert Tips & Tricks
- For a crispier crust, brush the rolled-out dough with olive oil before adding toppings.
- If you don’t have a pizza stone, use a preheated baking sheet.
- Don’t overwork the dough. Over-kneading can result in a tough crust.
- Experiment with different flours, such as whole wheat or spelt flour, for a variation in flavor and texture.
- If your dough is too sticky to handle, lightly flour your hands and the work surface.
- If your crust is browning too quickly, tent it loosely with foil.
Serving & Storage Suggestions
Serve the multigrain pizza crust immediately after baking for the best flavor and texture. It pairs beautifully with a simple green salad or a warm bowl of soup. Leftover pizza can be stored in the refrigerator for up to 3 days. Reheat in a preheated oven at 350°F (175°C) for 10-15 minutes, or until warmed through. For longer storage, freeze the baked pizza (or just the crust) in an airtight container for up to 2 months.
Nutritional Information
| Nutrient | Amount per Serving | % Daily Value |
|---|---|---|
| Calories | 90 kcal | 4% |
| Calories from Fat | 3g | |
| Total Fat | 0.4g | 0% |
| Saturated Fat | 0.1g | 0% |
| Cholesterol | 0mg | 0% |
| Sodium | 74.2mg | 3% |
| Total Carbohydrate | 18.8g | 6% |
| Dietary Fiber | 1.3g | 5% |
| Sugars | 0.8g | |
| Protein | 2.8g | 5% |
Variations & Substitutions
- Gluten-Free: Substitute the bread flour with a gluten-free pizza flour blend. You may need to adjust the liquid slightly.
- Vegan: Use water instead of milk and agave or maple syrup instead of honey.
- Herb Infusion: Add dried herbs, such as oregano, basil, or rosemary, to the flour mixture for an aromatic twist.
- Spicy Kick: Incorporate a pinch of red pepper flakes or a dash of cayenne pepper for a subtle heat.
- Sweet Pizza: Make a dessert pizza by topping the baked crust with fruits, nuts, and a drizzle of honey or chocolate sauce.
FAQs (Frequently Asked Questions)
Q: Can I make this dough without a bread machine?
A: Absolutely! The recipe includes instructions for both bread machine and hand-kneading methods. The hand-kneading method works just as well and is a great way to get a feel for the dough.
Q: Can I use all-purpose flour instead of bread flour?
A: While bread flour is recommended for a chewier crust, all-purpose flour can be used in a pinch. The texture may be slightly different, but the flavor will still be delicious.
Q: How do I prevent the pizza crust from sticking to the pan?
A: Ensure your pizza stone or baking sheet is preheated and lightly coated with cooking spray or cornmeal. This will create a barrier and prevent the dough from sticking.
Q: Can I prepare the dough ahead of time?
A: Yes! After the first rise, punch down the dough, wrap it tightly in plastic wrap, and refrigerate for up to 24 hours. Allow the dough to come to room temperature before shaping and baking.
Q: What is the best way to reheat leftover pizza?
A: For the best results, reheat leftover pizza in a preheated oven at 350°F (175°C) for about 10-15 minutes, or until heated through. This will help to restore the crispness of the crust.
Final Thoughts
Crafting this multigrain pizza crust is more than just following a recipe; it’s about creating an experience. From the satisfying feel of the dough in your hands to the anticipation of that first, delicious bite, every step is a testament to the simple pleasures of homemade food. I urge you to try this recipe, experiment with your favorite toppings, and share the joy of a truly exceptional pizza with your loved ones. Don’t hesitate to adjust the ingredients to your liking and please, share your creations and feedback!