
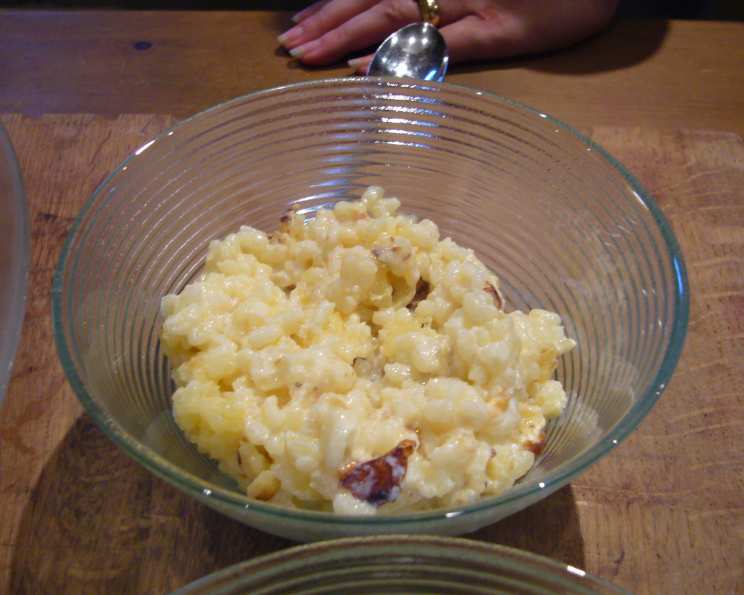
Mum’s Enduring Rice Pudding
The scent alone instantly transports me back to childhood. A whisper of warm milk, a hint of sweetness, and that undeniably comforting aroma of slowly baked rice – it’s the essence of Mum’s rice pudding. I remember countless afternoons spent perched on a kitchen stool, watching her carefully stir the creamy concoction, the anticipation building with each passing hour. It wasn’t just dessert; it was love baked into a simple, humble dish.
Recipe Overview
- Prep Time: 5 minutes
- Cook Time: 2 hours 30 minutes
- Total Time: 2 hours 35 minutes
- Servings: 4
- Yield: 4 servings
- Dietary Type: Vegetarian
Ingredients
- 4 tablespoons pudding rice (1 tbsp per person)
- 2 tablespoons sugar (approximate, not caster sugar)
- 2 cups whole milk (approximate, important it is full-fat milk)
- 1 teaspoon butter (1 knob of butter)
Equipment Needed
- Sieve
- Casserole dish
Instructions
-
Begin by thoroughly washing the rice in a sieve under cold running water. This step removes excess starch, which will help prevent the pudding from becoming overly gummy. Rinse until the water runs clear.
-
Transfer the washed rice to a casserole dish. Choose a dish that is oven-safe and large enough to accommodate the rice expanding as it cooks.
-
Evenly sprinkle the sugar over the rice in the casserole dish. The amount of sugar can be adjusted slightly to your preference, but remember that the long, slow baking process will concentrate the sweetness.
-
Place a knob of butter on top of the rice and sugar mixture. The butter will melt and add a subtle richness and creamy texture to the finished pudding.
-
Carefully pour the milk over the rice, sugar, and butter in the casserole dish. Ensure that the rice is fully submerged in the milk. It’s crucial to use full-fat milk for the best results; the higher fat content contributes to the pudding’s luxurious creaminess.
-
Bake in a preheated oven at 300°F (150°C) for 2 1/2 to 3 hours. This slow, gentle baking process is key to achieving the perfect texture.
-
Stir the pudding often during the baking process, especially in the first hour, to prevent the rice from settling and sticking to the bottom of the dish.
-
Add more milk as needed to maintain a creamy consistency. As the pudding bakes, the rice will absorb the milk. Check the level of the liquid regularly and add more milk as necessary to keep the rice submerged.
-
Towards the end of the baking time, you’ll notice a skin starting to form on the surface of the pudding. This is perfectly normal and adds a lovely textural element to the finished dish. Simply stir it in to incorporate it into the creamy mixture.
Expert Tips & Tricks
-
For an extra layer of flavor, consider infusing the milk with a vanilla bean during the baking process. Simply split a vanilla bean lengthwise and nestle it into the milk-rice mixture before baking. Remove the bean before serving.
-
If you prefer a thicker pudding, you can add a tablespoon of cornstarch to the milk before pouring it over the rice. Dissolve the cornstarch in a small amount of cold milk to prevent lumps.
-
To prevent the pudding from scorching on the bottom, you can place the casserole dish inside a larger baking dish filled with water. This creates a water bath that helps to distribute the heat evenly.
-
If the skin on top gets too thick for your liking, you can cover the dish loosely with foil during the last 30 minutes of baking.
Serving & Storage Suggestions
Serve Mum’s rice pudding warm or cold, depending on your preference. A dusting of ground cinnamon or nutmeg adds a touch of warmth and spice. Some people also enjoy a spoonful of fruit jam or stewed fruit on top.
Leftover rice pudding can be stored in an airtight container in the refrigerator for up to 3 days. It can be reheated in the microwave or on the stovetop, adding a splash of milk if necessary to restore its creamy consistency. Freezing is not recommended as it can alter the texture of the rice.
Nutritional Information
| Nutrient | Amount per Serving | % Daily Value |
|---|---|---|
| Calories | 106 kcal | N/A |
| Calories from Fat | 44 g | 42% |
| Total Fat | 4.9 g | 7% |
| Saturated Fat | 2.9 g | 14% |
| Cholesterol | 14.7 mg | 4% |
| Sodium | 55.5 mg | 2% |
| Total Carbohydrate | 11.8 g | 3% |
| Dietary Fiber | 0 g | 0% |
| Sugars | 12.7 g | 50% |
| Protein | 3.9 g | 7% |
Variations & Substitutions
-
For a dairy-free version, you can substitute the whole milk with full-fat coconut milk or almond milk. Keep in mind that the flavor will be slightly different.
-
Experiment with different types of sugar. Brown sugar will add a caramel-like flavor, while maple syrup will impart a subtle sweetness.
-
Add a handful of raisins or sultanas to the pudding for extra texture and sweetness. Soak the dried fruit in warm water for 30 minutes before adding it to the rice to plump them up.
-
For a more decadent treat, stir in a square or two of dark chocolate during the last 15 minutes of baking.
FAQs (Frequently Asked Questions)
Q: Can I use pre-cooked rice for this recipe?
A: While technically possible, using pre-cooked rice is not recommended. The slow baking process allows the rice to absorb the milk and develop a creamy texture that is essential to the character of this dish.
Q: How do I prevent the rice from sticking to the bottom of the casserole dish?
A: Stirring the pudding frequently during the baking process is key to preventing sticking. Also, make sure your casserole dish is well-greased.
Q: Can I use a different type of milk, like skim or 2%?
A: Full-fat milk is highly recommended for this recipe. The higher fat content contributes significantly to the pudding’s rich and creamy texture. Using lower-fat milk may result in a thinner and less satisfying pudding.
Q: My pudding is too thick. What can I do?
A: If your pudding becomes too thick, simply stir in a little extra milk until it reaches your desired consistency.
Q: Can I make this recipe in a slow cooker?
A: Yes, you can adapt this recipe for a slow cooker. Cook on low for 4-6 hours, stirring occasionally.
Final Thoughts
Mum’s rice pudding is more than just a dessert; it’s a warm hug on a plate. This simple yet comforting recipe is a testament to the power of home cooking and the enduring appeal of classic flavors. I encourage you to try it and create your own memories around this beloved dish. Whether you enjoy it warm on a chilly evening or cold as a refreshing treat, I hope this recipe brings you as much joy as it has brought me over the years. Don’t hesitate to experiment with different flavors and variations to make it your own. And most importantly, share it with those you love!