
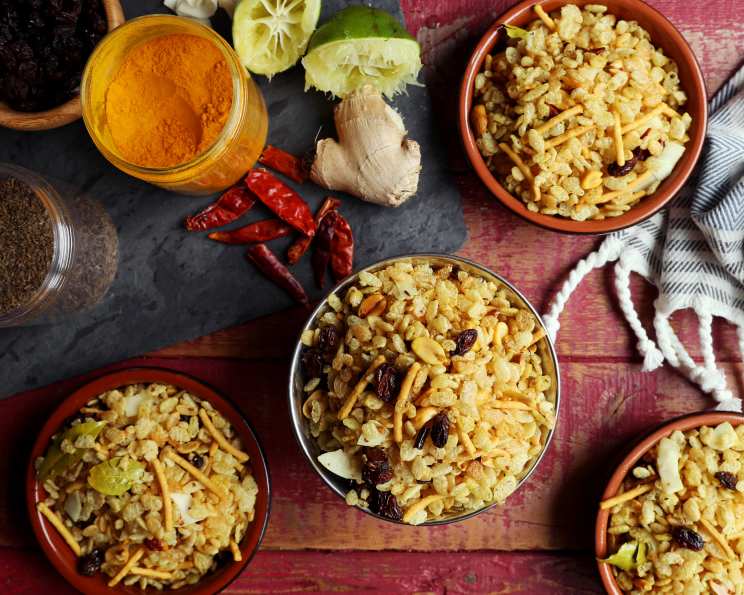
Mur’mur’ya C’a Chiwda: A Symphony of Spiced Puffed Rice
The aroma of freshly made Chiwda always transports me back to my grandmother’s kitchen. I can almost feel the warmth of the Indian sun streaming through the window as she expertly tossed puffed rice with spices, her hands moving with a practiced grace honed over decades. It wasn’t just a snack; it was a symbol of love, a welcome offering to guests, and a constant companion to countless cups of chai. It’s a tradition I cherish, and one I’m delighted to share with you.
Recipe Overview
- Prep Time: 10 minutes
- Cook Time: 25 minutes
- Total Time: 35 minutes
- Yields: 8 cups
- Serves: 12
- Dietary Type: Vegetarian, Gluten-Free (check sev ingredients)
Ingredients
- 1/4 cup oil
- 1 teaspoon cumin seed
- 3 inches fresh ginger, grated
- 12-15 fresh curry leaves
- 3-4 whole dried red chilies, broken into small pieces
- 1/4 teaspoon hing (asafetida powder)
- 1/4 cup raisins
- 1/2 cup raw unsalted peanuts
- 1/4 cup store-bought sev (spicy lentil noodles)
- 1/4 cup dried coconut, sliced (optional)
- 6 cups Rice Krispies (unsweetened rice puffs)
- 1 teaspoon salt
- 2 tablespoons sugar
- 2 tablespoons lime juice
Equipment Needed
- Large wok or deep frying pan
- Paper towels
- Two flat spatulas
- Airtight container
Instructions
- Begin by preparing the Rice Krispies. Carefully sift and pick through the puffed rice, discarding any discolored or misshapen pieces. This ensures a more even texture and appearance.
- Dry roast the puffed rice in a dry pan over medium heat. Keep the rice moving to ensure it gets an even toast and doesn’t burn. The goal is to make it toasty and fragrant, not colored or burnt. This step is crucial for removing any residual moisture and enhancing the crispiness of the chiwda.
- Once toasted, spread the puffed rice over a paper towel to allow any remaining moisture to wick away. This will help maintain its crunch. Let it cool completely.
- Now, let’s prepare the spice base. Heat the oil in a large wok or deep frying pan over medium heat. Ensure the wok is large enough to accommodate all the ingredients later.
- Add the cumin seeds to the hot oil. They should sizzle gently. Next, add the grated ginger and curry leaves. Stir vigorously to season the oil well with these aromatics. Reduce the heat slightly to prevent burning.
- Add the dried red chilies, asafetida powder, and turmeric powder to the wok. Stir vigorously to avoid burning the spices, which can result in a bitter taste. Work quickly, as these powdered spices can burn easily.
- Introduce the raisins and peanuts to the spiced oil. Allow them to cook and roast slightly, stirring frequently. Watch carefully as the peanuts begin to roast and turn golden brown.
- As the peanuts begin to roast, add the salt, sugar, and lime juice to the mixture. The lime juice will sizzle and create a lovely aroma. At this point, turn off the heat.
- While the oil and spices are still hot, add the cooled toasted puffed rice and sev in small batches to the wok. This ensures even distribution of the spices and prevents clumping.
- Toss the mixture with two flat spatulas with each addition of the rice and sev. Use a gentle but firm motion to coat everything evenly in the spiced oil. The spatulas help to lift and fold the mixture without crushing the puffed rice.
- Return the wok to a medium-low heat and toss this mixture quickly for a minute or two. This final heating helps to meld the flavors together and crisp up the chiwda even further. Be careful not to burn it!
- Remove the wok from the heat. The Mur’mur’ya C’a Chiwda is now ready. Serve hot, or allow it to cool completely before storing.
Expert Tips & Tricks
- Spice Level: Adjust the number of red chilies to control the spice level. For a milder version, remove the seeds from the chilies before adding them.
- Freshness: Use fresh curry leaves for the best flavor. If fresh curry leaves are unavailable, dried curry leaves can be used, but they won’t have the same intense aroma.
- Peanut Roasting: If you prefer, you can roast the peanuts in the oven beforehand for a more even roast.
- Sev Selection: Be mindful of the sev you choose, as some varieties may contain gluten. For a gluten-free chiwda, ensure you select a gluten-free sev.
- Even Roasting: Ensure even toasting of puffed rice by stirring constantly and using a wide pan for maximum surface area.
- Spice Blooming: Prevent burnt spices by adding spices in the oil only when the oil is at the right temperature. If the oil is too hot, remove from heat before adding.
- Oil Temperature: Maintain a consistent oil temperature while adding the spices and rice to ensure optimal flavour infusion without burning.
Serving & Storage Suggestions
Serve the Mur’mur’ya C’a Chiwda hot as a teatime snack, or allow it to cool completely before storing it in an airtight container. Properly stored, it will keep at room temperature for up to four weeks. This makes it a perfect make-ahead snack for parties, road trips, or simply for enjoying a quick and tasty treat whenever the mood strikes. You can also pack it in small pouches for lunchboxes.
Nutritional Information
| Nutrient | Amount per Serving | % Daily Value |
|---|---|---|
| Calories | 154 kcal | 8% |
| Total Fat | 8.2g | 12% |
| Saturated Fat | 1.2g | 5% |
| Cholesterol | 0mg | 0% |
| Sodium | 274.7mg | 11% |
| Total Carbohydrate | 19g | 6% |
| Dietary Fiber | 0.8g | 3% |
| Sugars | 5.8g | 23% |
| Protein | 2.2g | 4% |
Note: Nutritional information is an estimate and can vary based on specific ingredients and portion sizes.
Variations & Substitutions
- Coconut Crunch: Add more dried coconut slices for an extra layer of texture and flavor.
- Nutty Delight: Experiment with different types of nuts, such as cashews or almonds, for a unique twist.
- Sweet and Spicy: Adjust the sugar and chili quantities to customize the sweetness and spice levels to your liking. A touch of jaggery (unrefined sugar) can add a lovely caramel note.
- Curry Powder Kick: A teaspoon of curry powder (added with the other dry spices) will deepen the flavor profile.
- Roasted Chickpeas: Substitute some of the peanuts with roasted chickpeas for added protein and a different crunch.
FAQs (Frequently Asked Questions)
Q: Can I use regular rice puffs instead of Rice Krispies?
A: Yes, you can use any unsweetened rice puffs. Just be sure they are plain and not flavored, as this will affect the overall taste of the chiwda.
Q: How do I prevent the chiwda from becoming soggy?
A: Ensure that the puffed rice is thoroughly dry-roasted and cooled before adding it to the spiced oil. Store the chiwda in an airtight container to prevent it from absorbing moisture.
Q: Can I make this chiwda ahead of time?
A: Absolutely! Chiwda is a great make-ahead snack. It can be stored in an airtight container at room temperature for up to four weeks.
Q: Is this recipe suitable for vegans?
A: Yes, this recipe is vegan as long as the sev you use is also vegan. Check the ingredient list of the sev to ensure it doesn’t contain any dairy products.
Q: What can I do if I accidentally burn the spices?
A: If you burn the spices, unfortunately, the best thing to do is to discard the oil and spices and start over. Burnt spices will impart a bitter taste to the entire dish.
Final Thoughts
Mur’mur’ya C’a Chiwda is more than just a snack; it’s a taste of home, a memory wrapped in spices, and a perfect accompaniment to your favorite cup of tea. I encourage you to try this recipe and create your own memories around this simple yet satisfying dish. Feel free to adjust the ingredients to suit your preferences and dietary needs. Most importantly, have fun in the kitchen! And I hope you’ll share your experiences and feedback with me – I’d love to hear how it turns out.